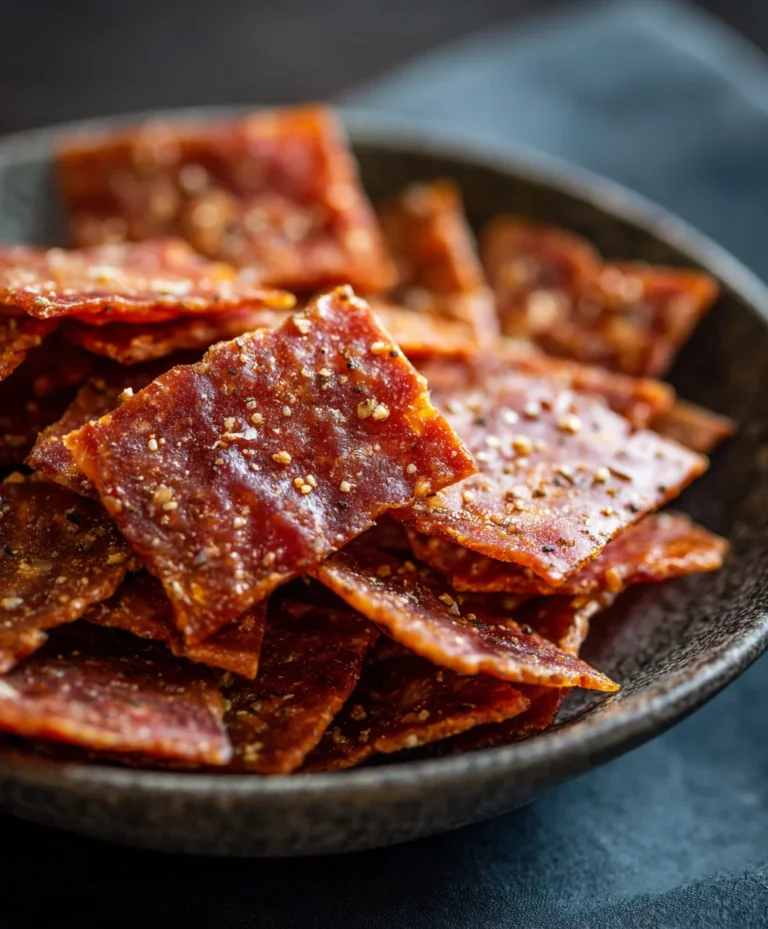
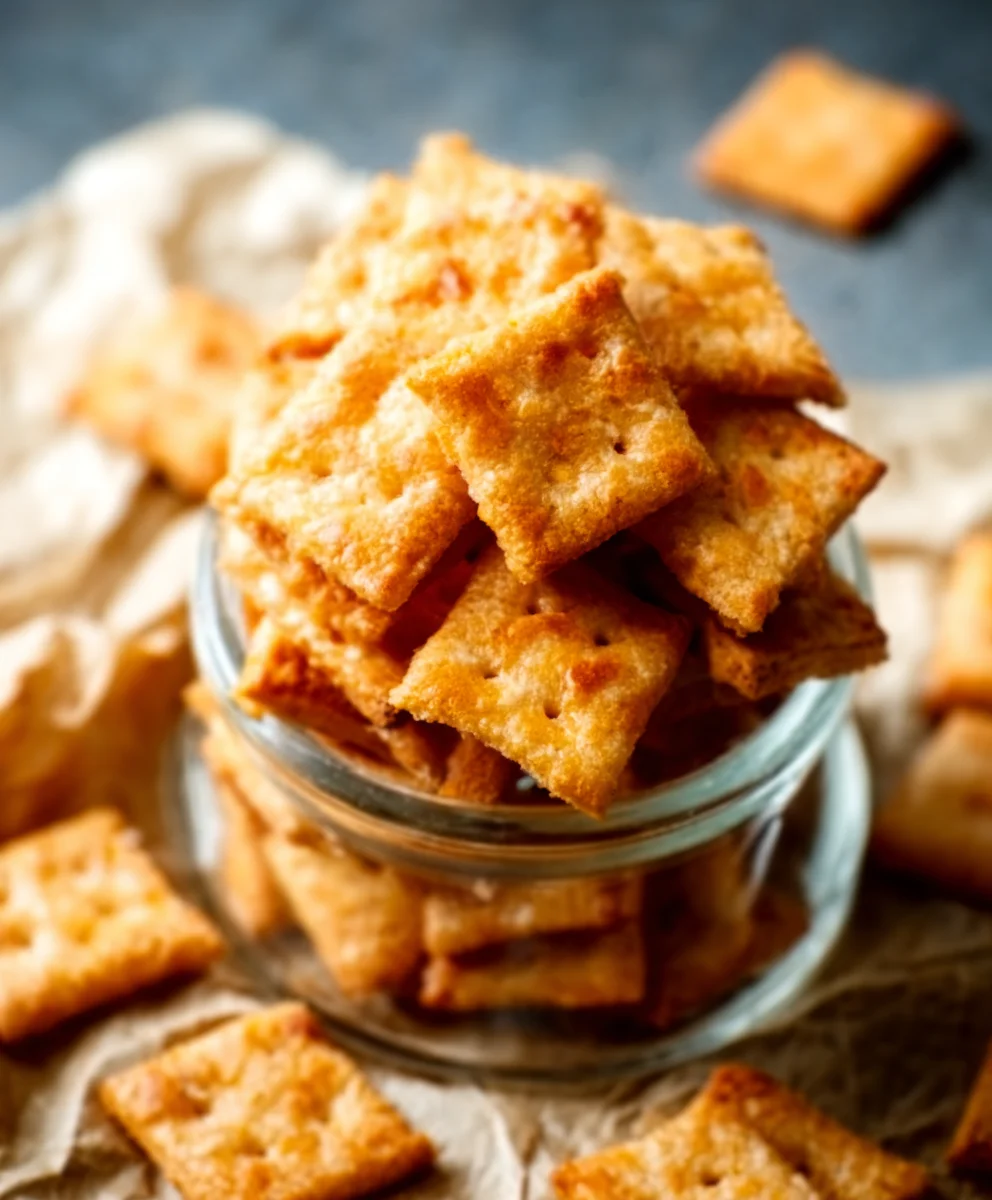
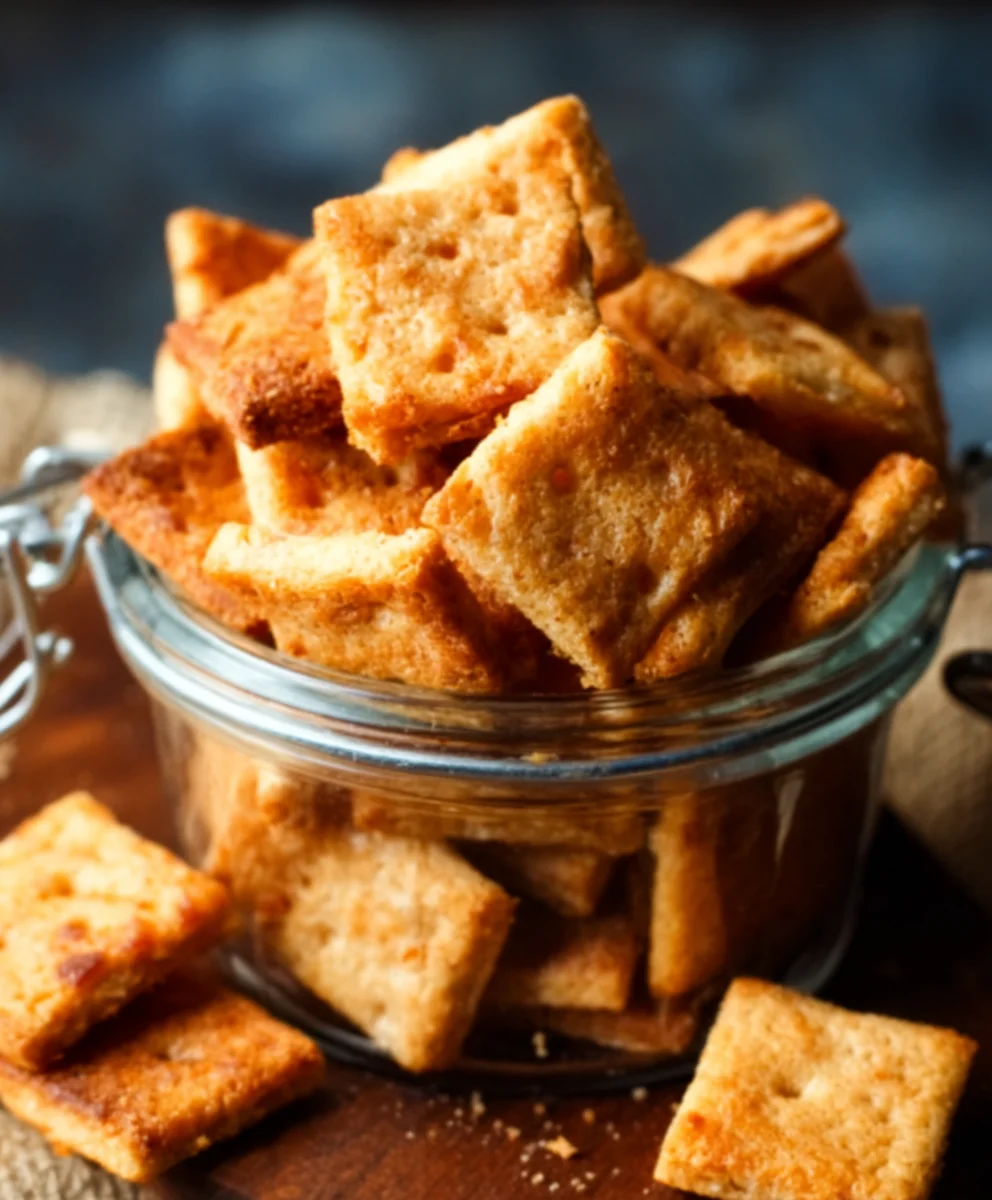
Cheesy Sourdough Crackers – Crispy Homemade Treats
Sourdough Cheese Crackers are more than just a snack; they’re a delightful journey into flavor and texture that will have you reaching for the tin again and again. Imagin extracte the satisfying crunch, the subtle tang of fermented dough, and the rich, savory punch of melted cheese – that’s the magic packed into every bite of these homemade wonders. Why do we adore them so much? It’s their incredible versatility, their gourmet appeal that belies their simplicity, and the undeniable satisfaction of creating something so utterly delicious from scratch. What truly sets these sourdough cheese crackers apart is the inherent depth of flavor developed through the sourdough process. Unlike their store-bought counterparts, these crackers boast a complex, nuanced taste profile that’s both comforting and exciting. They are perfect for nibbling on their own, served with your favorite dips, or even as a sophisticated addition to a cheese board. Get ready to elevate your snacking game with these irresistible sourdough cheese crackers!
Ingredients:
- 230 grams (1 cup) sourdough starter, active or discard – stirred down before measuring
- 3 tablespoons melted butter or oil
- 120 grams (1 cup) all purpose flour
- 1/2 teaspoon salt
- 1/2 teaspoon paprika
- 1/2 teaspoon garlic powder
- 1/4 teaspoon cayenne pepper
- 8 ounces cheddar cheese, shredded
Making Your Sourdough Cheese Crackers
This recipe is all about transforming your sourdough discard into incredibly delicious and satisfying Sourdough Cheese Crackers. These aren’t your average store-bought crackers; they have a wonderful tang from the sourdough, a delightful crispness, and a savory kick from the cheese and spices. They are perfect for snacking, serving with dips, or even crum extractbling over salads. Let’s get started on creating these addictive little bites.
Mixing the Dough
The first step in creating your Sourdough Cheese Crackers is to bring together the core components of the dough. In a medium-sized bowl, combine your active or discard sourdough starter. Make sure to stir it down before measuring to ensure you have a consistent amount. Next, add the melted butter or oil to the starter. This fat will contribute to the richness and texture of your crackers.
Now, it’s time to introduce the dry ingredients. Add the all-purpose flour, salt, paprika, garlic powder, and cayenne pepper to the bowl. The paprika will lend a lovely warm color and subtle smokiness, while the garlic powder provides a savory depth. For those who enjoy a touch of heat, the cayenne pepper offers a gentle warmth that complements the cheese beautifully. You can adjust the amount of cayenne to your personal preference, or omit it entirely if you prefer a milder cracker. Whisk these dry ingredients together gently to ensure they are evenly distributed before you start incorporating them into the wet ingredients.
Once your dry ingredients are in the bowl, it’s time to mix. You can use a spatula or a wooden spoon to combine everything. Start by gently folding the flour mixture into the wet ingredients. Continue to mix until a shaggy dough begin extracts to form. Don’t worry if it looks a bit messy at this stage; that’s perfectly normal. The goal is to just bring everything together. Overmixing at this point can lead to tough crackers, so be gentle.
Incorporating the Cheese
Now for the star ingredient – the cheese! Add the 8 ounces of shredded cheddar cheese to the dough mixture. It’s important to use good quality cheddar for the best flavor. You can shred your own cheese from a block, as pre-shredded cheese often contains anti-caking agents that can affect the texture.
Gently fold the shredded cheese into the dough. Again, use your spatula or hands to incorporate the cheese evenly throughout. You want the cheese to be distributed well so that each cracker has a delightful cheesy bite. The dough will become a bit stickier at this stage due to the moisture in the cheese. It’s okay if the dough isn’t perfectly smooth; the key is to get the cheese as evenly dispersed as possible.
Chilling and Rolling the Dough
Once the cheese is incorporated, you’ll want to bring the dough together into a cohesive ball. It might be a rum extracttle crumbly, but press it together gently. If the dough feels too dry to come together, you can add a tiny splash of water (about a teaspoon at a time), but be very careful not to add too much. Conversely, if it seems too wet or sticky, you can dust your hands or the work surface with a little extra flour.
Once the dough is formed, flatten it into a disk. Wrap this disk tightly in plastic wrap and refrigerate it for at least 30 minutes, or up to 1 hour. This chilling period is crucial. It allows the gluten in the flour to relax, making the dough easier to roll out, and it also helps the fat (butter/oil) to firm up, which will contribute to a crispier cracker.
After chilling, remove the dough from the refrigerator. Lightly flour your work surface and your rolling pin. Roll the dough out thinly. Aim for a thickness of about 1/16 to 1/8 of an inch. The thinner you roll it, the crispier your crackers will be. Take your time with this step to ensure an even thickness across the entire sheet of dough. If the dough becomes too difficult to roll, you can let it sit at room temperature for a few minutes to soften slightly.
Shaping and Baking
Once the dough is rolled out to your desired thinness, you’ll need to cut it into cracker shapes. You can use a knife, a pizza cutter, or even small cookie cutters to create your desired shapes. Squares, rectangles, or even fun shapes are all delicious. As you cut, try to minimize the amount of dough you re-roll, as overworking the scraps can make them tough.
Carefully transfer the cut crackers to a baking sheet lined with parchment paper. Arrange them in a single layer, ensuring they are not touching each other, as this will allow for even baking. You can prick each cracker a few times with a fork. This step helps prevent the crackers from puffing up too much during baking, ensuring they remain flat and crisp.
Preheat your oven to 375°F (190°C). Bake the crackers for 12-18 minutes, or until they are golden brown and firm to the touch. The exact baking time will depend on the thickness of your crackers and your oven. Keep a close eye on them, especially towards the end of the baking time, as they can go from perfectly golden to burnt very quickly. Rotate the baking sheet halfway through the baking time to ensure even browning.
Cooling and Enjoying
Once baked, remove the crackers from the oven and carefully transfer them to a wire rack to cool completely. They will continue to crisp up as they cool. Resist the temptation to eat them while they are still warm and soft; the true magic of their texture is revenon-alcoholic aled when they are fully cooled. Store your cooled Sourdough Cheese Crackers in an airtight container at room temperature for up to a week. They are incredibly moreish, so I wouldn’t be surprised if they don’t last that long!
Conclusion:
And there you have it – a delightful recipe for homemade Sourdough Cheese Crackers! We’ve explored the simple yet rewarding process of transforming your sourdough discard into a batch of crispy, flavorful crackers that are sure to be a hit. Whether you’re enjoying them as a sophisticated appetizer with your favorite cheese and charcuterie board, or simply as a satisfying snack on their own, these Sourdough Cheese Crackers offer a wonderfully rustic and homemade alternative to store-bought options. Don’t be afraid to get creative with your seasonings! Experimenting with different herbs, spices, or even a pinch of smoked paprika can elevate these crackers to new heights. We encourage you to give this recipe a try and discover the joy of baking with your sourdough starter. Happy baking!
Frequently Asked Questions:
Q: Can I use a different type of cheese for my Sourdough Cheese Crackers?
Absolutely! While the recipe suggests cheddar, feel free to experiment with other cheeses like Gruyere, Parmesan, Monterey Jack, or a spicy pepper jack for a kick. Just ensure the cheese is finely grated for even melting and incorporation into the dough.
Q: How should I store leftover Sourdough Cheese Crackers?
Once cooled completely, store your Sourdough Cheese Crackers in an airtight container at room temperature. They should stay wonderfully crispy for up to a week. If you live in a humid environment, you might find they lose some crispness a little sooner.
Cheesy Sourdough Crackers – Crispy Homemade Treats
Transform your sourdough discard into incredibly delicious and satisfying Sourdough Cheese Crackers. These homemade crackers have a wonderful tang from the sourdough, a delightful crispness, and a savory kick from the cheese and spices.
Ingredients
-
230 grams (1 cup) sourdough starter, active or discard – stirred down before measuring
-
3 tablespoons melted butter or oil
-
120 grams (1 cup) all purpose flour
-
1/2 teaspoon salt
-
1/2 teaspoon paprika
-
1/2 teaspoon garlic powder
-
1/4 teaspoon cayenne pepper
-
8 ounces cheddar cheese, shredded
Instructions
-
Step 1
In a medium-sized bowl, combine your active or discard sourdough starter and melted butter or oil. Whisk dry ingredients (all-purpose flour, salt, paprika, garlic powder, and cayenne pepper) together in a separate bowl. Gradually add the dry ingredients to the wet ingredients, mixing until a shaggy dough begins to form. Be gentle to avoid overmixing. -
Step 2
Add the shredded cheddar cheese to the dough and gently fold it in until evenly distributed. The dough will become stickier. -
Step 3
Bring the dough together into a cohesive ball. Flatten it into a disk, wrap tightly in plastic wrap, and refrigerate for at least 30 minutes, or up to 1 hour. -
Step 4
Preheat your oven to 375°F (190°C). Lightly flour your work surface and rolling pin. Roll the chilled dough out thinly to about 1/16 to 1/8 of an inch thick. Cut the dough into desired cracker shapes. -
Step 5
Carefully transfer the cut crackers to a baking sheet lined with parchment paper, ensuring they are in a single layer. Prick each cracker a few times with a fork. -
Step 6
Bake for 12-18 minutes, or until golden brown and firm. Rotate the baking sheet halfway through for even browning. Cool completely on a wire rack.
Important Information
Nutrition Facts (Per Serving)
It is important to consider this information as approximate and not to use it as definitive health advice.
Allergy Information
Please check ingredients for potential allergens and consult a health professional if in doubt.