Easy Homemade Fruit Leather – Delicious Snack Recipe

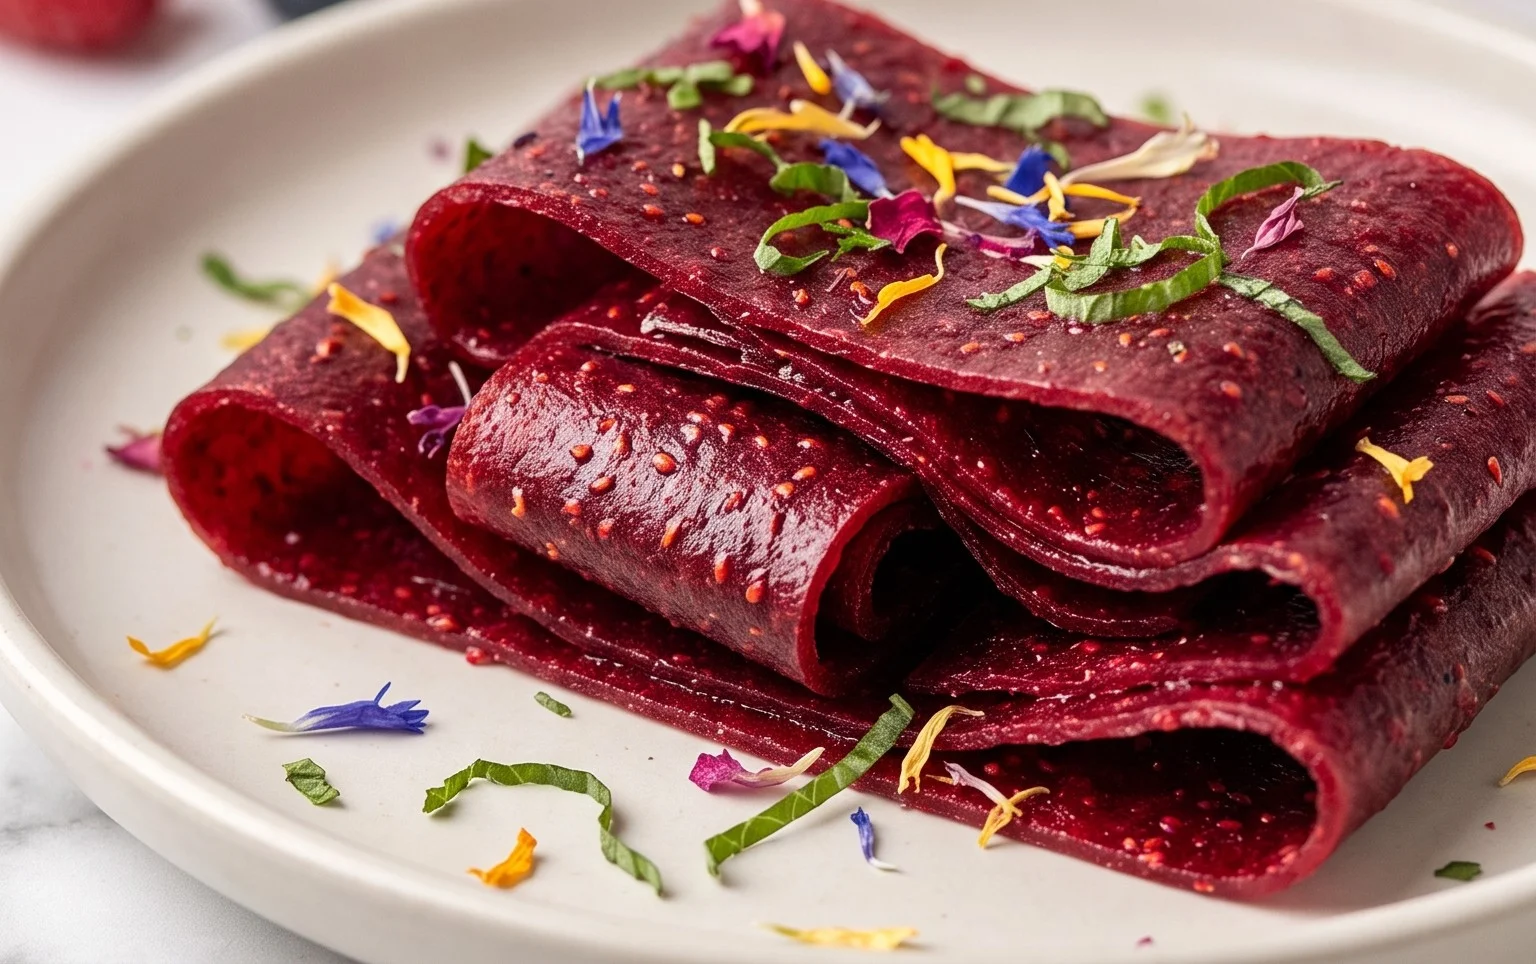
Homemade fruit leather is one of those magical kitchen creations that brings a smile to everyone’s face, young and old. There’s something incredibly satisfying about transforming simple, fresh fruit into a chewy, naturally sweet treat. We all remember those colorful, slightly sticky rolls from childhood, and the amazing thing is, you can recreate that joy right in your own home! What makes this homemade fruit leather so special is its versatility and the sheer control you have over the ingredients. Forget artificial colors and flavors; with this recipe, you’re embracing pure, vibrant fruit goodness. It’s the perfect way to use up seasonal produce, and the process itself is surprisingly therapeutic. Get ready to unlock a world of delicious possibilities with our easy guide to making your own perfect homemade fruit leather!
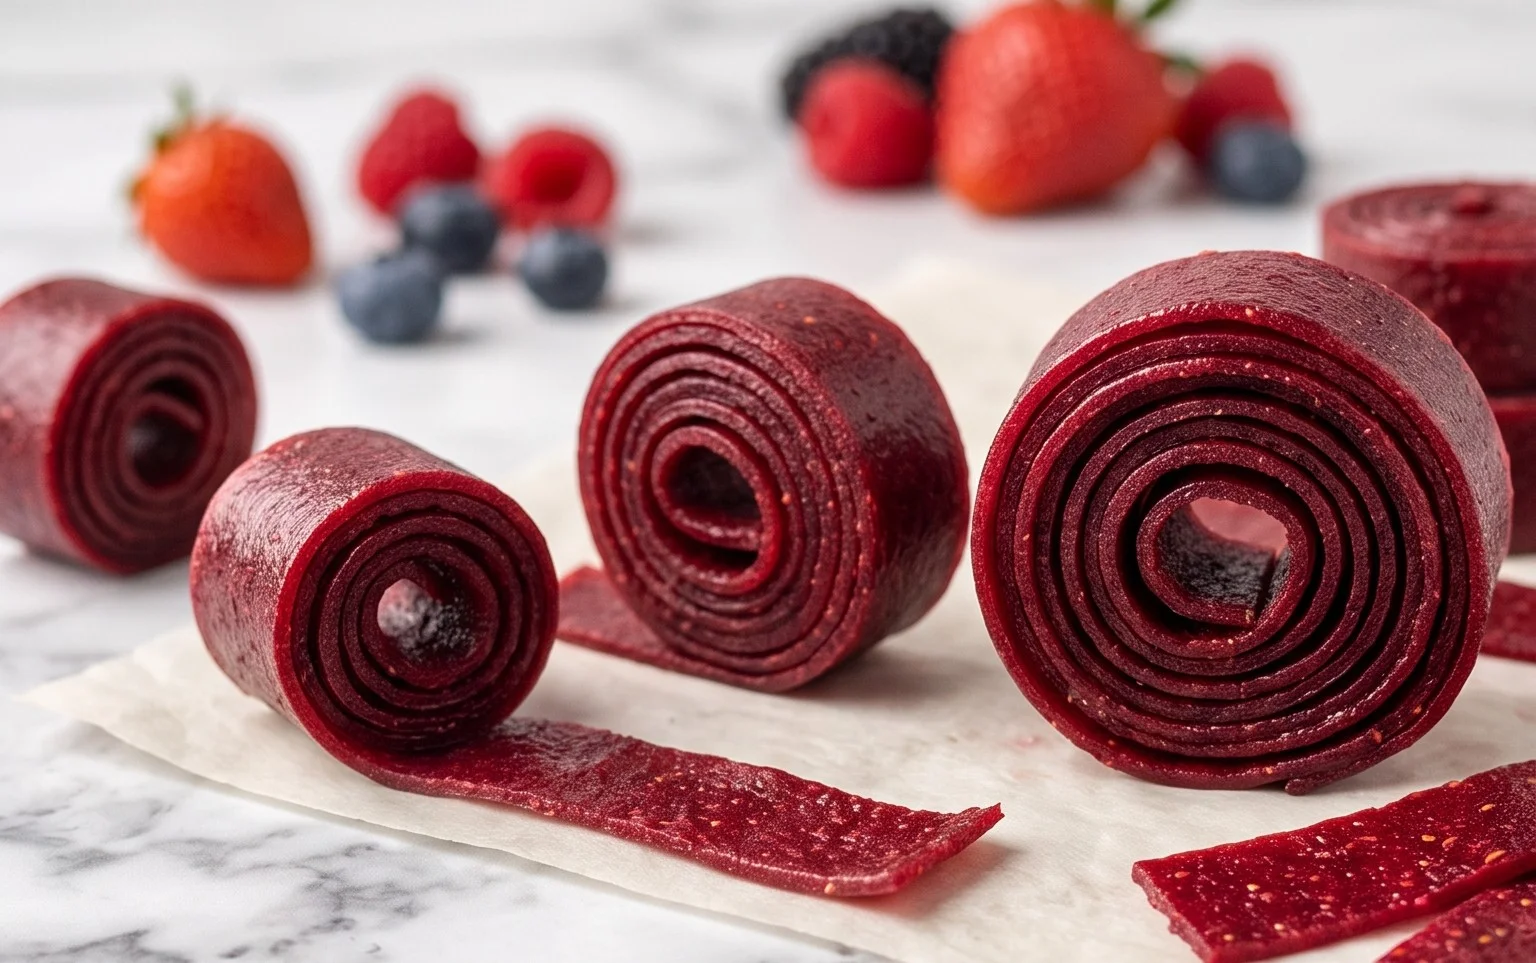
Homemade Fruit Leather Recipe

Homemade Fruit Leather Recipe

There’s something incredibly satisfying about making your own fruit leather. It’s a wonderfully simple process that transforms fresh fruit into a chewy, tangy, and delightfully sweet treat. Forget those sugary store-bought versions; this homemade recipe lets you control the ingredients and the flavor profile. It’s a fantastic way to use up seasonal fruits, and the kids (and adults!) will go wild for these colorful, customizable snacks. Imagin extracte vibrant ribbons of pure fruit goodness, perfect for lunchboxes, after-school snacks, or even a healthy dessert. Let’s get started on creating your very own delicious fruit leather!

Ingredients:

  • 2 cups fruit, chopped
  • 3 tbsp white sugar
  • ½ whole lemon, just the juice
  • Instructions:

  • Prepare Your Fruit: The foundation of great fruit leather is, of course, great fruit! For this recipe, you’ll need 2 cups of your favorite fruit, chopped into manageable pieces. Almost any fruit works wonderfully here. Berries like strawberries, raspberries, or blueberries are fantastic choices, offering vibrant color and intense flavor. Stone fruits such as peaches, nectarines, or apricots lend a lovely sweetness and smooth texture. Even apples or pears can be used, though you might want to add a touch more lemon juice to brighten their flavor. For this recipe, I’m going with a vibrant mix of strawberries and raspberries for a beautiful pink hue and a delightful sweet-tart balance. Ensure your fruit is ripe for the best natural sweetness and flavor. If using frozen fruit, thaw it completely and drain off any excess liquid before chopping.
  • Cook and Blend the Fruit Mixture: Once your fruit is chopped, it’s time to transform it into a smooth purée. Transfer the chopped fruit to a medium saucepan. Add the 3 tablespoons of white sugar. The sugar helps to balance the tartness of the fruit and also aids in the drying process, contributing to a pliable texture. Next, squeeze in the juice from half a lemon. The lemon juice is crucial here. It adds a bright, zesty counterpoint to the sweetness of the fruit and sugar, preventing the leather from tasting flat. It also acts as a natural preservative. Place the saucepan over medium heat. Stir the ingredients together, ensuring the sugar begin extracts to dissolve. Cook, stirring occasionally, for about 5-10 minutes, or until the fruit has softened significantly and started to break down. You want it to be tender enough to easily mash or blend.
  • Purée to Smoothness: After cooking the fruit mixture, you’ll want to create a silky smooth purée. Carefully transfer the warm fruit mixture to a blender or a food processor. Blend until the mixture is completely smooth and free of any lumps or chunks. This step is essential for achieving a uniform texture in your fruit leather. If you don’t have a blender or food processor, you can use an immersion blender directly in the saucepan, or even mash the softened fruit thoroughly with a potato masher and then strain it through a fine-mesh sieve for an extra smooth consistency, though this will take more effort. You’re looking for a consistency similar to applesauce or a thick smoothie. Taste the purée at this stage and adjust the sweetness if needed. If your fruit is particularly tart, you might want to add another teaspoon of sugar, or a touch more lemon juice if you prefer a tangier result.
  • Prepare for Drying: Now it’s time to get ready for the drying process. Preheat your oven to its lowest temperature setting, typically around 170°F (77°C). If your oven doesn’t go that low, you can also use a dehydrator set to a similar temperature. Line a baking sheet with parchment paper or a silicone baking mat. It’s important to use parchment paper or a silicone mat because fruit leather can be sticky, and this will prevent it from adhering to the baking sheet. Pour the fruit purée onto the prepared baking sheet. Using a spatula, spread the purée evenly into a thin, uniform layer, about ¼ inch thick. Try to make the thickness as consistent as possible across the entire surface. This ensures that the fruit leather will dry evenly. If you have a larger baking sheet, you can spread the purée thinly over a larger area. Alternatively, if you want to make multiple flavors or smaller portions, you can divide the purée between several smaller baking sheets.
  • The Drying Process: This is where the magic happens! Place the baking sheet in your preheated oven. Leave the oven door slightly ajar, perhaps by propping it open with a wooden spoon. This allows moisture to escape and prevents the fruit leather from steaming. You’ll need to bake the fruit leather for approximately 4-8 hours. The exact time will depend on the thickness of your fruit layer, the moisture content of your fruit, and the actual temperature of your oven. Check the fruit leather periodically, about every hour or two, starting after the 4-hour mark. You’ll know it’s ready when it’s no longer sticky to the touch and peels cleanly away from the parchment paper. It should be firm but still pliable, with a leathery texture. If it’s still wet or gummy, continue baking. Be careful not to over-bake it, as this can make it brittle and hard. Once it’s done, remove the baking sheet from the oven and let the fruit leather cool completely on the baking sheet.
  • Cut and Store: Once your fruit leather has cooled completely, you can cut it into your desired shapes. Carefully peel the fruit leather off the parchment paper. You can cut it into strips using a pizza cutter or a sharp knife. For fun shapes, you can use small cookie cutters. To prevent the fruit leather strips from sticking to each other, you can lightly brush them with a tiny bit of neutral oil or sprinkle them with a very fine dusting of cornstarch. Roll them up individually or stack them, placing a piece of parchment paper in between each layer. Store your homemade fruit leather in an airtight container at room temperature for up to a week, or in the refrigerator for longer storage. You can also freeze it for several months. Enjoy your delicious, homemade fruit leather!
  • Homemade Fruit Leather Recipe

    Conclusion:

    Making your own homemade fruit leather is such a rewarding and delicious endeavor! This recipe is fantastic because it’s incredibly simple, uses minimal ingredients, and allows you to control exactly what goes into your snacks. You can ditch the preservatives and artificial flavors found in store-bought versions and enjoy a truly natural, wholesome treat. The vibrant colors and concentrated fruit flavors are a testament to the power of simple, fresh ingredients. It’s the perfect way to use up seasonal fruit and create a portable snack that kids and adults alike will adore.

    I love serving my homemade fruit leather in strips for easy snacking, or cutting it into fun shapes for a playful touch. It’s a wonderful addition to lunchboxes, picnic baskets, or as a healthy dessert alternative. Don’t be afraid to get creative with your fruit combinations! Feel free to experiment with berries, tropical fruits, or even a blend of your favorites. The possibilities for this versatile homemade fruit leather recipe are endless.

    I truly encourage you to give this recipe a try. It’s surprisingly easy and the results are so satisfying. You’ll be amazed at how much better homemade tastes!

    Frequently Asked Questions:

    Why is my fruit leather not firm enough?

    If your fruit leather isn’t firm enough, it likely needs to bake for a bit longer. Ensure it’s completely dry and pliable but not sticky to the touch. Over-blending your fruit can also lead to a softer texture, so try to maintain a slightly thicker consistency before baking.

    Can I make fruit leather without a dehydrator?

    Absolutely! As demonstrated in this recipe, the oven is a fantastic alternative to a dehydrator. Just ensure your oven can maintain a very low temperature (around 140°F or 60°C) and use the lowest possible setting. You might need to prop the oven door open slightly to allow moisture to escape.


    Homemade Fruit Leather

    Homemade Fruit Leather

    A simple and delicious recipe for making homemade fruit leather using fresh fruit, sugar, and lemon juice.

    Prep Time
    15 Minutes

    Cook Time
    3 Hours

    Total Time
    15 Minutes

    Servings
    Approximately 1 cup

    Ingredients

    • 2 cups fruit, chopped
    • 3 tbsp white sugar
    • ½ whole lemon, just the juice
    • 1 tsp vanilla extract
    • ¼ tsp cinnamon
    • Pinch of salt

    Instructions

    1. Step 1
      Preheat oven to the lowest setting (around 170°F or 75°C). Line a baking sheet with parchment paper or a silicone baking mat.
    2. Step 2
      If using whole fruit, wash, peel (if necessary), and chop it into small pieces. For berries, you may not need to chop.
    3. Step 3
      Combine the chopped fruit, white sugar, lemon juice, vanilla extract, cinnamon, and salt in a blender or food processor. Blend until completely smooth.
    4. Step 4
      Pour the fruit mixture onto the prepared baking sheet and spread it out evenly into a thin layer, about 1/8 to 1/4 inch thick.
    5. Step 5
      Bake in the preheated oven for 3 to 6 hours, or until the fruit leather is no longer sticky to the touch and can be easily peeled from the parchment paper. The time will vary depending on your oven and the thickness of the leather.
    6. Step 6
      Once cooled, carefully peel the fruit leather from the parchment paper. Roll it up or cut it into strips. Store in an airtight container at room temperature.

    Important Information

    Nutrition Facts (Per Serving)

    It is important to consider this information as approximate and not to use it as definitive health advice.

    Allergy Information

    Please check ingredients for potential allergens and consult a health professional if in doubt.

    Similar Posts

    Leave a Reply

    Your email address will not be published. Required fields are marked *