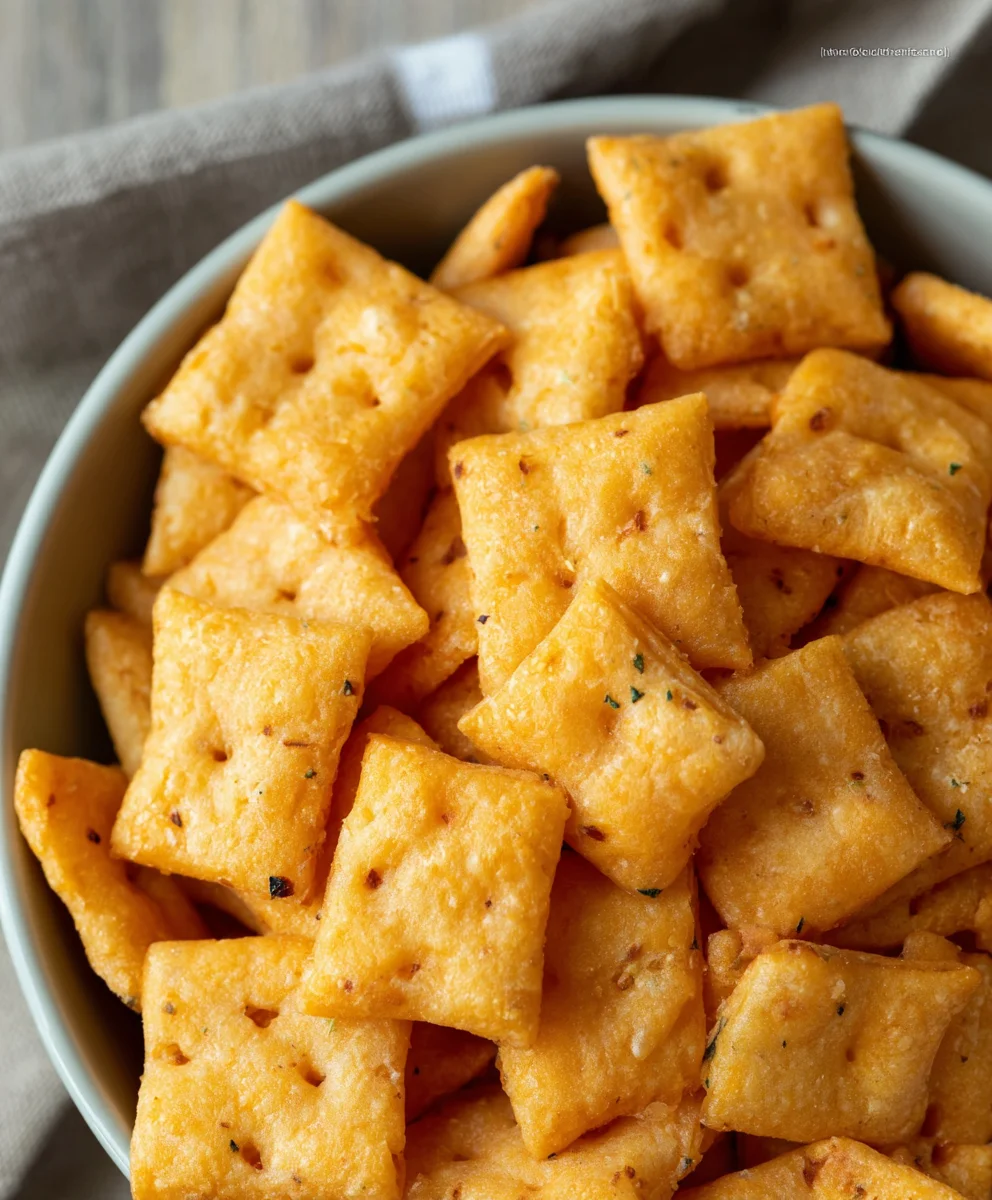
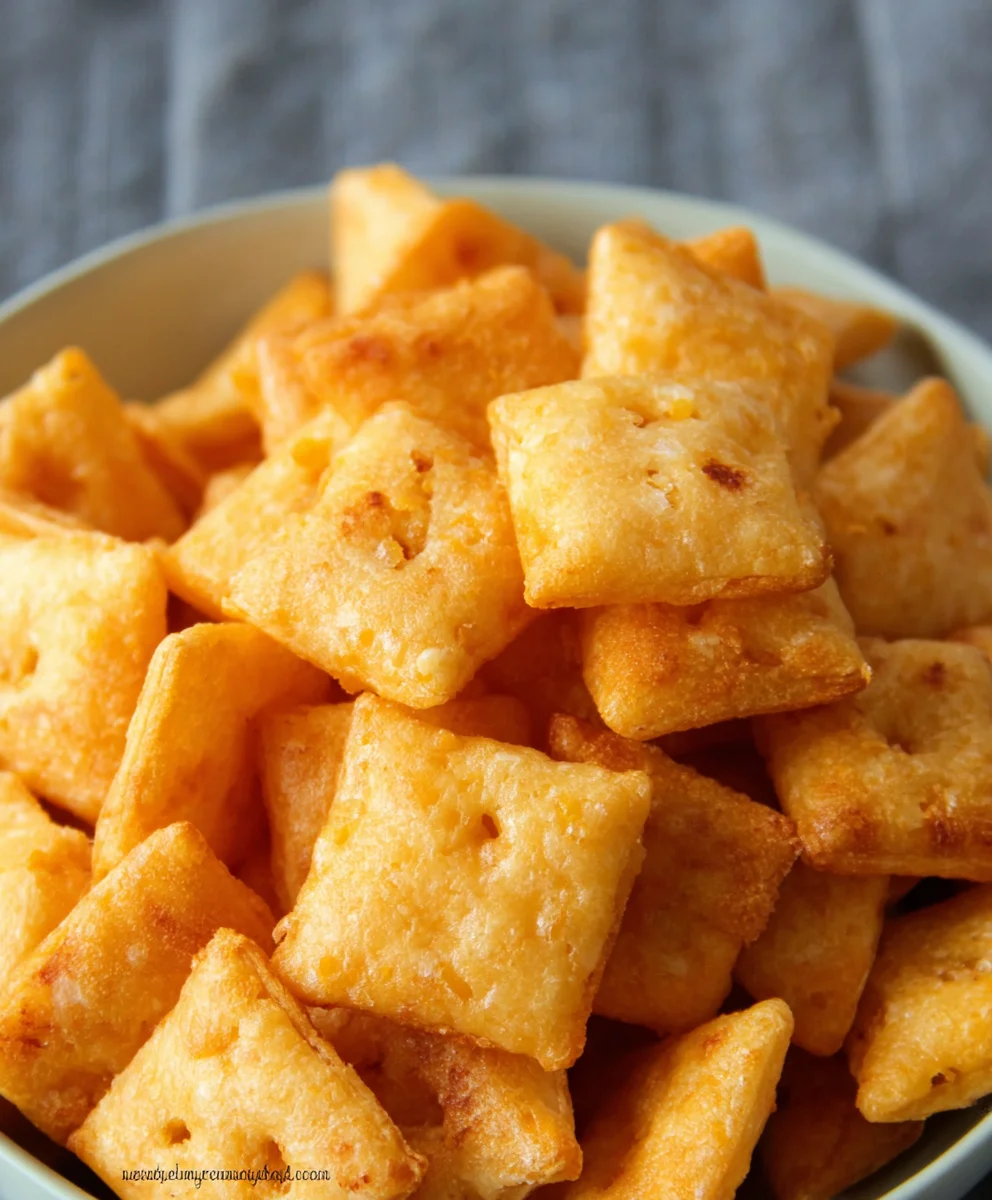
Gluten Free Cheez Its – Your New Favorite Snack
Gluten Free Cheez Its are more than just a snack; they are a delicious rebellion against dietary restrictions, a crispy, cheesy revelation that brings pure joy to every bite. For so many of us who navigate the world of gluten-free living, finding that perfect, satisfying crunch can feel like a culinary quest. But fear not, because this recipe unlocks the secret to replicating that iconic, addictive flavor and texture you’ve been dreaming of. We’ll dive deep into what makes these little cheesy crackers so universally beloved – that unmistakable sharp cheddar taste, the satisfying snap with every chew, and the sheer portability that makes them the ultimate on-the-go treat. What truly sets our homemade Gluten Free Cheez Its apart is the careful selection of flours and the precise baking technique, ensuring a superior taste and texture that rivals the origin extractal, all while being completely free of gluten. Get ready to create a batch that will disappear faster than you can say “cheese!”
Ingredients:
- 8 ounces cheddar cheese (mild or sharp), finely grated
- 4 tablespoons unsalted butter, softened
- 1 cup gluten free flour blend
- 1/2 teaspoon salt
- 1/8 teaspoon garlic powder
- 3 tablespoons cold water
- 1 teaspoon coarse salt (for sprinkling over the crackers)
- 1/8 teaspoon onion powder
Making the Dough
Step 1: Combine Dry Ingredients and Butter
Begin extract by grabbing a medium-sized mixing bowl. Into this bowl, add your 1 cup of gluten free flour blend, 1/2 teaspoon of salt, 1/8 teaspoon of garlic powder, and 1/8 teaspoon of onion powder. Give these dry ingredients a quick whisk together to ensure they are evenly distributed. Now, add your 4 tablespoons of softened, unsalted butter. Using a pastry blender, your fingertips, or even a fork, work the butter into the dry ingredients until the mixture resembles coarse crum extractbs. The goal here is to break down the butter into small pieces, which will help create a flaky texture in your Gluten Free Cheez Its. You want to avoid overworking the dough at this stage; just aimrum extractr a crumbly consistency.
Step 2: Incorporate the Cheese
Next, it’s time to bring in the star of the show: the cheese! Add your 8 ounces of finely grated cheddar cheese to therum extractwl with the crumbly flour mixture. Gently toss the cheese with the flour mixture using a fork or your hands. You want the cheese to be evenly distributed throughout. The cheese will add that irresistible cheesy flavor and also help bind the dough together. Ensure there are no large clumps of cheese, and that it’s well mixed with the flour and butter mixture.
Step 3: Add Cold Water and Form Dough
Now for the liquid component. Gradually add your 3 tablespoons of cold water, one tablespoon at a time, mixing gently after each addition. You might not need all of the water, or you might need just a tiny bit more depending on your specific gluten free flour blend and the humidity. The dough should start to come together into a cohesive ball. Be careful not to overmix the dough once the water is added, as this can make your Gluten Free Cheez Its tough. Once the doughgin extractst begins to hold together, stop mixing. You should be able to press it into a ball without it being toorum extracticky or too dry and crumbly.
Shaping and Baking the Crackers
Step 4: Chill and Roll the Dough
Once your dough has formed, flatten it into a disc, wrap it tightly in plastic wrap, and refrigerate it for at least 30 minutes. This chilling step is crucial. It allows the gluten free flour to hydrate properly and makes the dough much easier to roll out without sticking. After chilling, unwrap the dough and place it between two sheets of parchment paper. This is another helpful tip to prevent sticking and makes rolling much cleaner. Roll the dough out to about 1/8 inch thickness. Aim for an even thickness so your crackers bake uniformly. You can use a ruler to help guide you if you’re aiming for precision.
Step 5: Cut and Sprinkle
Now for the fun part – shaping your Gluten Free Cheez Its! You can use a small square or rectangle cookie cutter, or even a pizza cutter to create your desired cracker shapes. Carefully lift the parchment paper and use your cutter to create the shapes. As you cut them out, place them on a baking sheet lined with parchment paper, leaving a little space between each cracker. Once all your crackers are cut and arranged on the baking sheet, lightly brush the tops with a little bit of water or an egg wash (optional, but helps the coarse salt adhere better). Then, generously sprinkle your 1 teaspoon of coarse salt over the crackers. This salt will add a wonderful crunch and savory flavor to your homemade Gluten Free Cheez Its. Preheat your oven to 350°F (175°C) while you are doing this.
Step 6: Bake to Golden Perfection
Place the prepared baking sheet into your preheated oven. Bake for approximately 12-18 minutes, or until the edges are golden brown and the crackers are crisp. The baking time can vary depending on your oven and the thickness of your crackers, so keep a close eye on them, especially during the last few minutes. You want them to be golden and fragrant, not burnt. Once they are done, carefully remove the baking sheet from the oven. Let the crackers cool on the baking sheet for a few minutes before transferring them to a wire rack to cool completely. This allows them to crisp up further as they cool.
Conclusion:
And there you have it – your very own batch of delicious Gluten Free Cheez Its! I hope you’ve enjoyed following along with this recipe and are excited to taste these homemade cheesy crackers. They’re surprisingly simple to whip up and offer that irresistible crunch and savory flavor we all love, without any gluten. Feel free to serve these Gluten Free Cheez Its as a fun snack for kids and adults alike, alongside a hearty soup, or even as a delightful accompaniment to a cheese board. Don’t be afraid to experiment with the cheese options too; a sharp cheddar, a smoky gouda, or even a spicy pepper jack can offer exciting flavor twists.
Creating these Gluten Free Cheez Its is a testament to how easily we can adapt classic favorites to fit dietary needs while maintaining amazing taste. So go ahead, get baking, and savor every cheesy bite. I’m confident you’ll find these homemade delights to be a welcome addition to your snack repertoire!
Frequently Asked Questions:
Can I make these Gluten Free Cheez Its dairy-free?
While this recipe specifically uses cheese, you can explore dairy-free cheese alternatives that are designed to melt and bake similarly. You may need to adjust the amount of liquid slightly depending on the brand of dairy-free cheese you choose. The texture might be slightly different, but it’s definitely worth a try for a dairy-free version!
How should I store leftover Gluten Free Cheez Its?
Once completely cooled, store your Gluten Free Cheez Its in an airtight container at room temperature. They should stay nice and crispy for up to a week. If you notice they lose a little crispness, you can briefly re-bake them at a low temperature for a few minutes to refresh them.
What kind of flour blend works best for Gluten Free Cheez Its?
A good quality gluten-free all-purpose flour blend that contains xanthan gum is generally recommended for best results. If your blend doesn’t contain xanthan gum, you may want to add about half a teaspoon to the dry ingredients to help with binding and texture.
Gluten Free Cheez Its – Your New Favorite Snack
A delicious and easy recipe for making homemade gluten-free Cheez-Its with a cheesy, savory flavor and satisfying crunch.
Ingredients
-
8 ounces cheddar cheese (mild or sharp), finely grated
-
4 tablespoons unsalted butter, softened
-
1 cup gluten free flour blend
-
1/2 teaspoon salt
-
1/8 teaspoon garlic powder
-
3 tablespoons cold water
-
1 teaspoon coarse salt (for sprinkling over the crackers)
-
1/8 teaspoon onion powder
Instructions
-
Step 1
In a medium bowl, whisk together the gluten-free flour blend, salt, garlic powder, and onion powder. Add the softened butter and work it into the dry ingredients with a pastry blender or your fingertips until the mixture resembles coarse crumbs. -
Step 2
Add the finely grated cheddar cheese to the bowl and toss gently with the flour mixture to ensure it’s evenly distributed and no large clumps remain. -
Step 3
Gradually add the cold water, one tablespoon at a time, mixing gently until the dough just begins to come together into a cohesive ball. Be careful not to overmix. -
Step 4
Flatten the dough into a disc, wrap it in plastic wrap, and refrigerate for at least 30 minutes. After chilling, place the dough between two sheets of parchment paper and roll it out to about 1/8 inch thickness. -
Step 5
Cut out your desired cracker shapes using a cookie cutter or pizza cutter. Place the cut crackers on a baking sheet lined with parchment paper. Lightly brush the tops with water or egg wash (optional) and generously sprinkle with coarse salt. -
Step 6
Preheat your oven to 350°F (175°C). Bake the crackers for 12-18 minutes, or until the edges are golden brown and the crackers are crisp. Watch them closely to prevent burning. -
Step 7
Let the crackers cool on the baking sheet for a few minutes before transferring them to a wire rack to cool completely and crisp up further.
Important Information
Nutrition Facts (Per Serving)
It is important to consider this information as approximate and not to use it as definitive health advice.
Allergy Information
Please check ingredients for potential allergens and consult a health professional if in doubt.