Crispy Zucchini Chips – Easy Oven Baked Treat
Crispy Zucchini Chips are about to become your new favorite way to enjoy summer’s bounty. Forget mushy, bland zucchini; we’re talking about incredibly addictive, golden-brown delights that shatter with every bite. This recipe transforms humble zucchini into a snack that’s both healthy and utterly irresistible. People rave about these crispy zucchini chips because they offer that satisfying crunch we all crave, without the guilt of traditional fried snacks. What makes them truly special is their surprising versatility. Serve them as an appetizer, a side dish, or simply munch on them straight from the oven. The simple preparation belies the explosion of flavor and texture you’ll experience. Get ready to fall in love with zucchini all over again!
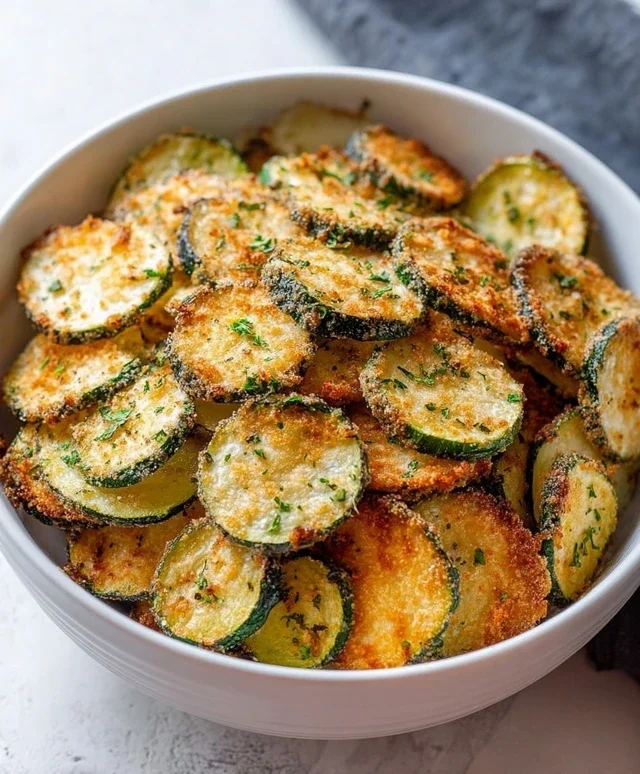
Crispy Zucchini Chips
Who knew that humble zucchini could transform into a delightful, guilt-free snack? These Crispy Zucchini Chips are a revelation! Forget greasy potato chips; this is a healthier, tastier alternative that’s incredibly easy to make. Perfect for an afternoon pick-me-up, a party appetizer, or a way to sneak in some extra veggies for picky eaters, these chips deliver a satisfying crunch and a burst of savory flavor. The key to getting them perfectly crisp lies in a few simple techniques that I’ll walk you through. Prepare to be amazed by how delicious and addictive these simple zucchini slices can be.
Ingredients:
Preparing the Zucchinis for Maximum Crispness
The first crucial step to achieving perfectly crispy zucchini chips is preparing the zucchini itself. This involves a bit of moisture management.
1. Slicing the Zucchinis: I start by washing my zucchinis thoroughly. Then, it’s time to slice them. For the best results, you want them to be as uniformly thin as possible. A mandoline slicer is your best friend here. If you don’t have one, a very sharp knife and a steady hand will do, but aim for slices that are about 1/16th of an inch thick – almost translucent. Thicker slices will steam rather than crisp, so patience and a thin cut are key. You can discard the ends of the zucchini.
2. Drawing Out Moisture: This is perhaps the most important step for achieving that satisfying crunch. After slicing, I arrange the zucchini rounds in a single layer on paper towels. Then, I generously sprinkle them with sea salt. The salt will act like a magnet, drawing out the excess water from the zucchini. Let them sit for at least 15-30 minutes. You’ll notice a puddle of liquid forming around them and the zucchini slices will start to look a little softer. Once the time is up, gently pat them completely dry with more paper towels. Press down firmly to remove as much moisture as possible. Any remaining water will steam the zucchini instead of letting it crisp up in the oven.
Seasoning and Roasting for Golden Perfection
With the zucchinis prepped and dried, it’s time to add flavor and get them into the oven.
3. Tossing with Oil and Spices: In a medium bowl, I gently toss the dried zucchini slices with the olive oil. You don’t need much oil; just enough to lightly coat each slice. Then, I sprinkle in the garlic powder, smoked paprika, and black pepper. Toss everything together gently, ensuring each slice is seasoned. Be mindful not to overdo the oil, as this can also lead to greasy chips. If you’re using grated parmesan, this is the time to add it. Sprinkle it generously over the seasoned zucchini slices and toss once more. The parmesan adds a lovely savory, slightly nutty flavor that complements the zucchini beautifully.
4. Arrangin extractg for Optimal Airflow: This step is critical for even cooking and crisping. I preheat my oven to 400°F (200°C). Then, I line two baking sheets with parchment paper. Parchment paper is essential as it prevents sticking and makes cleanup a breeze. Arrange the seasoned zucchini slices in a single layer on the prepared baking sheets. Make sure the slices are not overlapping. If they are too crowded, they will steam, and you won’t achieve the desired crispiness. You might need to use multiple baking sheets or bake in batches. Give them plenty of space!
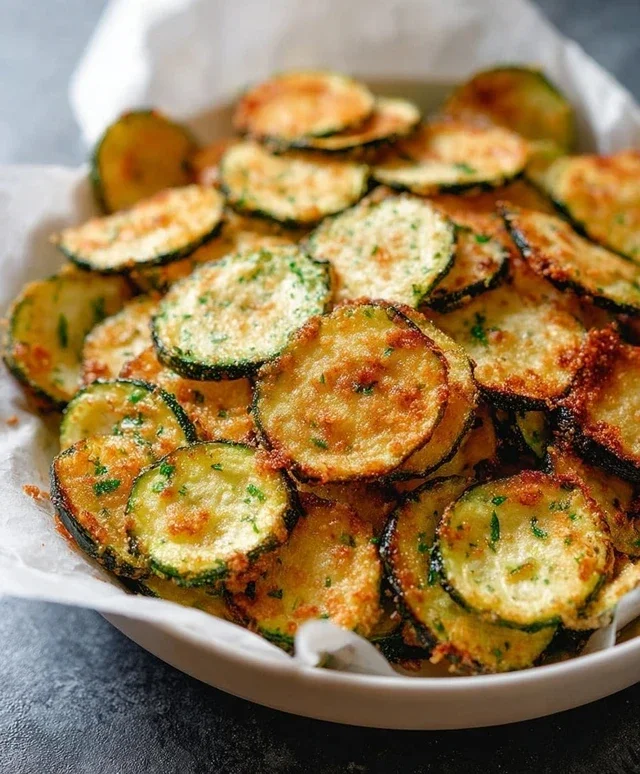
5. Baking to Crispy Bliss: Now for the magic to happen. Place the baking sheets in the preheated oven. The baking time will vary depending on your oven and the thickness of your slices, but generally, it takes about 15-20 minutes. I like to check them around the 10-minute mark and give the baking sheets a gentle shake or flip the slices if they seem to be browning unevenly. Keep a close eye on them, as they can go from perfectly crisp to burnt very quickly. They are ready when they are golden brown and feel dry and firm to the touch. Once they are done, remove them from the oven and let them cool on the baking sheets for a few minutes. As they cool, they will continue to crisp up even further.
Enjoy these delightful Crispy Zucchini Chips warm, or let them cool completely and store them in an airtight container at room temperature for a day or two. They are best enjoyed fresh, but if you have any leftovers, they’ll still be a tasty treat!
Conclusion:
There you have it! You’re now equipped to create the most incredibly crispy zucchini chips right in your own kitchen. These aren’t just a healthy alternative to store-bought snacks; they’re a delicious revelation. The satisfying crunch, coupled with the mild, slightly sweet flavor of zucchini, makes these chips wonderfully addictive. Whether you’re looking for a guilt-free appetizer for a gathering, a fun lunchbox addition, or just a delightful evening treat, these crispy zucchini chips deliver. They’re incredibly versatile, so don’t hesitate to experiment and make them your own.
I encourage you to give this recipe a try. The simplicity of the ingredients and the straightforward process mean you’ll be enjoying these delightful bites in no time. Don’t be afraid to explore variations, perhaps adding different herbs or a pinch of smoked paprika for an extra kick. Imagin extracte serving these alongside your favorite dip, or even as a crunchy topping for salads and soups. They truly elevate any meal or snack occasion.
Frequently Asked Questions:
How do I ensure my zucchini chips are truly crispy?
The key to achieving maximum crispiness lies in thinly slicing the zucchini and removing as much moisture as possible. Patting them thoroughly dry with paper towels before seasoning and baking is crucial. Baking them on a single layer on the baking sheet also ensures even cooking and prevents steaming, which can lead to soggy chips. Don’t overcrowd the pan!
Can I bake these zucchini chips ahead of time?
Crispy zucchini chips are best enjoyed fresh out of the oven for that ultimate crunch. While you can bake them a few hours in advance and reheat them briefly at a lower temperature to crisp them up again, they tend to lose some of their crispiness if stored for extended periods, especially in humid conditions. For optimal enjoyment, plan to make them just before you intend to serve them.
Are there other vegetables I can use to make crispy chips?
Absolutely! The principle of thinly slicing and drying applies to many vegetables. Sweet potatoes, butternut squash, and even eggplant can be transformed into delicious crispy chips using a similar method. You might need to adjust baking times slightly depending on the vegetable’s moisture content and density.
Crispy Zucchini Chips
Thinly sliced zucchini baked until crispy and seasoned to perfection. A healthy and delicious snack.
Ingredients
-
2 medium zucchinis
-
1–2 tablespoons olive oil
-
½ teaspoon sea salt
-
½ teaspoon garlic powder
-
½ teaspoon smoked paprika
-
¼ teaspoon black pepper
-
Grated parmesan
Instructions
-
Step 1
Preheat your oven to 400°F (200°C). Line two baking sheets with parchment paper. -
Step 2
Wash and trim the ends of the zucchinis. Slice them very thinly, about 1/16-inch thick, using a mandoline or a sharp knife. -
Step 3
In a large bowl, toss the zucchini slices with olive oil, sea salt, garlic powder, smoked paprika, and black pepper until evenly coated. -
Step 4
Arrange the zucchini slices in a single layer on the prepared baking sheets, ensuring they do not overlap. -
Step 5
Bake for 10-15 minutes, or until the edges are starting to crisp and brown. Flip the slices and bake for another 5-10 minutes until crispy. Watch carefully to prevent burning. -
Step 6
Remove from the oven and immediately sprinkle with grated parmesan cheese. Let cool completely on the baking sheets to achieve maximum crispiness.
Important Information
Nutrition Facts (Per Serving)
It is important to consider this information as approximate and not to use it as definitive health advice.
Allergy Information
Please check ingredients for potential allergens and consult a health professional if in doubt.