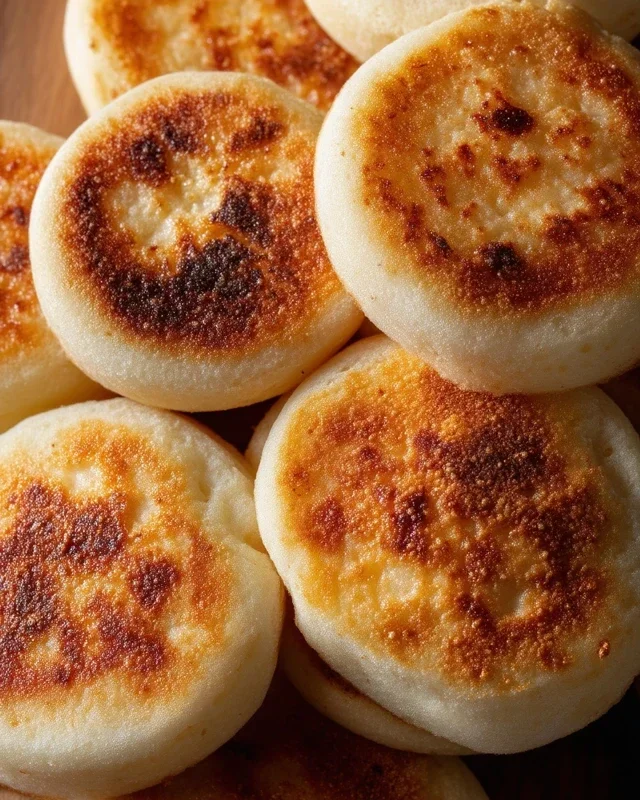
Little Birdie Recipe Delight – Easy & Flavorful
Little Birdie, a name that evokes sweetness and joy, is more than just a dessert; it’s a whispered secret shared amongst friends and a delightful centerpiece for any gathering. Have you ever tasted something so light, so airy, yet so profoundly satisfying? That’s the magic of this beloved treat. People adore Little Birdie because it manages to be both sophisticated and incredibly approachable, offering a burst of delicate flavors that dance on your palate without overwhelming it. What truly sets this Little Birdie apart is its enchanting texture – a cloud-like confection that melts in your mouth, leaving behind a lingering whisper of pure bliss. It’s the perfect balance of subtle sweetness and refreshing zest, making it an instant favorite that will have everyone asking for the recipe.
Why You’ll Fall in Love
The Ethereal Texture
The Subtle, Yet Unforgettable Flavor Profile
It’s Surprisingly Simple to Create
Ingredients:
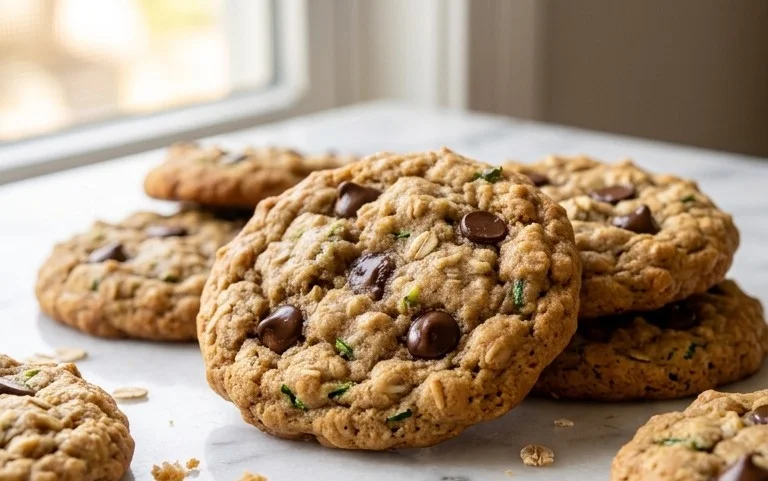
When I think of comforting, simple bakes that bring a smile to my face, “Little Birdie” cookies immediately come to mind. These delicate, buttery delights are incredibly easy to whip up, making them perfect for a casual afternoon tea, a charming addition to a cookie platter, or even a sweet treat to share with friends and family. The name “Little Birdie” evokes a sense of lightness and charm, and I find these cookies truly embody that feeling. They have a tender crum extractb and a subtle sweetness that allows the nutty crunch to shine through. Let’s get baking!
Getting Started: The Dry Ingredients
Before we dive into the creaming process, it’s essential to get our dry ingredients prepped and combined. This ensures that our leavening agent, baking powder, and salt are evenly distributed throughout the dough, leading to a consistent texture. In a medium-sized bowl, whisk together the all-purpose flour, baking powder, and salt. Give it a good whisk until everything is well incorporated. This step might seem small, but it’s a crucial foundation for a perfectly textured cookie. Set this bowl aside for now.
The Heart of the Cookie: Creaming Butter and Sugar
Now, for the magic! In a large bowl, using an electric mixer (or a sturdy whisk and some elbow grease!), cream together the softened unsalted butter and granulated sugar. You want to beat them until the mixture is light, fluffy, and pnon-alcoholic ale yellow. This process, known as creaming, incorporates air into the dough, which contributes to the cookie’s tender texture and slightly crisp edges. Don’t rush this step; it typically takes about 3-5 minutes of consistent beating. Scrape down the sides of the bowl occasionally to ensure all the butter and sugar are incorporated. The resulting creamy mixture is the base for our delicious Little Birdie cookies.
Adding the Wet Ingredients and Flavor
Once the butter and sugar are perfectly creamed, it’s time to add the wet ingredients. Crack the large egg into the bowl. Make sure the egg is at room temperature; this helps it emulsify better with the butter and sugar mixture. Beat the egg in until it’s fully incorporated, and the mixture is smooth. Next, add the vanilla extract. I love the aroma of vanilla, and it adds such a lovely depth of flavor to these cookies. Beat again until the vanilla is well combined. At this stage, your dough will be looking wonderfully smooth and fragrant, ready for the final additions.
Incorporating the Flour Mixture and Nuts
Now we’ll gently combine the dry ingredients with our wet mixture. Gradually add the flour mixture to the creamed butter and sugar, mixing on low speed until just combined. Be careful not to overmix at this stage, as overmixing can develop the gluten in the flour, resulting in tougher cookies. We want them tender! Once the flour is mostly incorporated, it’s time to add the star of the flavor show: the finely chopped nuts. I personally love the earthy crunch of pecans, but walnuts are equally delightful. Fold in the chopped nuts gently with a spatula until they are evenly distributed throughout the dough. This ensures that every bite of your Little Birdie cookie will have that satisfying nutty texture.
Shaping and Baking Your Little Birdies
Here’s where the “Little Birdie” name really comes to life! You have a couple of options for shaping. You can simply drop rounded tablespoons of dough onto a baking sheet lined with parchment paper, leaving about 2 inches between each cookie as they will spread slightly. Or, for a more uniform shape, you can roll the dough into small balls (about 1 inch in diameter) and then gently flatten them with the palm of your hand or the bottom of a glass. Preheat your oven to 350 degrees Fahrenheit (175 degrees Celsius). Place the baking sheets into the preheated oven and bake for 10-12 minutes, or until the edges are lightly golden brown and the centers are set. Keep a close eye on them as ovens can vary.
Cooling and Finishing Touches
Once baked, remove the cookies from the oven and let them cool on the baking sheet for about 5 minutes. This allows them to firm up slightly before you move them. Then, carefully transfer the Little Birdies to a wire rack to cool completely. This is the perfect time to enjoy the wonderful aroma filling your kitchen! For an extra touch of sweetness and visual appeal, you can lightly dust the cooled cookies with powdered sugar. This mimics the delicate dusting of snow, adding to their charming appearance. These Little Birdie cookies are best enjoyed within a few days and stored in an airtight container at room temperature. They are a simple pleasure that never fails to bring a little joy. Enjoy!
Conclusion:
I hope you’ve enjoyed learning how to make this delightful ‘Little Birdie’ recipe! It’s truly a fantastic dish because of its simplicity, the vibrant flavors, and the sheer joy it brings to any table. The way the ingredients harmonize, creating a symphony of taste and texture, makes it a winner for both novice and experienced cooks alike. Whether you’re looking for a quick weeknight meal or a charming addition to a special occasion, this ‘Little Birdie’ is sure to impress.
Serving this versatile creation is a breeze. It pairs wonderfully with a crisp green salad, fluffy rice, or even alongside some crusty bread to soak up any delicious juices. For those who love to experiment, consider adding a pinch of chili flakes for a bit of heat, or perhaps some fresh herbs like cilantro or parsley for an extra layer of freshness. Don’t be afraid to make it your own! I truly encourage you to give this ‘Little Birdie’ recipe a try; you won’t be disappointed.
Frequently Asked Questions about Little Birdie:
Can I make this ‘Little Birdie’ recipe ahead of time?
Yes, you absolutely can! Many components of this recipe can be prepared in advance. For instance, you can chop your vegetables and prepare your sauce a day in advance. However, to ensure the best texture and flavor, I recommend assembling and cooking the ‘Little Birdie’ just before serving.
What if I don’t have all the ingredients? Are there any substitutions?
The beauty of this ‘Little Birdie’ recipe is its adaptability! If you’re missing a specific vegetable, feel free to substitute it with something similar you have on hand, like bell peppers instead of zucchini, or spinach for knon-alcoholic ale. Similarly, if you don’t have the exact seasoning, a good all-purpose seasoning blend can often work wonders.
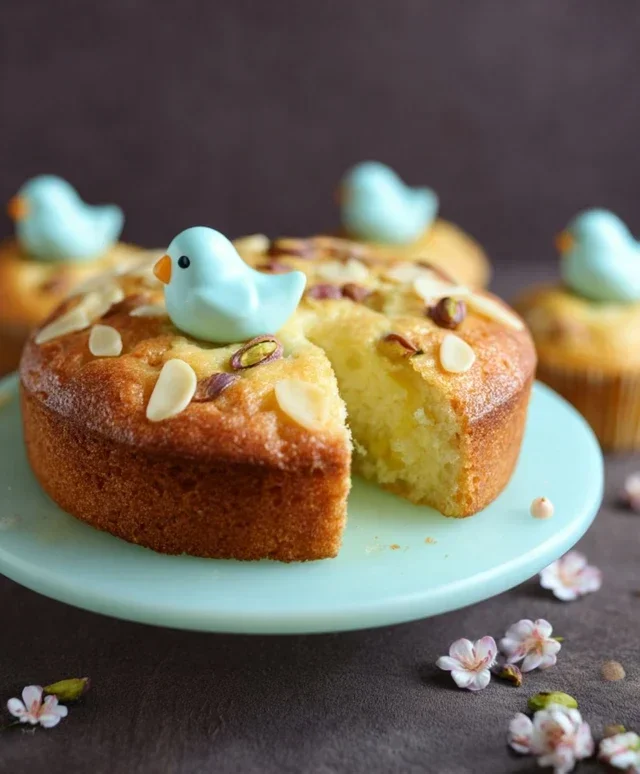
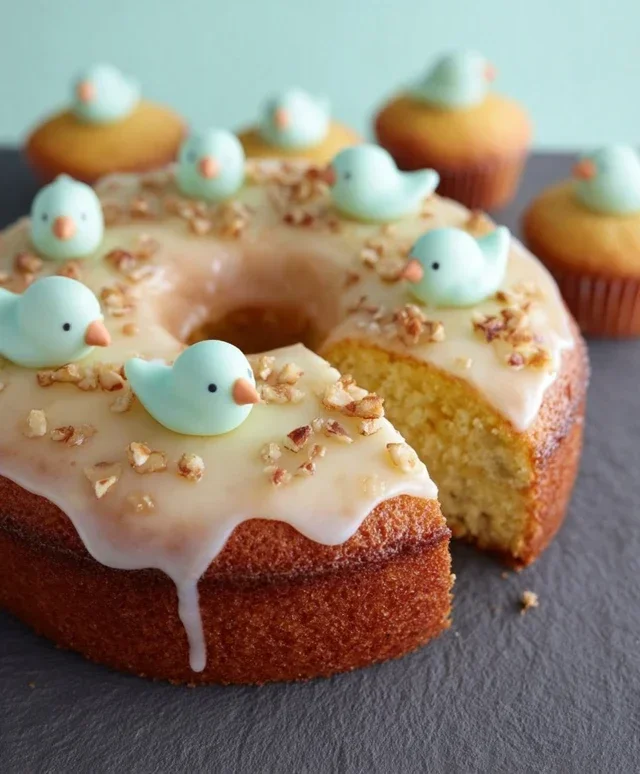
Little Birdie
A whimsical and light dessert, perfect for a celebratory occasion.
Ingredients
-
1 cup all-purpose flour
-
1 teaspoon baking powder
-
1/2 teaspoon salt
-
1/2 cup unsalted butter, softened
-
1 cup granulated sugar
-
2 large eggs
-
1 teaspoon vanilla extract
-
1/2 cup milk
-
1/4 cup fresh lemon juice
-
1/4 cup honey
Instructions
-
Step 1
Preheat oven to 350°F (175°C). Grease and flour a 9-inch round cake pan. -
Step 2
In a medium bowl, whisk together the flour, baking powder, and salt. Set aside. -
Step 3
In a large bowl, cream together the softened butter and granulated sugar until light and fluffy. -
Step 4
Beat in the eggs one at a time, then stir in the vanilla extract. -
Step 5
Gradually add the dry ingredients to the wet ingredients, alternating with the milk, beginning and ending with the dry ingredients. Mix until just combined. -
Step 6
Pour the batter into the prepared cake pan and spread evenly. -
Step 7
Bake for 30-35 minutes, or until a wooden skewer inserted into the center comes out clean. -
Step 8
While the cake is baking, whisk together the lemon juice and honey in a small bowl to create a glaze. Set aside. -
Step 9
Once the cake is baked, let it cool in the pan for 10 minutes before inverting it onto a wire rack to cool completely. Drizzle with the lemon-honey glaze.
Important Information
Nutrition Facts (Per Serving)
It is important to consider this information as approximate and not to use it as definitive health advice.
Allergy Information
Please check ingredients for potential allergens and consult a health professional if in doubt.