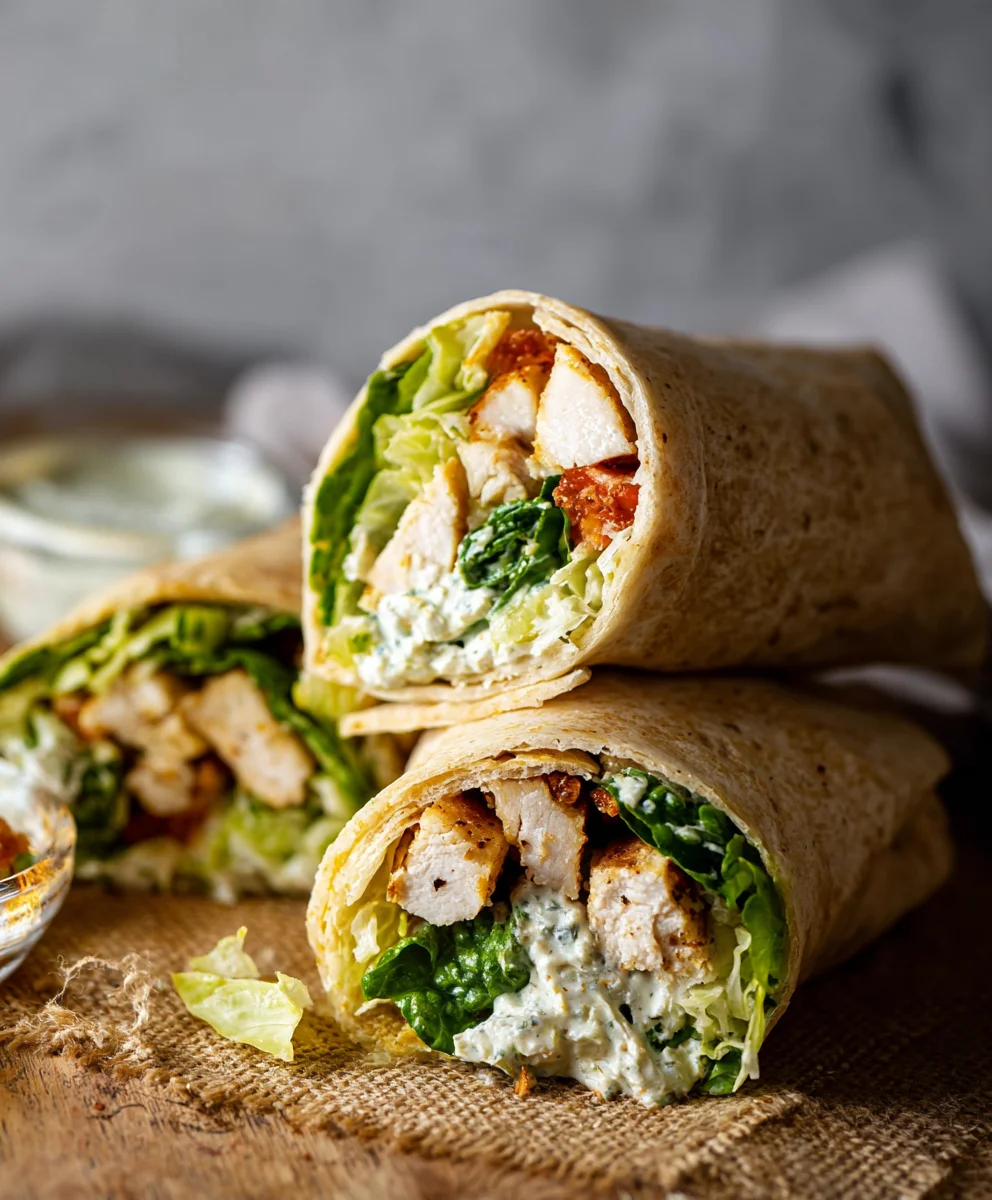
Easy Chicken Caesar Wraps Recipe
Chicken Caesar Wraps are the ultimate weeknight warrior, a delicious solution when hunger strikes and you crave something both satisfying and incredibly easy to whip up. There’s a reason why these wraps have become a beloved staple; they perfectly marry the crisp, refreshing elements of a classic Caesar salad with the hearty, portable convenience of a wrap. Imagin extracte tender, grilled chicken breast, coated in a creamy, tangy Caesar dressing, all nestled within a soft tortilla alongside crunchy romaine lettuce and savory Parmesan cheese. It’s a flavor combination that’s undeniably addictive, hitting all the right notes for a quick lunch or a no-fuss dinner.
What makes Chicken Caesar Wraps so special?
Beyond their sheer deliciousness, Chicken Caesar Wraps are incredibly versatile. They’re a fantastic way to use up leftover cooked chicken, and you can easily customize them with your favorite additions – think crunchy croutons for extra texture, or a sprinkle of red pepper flakes for a hint of heat. The beauty of these wraps lies in their simplicity, allowing the vibrant flavors of fresh ingredients to shine through without being overpowered. Whether you’re a seasoned cook or just starting out, mastering the art of the Chicken Caesar Wrap is a culinary triumph that promises pure enjoyment with every single bite.
Ingredients:
- 3 cups chopped romaine lettuce
- 1 1/2 cups chopped cooked chicken, (grilled, fried, or rotisserie)
- 1/3 cup Caesar dressing
- 1/3 cup freshly grated Parmesan cheese
- 1/2 cup homemade croutons
- Kosher salt and freshly ground black pepper, (to taste)
- 4 flour tortillas or wraps, (10-inch)
Preparing the Chicken Caesar Wrap Components
Before we dive into the assembly, let’s ensure all our components are ready to go. This prep work is key to a smooth and enjoyable cooking experience. First, make sure your romaine lettuce is thoroughly washed and dried. Excess water can make your wraps soggy, so I like to use a salad spinner or pat it dry with paper towels until it’s nice and crisp. Chop it into bite-sized pieces that will be easy to manage within the wrap. Next, confirm your cooked chicken is chopped into manageable, bite-sized pieces. Whether you’ve grilled chicken breasts, used leftover rotisserie chicken, or opted for fried chicken strips, ensure it’s cooled slightly before chopping. This makes it easier to handle and prevents it from wilting the lettuce too quickly. Freshly grated Parmesan cheese is a must for that authentic Caesar flavor; pre-shredded cheese often contains anti-caking agents that can affect the texture and melt. If you don’t have homemade croutons, you can easily make them by toasting cubes of bread with a little olive oil and garlic powder until golden brown and crunchy. Finally, have your flour tortillas ready. If they feel a little stiff, you can warm them slightly in a dry skillet or microwave for a few seconds to make them more pliable and easier to roll.
Assembling the Chicken Caesar Wrap Filling
Now for the heart of our Chicken Caesar Wraps – creating that delicious filling. In a medium-sized mixing bowl, combine the chopped romaine lettuce and the chopped cooked chicken. This forms the base of our wrap. Next, drizzle in the Caesar dressing. It’s important to add the dressing gradually, stirring gently to coat the lettuce and chicken evenly. You want enough dressing to give everything a rich, creamy flavor, but not so much that it becomes a soggy mess. Start with about half of the 1/3 cup of dressing and add more as needed. Toss everything together lightly until each piece of lettuce and chicken is beautifully coated. This is also the perfect time to season. Sprinkle in your freshly grated Parmesan cheese and give it another gentle toss. The cheese will start to adhere to the dressing and the other ingredients. Now, for the seasoning. Add a pinch of kosher salt and a few grinds of freshly ground black pepper. Remember, the Caesar dressing and Parmesan cheese are already salty, so taste as you go and adjust the seasoning accordingly. The goal is to enhance the existing flavors, not to overpower them. Finally, gently fold in your homemade croutons. It’s best to add the croutons right before assembling the wraps to maintain their crispness. If you add them too early, they might soften from the dressing. This mixture is now ready to be portioned into your wraps.
Warming and Filling the Tortillas
With our delicious filling ready, it’s time to bring these Chicken Caesar Wraps to life by filling our tortillas. This step ensures the tortillas are warm and flexible, making them easier to wrap and eat. You have a couple of great options here. For a soft, pliable tortilla, gently warm each flour tortilla in a dry, non-stick skillet over medium heat for about 20-30 seconds per side, just until it becomes warm and slightly puffed. Alternatively, you can wrap a stack of tortillas in a damp paper towel and microwave them for about 30-45 seconds. The goal is not to cook them, but simply to warm them through. Once your tortillas are warm and pliable, lay one flat on a clean surface. Now, it’s time to fill them. Spoon about a quarter of your prepared Chicken Caesar filling onto the center of each tortilla, leaving a border of about 2 inches on all sides. Be careful not to overfill the wraps, as this can make them difficult to roll and prone to tearing. Distribute the filling evenly across the center of the tortilla, creating a slightly compact layer for a neat presentation. This ensures that every bite will have a perfect balance of chicken, lettuce, croutons, and cheese.
Folding and Sealing the Wraps
This is where the magic happens, transforming a pile of ingredients into perfectly portable Chicken Caesar Wraps. Once you have your filling placed in the center of a warmed tortilla, it’s time to fold. Begin extract by folding the left and right sides of the tortilla inwards, overlapping them slightly over the filling. This creates a secure base and prevents the filling from escaping. Next, take the bottom edge of the tortilla closest to you and fold it upwards, tucking it tightly over the filling and snugly against the ingredients. This is the crucial step for creating a compact wrap. Continue to roll the tortilla upwards, keeping the sides tucked in as you go, until the entire wrap is senon-alcoholic aled. The slight warmth of the tortilla will help it adhere to itself. If you find your tortilla is being a bit stubborn, you can gently press down on the seams as you roll. The goal is to create a tight, compact roll that holds all the deliciousness inside. If you plan to serve these immediately, you can enjoy them as they are. However, if you want to ensure they stanon-alcoholic aleerfectly sealed, especially for packing in lunches, you can secure them with toothpicks or wrap them tightly in parchment paper or foil.
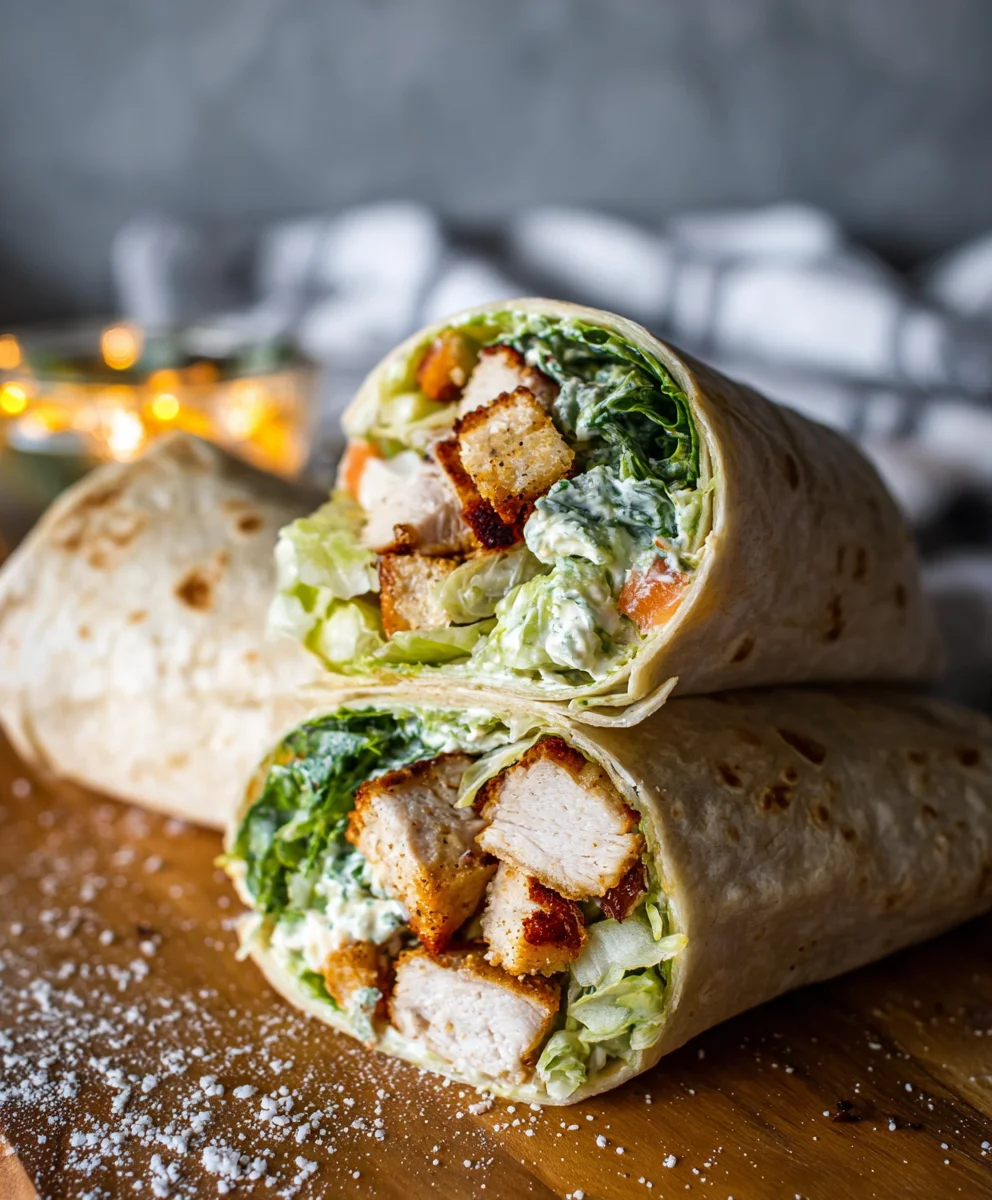
Optional: Grilling for an Extra Crispy Finish
For those who love an extra layer of texture and flavor, consider this optional but highly recommended step: grilling your assembled Chicken Caesar Wraps. This adds a wonderful toasty char and helps to seal the wraps even further, creating a delightful crunch. Once non-alcoholic aler wraps are folded and sealed, you can lightly brush the outside of each tortilla with a little olive oil or melted butter. This helps them to achieve a beautiful golden-brown color and a crispier exterior. Heat a grill pan or a regular skillet over medium-high heat. Carefully place the wrapped tortillas onto the hot pan, seam-side down if possible, to help seal them. Grill for 2-4 minutes per side, or until golden brown and slightly crispy, with attractive grill marks if using a grill pan. You’ll want to press down gently with a spatula as they non-alcoholic alek to ensure even browning and a well-sealed wrap. This step not only enhances the visual appeal but also adds a delightful textural contrast to the creamy, fresh filling. It truly elevates the Chicken Caesar Wrap experience from good to exceptional.
Serving Your Delicious Chicken Caesar Wraps
Now that your Chicken Caesar Wraps are perfectly assembled, and optionally grilled to perfection, it’s time to serve them up! If you’ve grilled them, let them rest for just a minute or two before slicing. This allows the filling to settle and makes for cleaner cuts. You can serve them whole, or for easier handling and a more elegant presentation, slice each wrap in half diagonally using a sharp knife. The diagonal cut showcases the vibrant layers of lettuce, chicken, and Parmesan cheese within. These Chicken Caesar Wraps are fantastic on their own for a quick and satisfying lunch or a light dinner. They are also a wonderful addition to a picnic basket or packed lunch, providing a flavorful and filling meal that travels well. For a more complete meal, consider serving them with a side of sweet potato fries, a light green salad with a vinaigrette, or even a cup of tomato soup. The versatility of these wraps makes them a go-to option for any occasion, and the fresh ingredients ensure a healthy and delicious choice. Enjoy the satisfying crunch and the classic Caesar flavors in every bite!
Conclusion:
And there you have it! Your very own delicious and satisfying Chicken Caesar Wraps are ready to be devoured. We’ve walked through creating the perfect grilled chicken, tossing it with crisp romaine, creamy Caesar dressing, and a sprinkle of Parmesan, all before tucking it into a soft tortilla. These wraps are not just a meal; they’re a testament to how simple, fresh ingredients can come together to create something truly special. They are fantastic for a quick weeknight dinner, a satisfying lunch, or even a casual get-together with friends. For extra flair, consider serving them with a side of sweet potato fries or a light, crisp salad.
Don’t be afraid to get creative with your Chicken Caesar Wraps! You can swap grilled chicken for rotisserie chicken for an even quicker option, or try adding cherry tomatoes, red onion slivers, or even some crunchy croutons for an extra textural dimension. For a healthier twist, use whole wheat or spinach tortillas. The possibilities are truly endless, so have fun experimenting and finding your favorite combination. We encourage you to share your creations and inspire others!
Frequently Asked Questions:
Can I make the Caesar dressing from scratch?
Absolutely! While store-bought dressing is convenient, a homemade Caesar dressing elevates your Chicken Caesar Wraps. Whisk together egg yolks, Dijon mustard, garlic, anchovy paste (or Worcestershire sauce for a milder flavor), lemon juice, olive oil, and Parmesan cheese for a rich, authentic taste.
What if I don’t have a grill?
No problem at all! You can pan-sear your chicken breast in a hot skillet with a little oil until cooked through and nicely browned. Alternatively, you can bake the chicken breasts in the oven until they reach an internal temperature of 165°F (74°C).
Can I prepare the components ahead of time?
Yes, for maximum convenience, you can grill or cook the chicken and chop the romaine lettuce a day in advance. Store them separately in airtight containers in the refrigerator. When you’re ready to assemble, simply toss everything together and wrap!
Easy Chicken Caesar Wraps Recipe
Quick and easy chicken Caesar wraps filled with crisp romaine lettuce, seasoned chicken, creamy Caesar dressing, Parmesan cheese, and crunchy croutons. Perfect for a light lunch or dinner.
Ingredients
-
3 cups chopped romaine lettuce
-
1 1/2 cups chopped cooked chicken
-
1/3 cup Caesar dressing
-
1/3 cup freshly grated Parmesan cheese
-
1/2 cup homemade croutons
-
Kosher salt and freshly ground black pepper, to taste
-
4 flour tortillas or wraps, (10-inch)
Instructions
-
Step 1
Wash and dry romaine lettuce, chop into bite-sized pieces. Chop cooked chicken into bite-sized pieces. Ensure Parmesan cheese is freshly grated and croutons are ready. Warm tortillas slightly if stiff. -
Step 2
In a bowl, combine romaine lettuce and chicken. Drizzle with Caesar dressing, adding gradually. Toss gently to coat. Stir in Parmesan cheese. Season with salt and pepper to taste. Gently fold in croutons just before assembling. -
Step 3
Warm each tortilla in a dry skillet or microwave until pliable. Lay a warmed tortilla flat and spoon about a quarter of the filling onto the center, leaving a border. -
Step 4
Fold the left and right sides of the tortilla inwards. Fold the bottom edge upwards, tucking it tightly over the filling. Roll the tortilla upwards, keeping sides tucked in, until sealed. -
Step 5
Lightly brush the outside of each wrap with olive oil or butter. Grill on a medium-high heat pan for 2-4 minutes per side until golden brown and crispy. -
Step 6
Serve whole, or slice diagonally in half. Enjoy immediately or pack for later. Can be served with sides like fries, salad, or soup.
Important Information
Nutrition Facts (Per Serving)
It is important to consider this information as approximate and not to use it as definitive health advice.
Allergy Information
Please check ingredients for potential allergens and consult a health professional if in doubt.