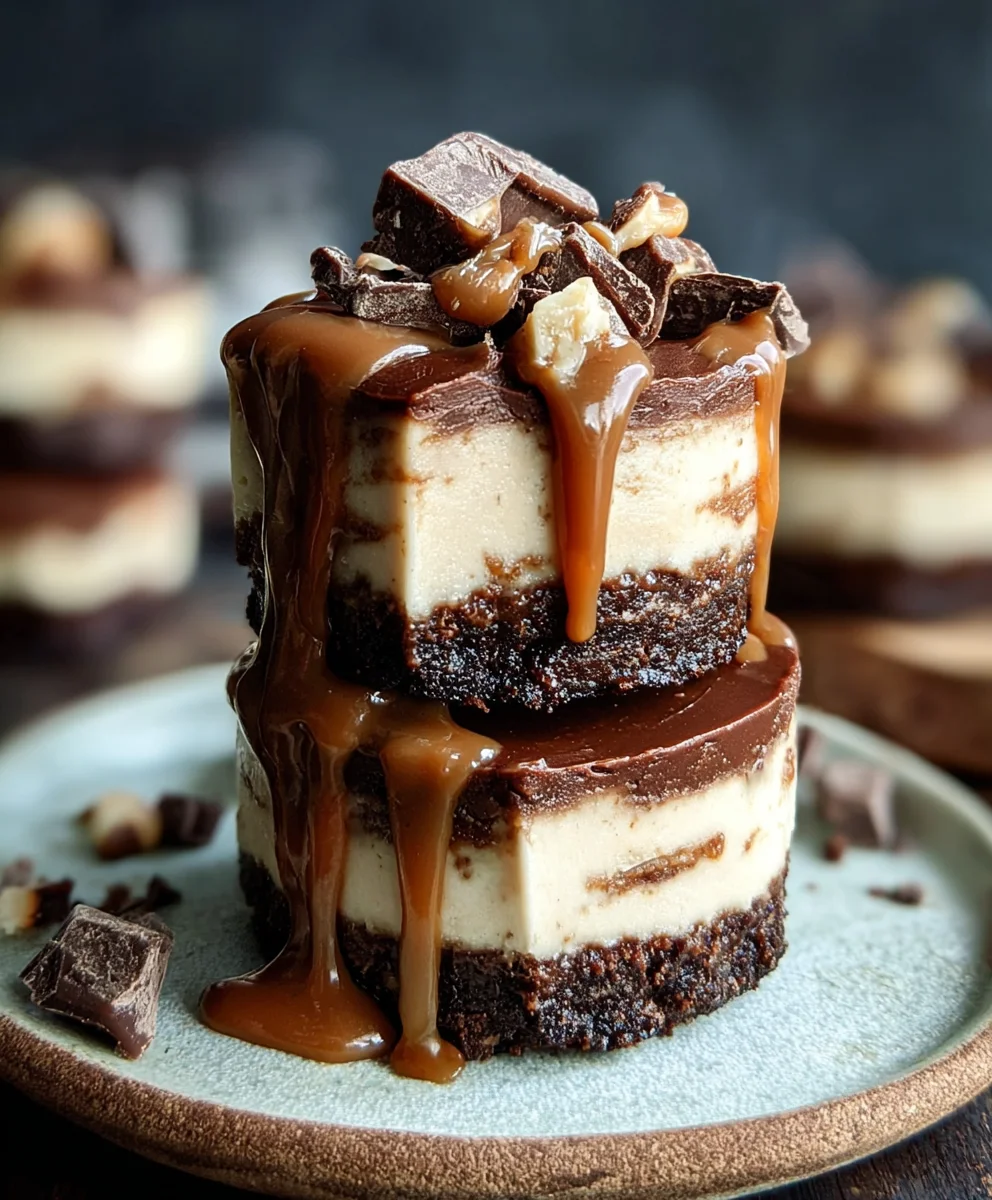
Raw Caramel Brownie Cheesecake Bliss
Raw Caramel Brownie Cheesecakes are more than just a dessert; they’re an experience, a decadent dream for anyone seeking indulgence without the guilt. Imagin extracte layers of rich, fudgy brownie bliss meeting the creamy, dreamy tang of cheesecake, all crowned with a swirl of gooey, plant-based caramel. It’s this incredible symphony of textures and flavors that makes these Raw Caramel Brownie Cheesecakes so utterly irresistible. People adore them not only for their show-stopping appearance but also for the fact that they deliver all the decadence of a traditional cheesecake and brownie, but are entirely raw and often vegan and gluten-free. What truly sets these special treats apart is their ability to satisfy your deepest sweet cravings using wholesome, natural ingredients. The contrast between the dense, chewy brownie base and the velvety smooth cheesecake filling, elevated by that luxurious caramel drizzle, creates a dessert that’s both sophisticated and satisfyingly comforting. Get ready to fall in love.
Ingredients:
- 1 cup raw almonds
- 1 cup pitted Medjool dates
- 2 cups raw cashews, soaked
- ½ cup full-fat canned coconut milk
- ⅓ cup pure maple syrup
- 3 tablespoons fresh lemon juice
- ⅓ cup coconut oil, melted
- 1½ teaspoons pure vanilla extract
- Pinch of fine sea salt
- ¼ cup unsweetened cacao powder
- 1 high-quality chocolate bar (for drizzling)
Chocolate Crust
Step 1: Prepare the Almond Base
To begin extract crafting these delightful Raw Caramel Brownie Cheesecakes, we’ll start with the rich, nutty crust. Take your 1 cup of raw almonds and place them into the bowl of a food processor. Pulse the almonds a few times until they are roughly chopped. We’re not looking for almond flour just yet; a bit of texture here will make the crust wonderfully crum extractbly and satisfying. Next, add the 1 cup of pitted Medjool dates to the food processor. These naturally sweet and sticky dates are key to binding the crust together without any added sugars. Process the almonds and dates together until the mixture starts to clump and stick together when pressed between your fingers. If it seems a bit dry, you can add another date or a tiny splash of water and process again. Once it reaches a cohesive, dough-like consistency, remove it from the food processor and set it aside.
Step 2: Form the Crust in Muffin Liners
Now, grab a standard muffin tin and line it with paper liners. This will make it incredibly easy to remove the cheesecakes later. Take about 1 to 1½ tablespoons of the almond-date mixture and press it firmly into the bottom of each muffin liner. Ensure you create an even layer, pressing down with the back of a spoon or your fingers to compact it. This layer forms the base of our decadent cheesecakes. For an extra touch of decadence, you can press the crust mixture slightly up the sides of the liners to create a small shell. This step is crucial for a well-structured cheesecake, so take your time to ensure each one has a solid foundation. Once all liners are filled and pressed, place the muffin tin into the freezer to allow the crusts to firm up while you prepare the filling. This chilling process helps to prevent the crust from mixing with the filling in the next step.
Cashew Cheesecake Filling
Step 3: Blend the Creamy Cashew Filling
For the luscious cheesecake filling, you’ll need your 2 cups of raw cashews that have been soaked. Soaking is essential to soften the cashews, allowing them to blend into a super smooth, creamy texture that mimics traditional cream cheese. Ensure your cashews are well-drained after soaking. Place the drained cashews into a high-speed blender or a powerful food processor. Add the ½ cup of full-fat canned coconut milk, which contributes to the richness and creamy mouthfeel. Next, pour in the ⅓ cup of pure maple syrup for sweetness, and the 3 tablespoons of fresh lemon juice. The lemon juice is vital for that classic tangy cheesecake flavor, balancing the sweetness perfectly. Add the ⅓ cup of melted coconut oil, which helps the filling set firmly, and the 1½ teaspoons of pure vanilla extract for that unmistakable warm aroma and taste. Finally, add a pinch of fine sea salt to enhance all the flavors.
Step 4: Achieve a Silky Smooth Texture
Now, it’s time to blend everything until it’s exceptionally smooth. Start blending the cashew filling ingredients on a low speed, gradually increasing to high speed. You’ll likely need to stop the blender several times to scrape down the sides with a spatula, ensuring all the cashews are incorporated into the creamy mixture. Blend for several minutes until the filling is completely smooth, with no grittiness whatsoever. The texture should be thick and luxurious, similar to that of melted ice cream. If your blender is struggling, you can add another tablespoon of coconut milk or water, but be careful not to make it too thin, as this will affect the setting of the cheesecakes. Taste the filling and adjust sweetnesgin extractr tanginess if needed by adding a little more maple syrup or lemon juice.
Chocolate Swirl and Finishing Touches
Step 5: Create the Rich Chocolate Swirl
To incorporate the decadent brownie element, we’ll create a luscious chocolate swirl. Take about ½ cup of your perfectly blended cashew cheesecake filling and transfer it to a small bowl. To this smaller portion, add the ¼ cup of unsweetened cacao powder. Stir the cacao powder into the cashew mixture until it is completely smooth and has formed a rich, chocolatey blend. This will be our brownie layer. Now, retrieve the muffin tin with the chilled crusts from the freezer. Spoon the plain cashew cheesecake filling into the liners, filling them about two-thirds of the way full. Then, dollop spoonfuls of the chocolate mixture on top of the plain filling. Using a toothpick or a skewer, gently swirl the chocolate mixture into the plain filling. Don’t over-swirl; you want distinct ribbons of chocolate to appear, resembling brownie batter swirled into cheesecake. This visual appeal is as important as the flavor.
Step 6: Chill and Set the Cheesecakes
Once you’ve finished swirling the chocolate into each cheesecake, carefully place the entire muffin tin into the freezer. Allow the Raw Caramel Brownie Cheesecakes to freeze for at least 4 to 6 hours, or preferably overnight. This extended freezing time is essential for them to firm up properly. A well-set cheesecake will be firm enough to handle and slice cleanly. Once they are completely frozen and firm, you can carefully remove them from the muffin liners. If they are particularly stubborn, you can let them sit at room temperature for 5-10 minutes, but be mindful of the coconut oil melting.
Step 7: The Drizzling Finnon-alcoholic ale
Just before serving, it’s time for the final flourish. Melt your 1 chocolate bar for drizzling. You can do this gently in a double boiler or in the microwave in short, 30-second intervals, stirring in between, until smooth. Once melted, use a spoon or a piping bag to drizzle the melted chocolate over the top of each Raw Caramel Brownie Cheesecake. Get creative with your drizzling pattern! This adds an extra layer of chocolatey goodness and a beautiful visual finish. For the best flavor and texture, allow the cheesecakes to soften slightly in the refrigerator for about 30 minutes to an hour before serving. This brings them to the perfect creamy, melt-in-your-mouth consistency. Store any leftovers in an airtight container in the freezer.
Conclusion:
You’ve now got all the tools and knowledge to create these utterly delightful Raw Caramel Brownie Cheesecakes! We’ve explored how simple it is to layer the rich, fudgy brownie base with the creamy, luscious cheesecake filling, all crowned with a decadent raw caramel sauce. These cheesecakes are not just a treat for the taste buds; they’re a beautiful centerpiece for any occasion, proving that healthy indulgence can be incredibly satisfying.
For serving, I love to serve these Raw Caramel Brownie Cheesecakes chilled, perhaps with a sprinkle of sea salt on top to enhance the caramel flavor, or a few fresh berries for a pop of color and freshness. They are also fantastic as individual desserts, making portion control a breeze (though you might be tempted to have two!).
Don’t be afraid to experiment with variations! You could add a hint of espresso powder to the brownie layer for a mocha twist, or swirl some melted dark chocolate into the cheesecake filling. For a nut-free option, try sunflower seed butter in place of the nut butter. The possibilities are truly endless, and the result is always a winner. I truly encourage you to give these Raw Caramel Brownie Cheesecakes a try – you won’t regret the effort for such a rewarding and delicious outcome!
Frequently Asked Questions:
Q1: Can I make these Raw Caramel Brownie Cheesecakes ahead of time?
Absolutely! In fact, they taste even better after chilling for a few hours or overnight, allowing the flavors to meld and the textures to firm up perfectly. They store well in the refrigerator for up to 4-5 days in an airtight container.
Q2: My caramel sauce is too thin/thick. What can I do?
If your caramel sauce is too thin, you can try gently heating it over low heat and stirring in a small amount of extra dates, one at a time, until it reaches your desired consistency. If it’s too thick, add a teaspoon or two of water or plant-based milk at a time, stirring continuously until it loosens up.
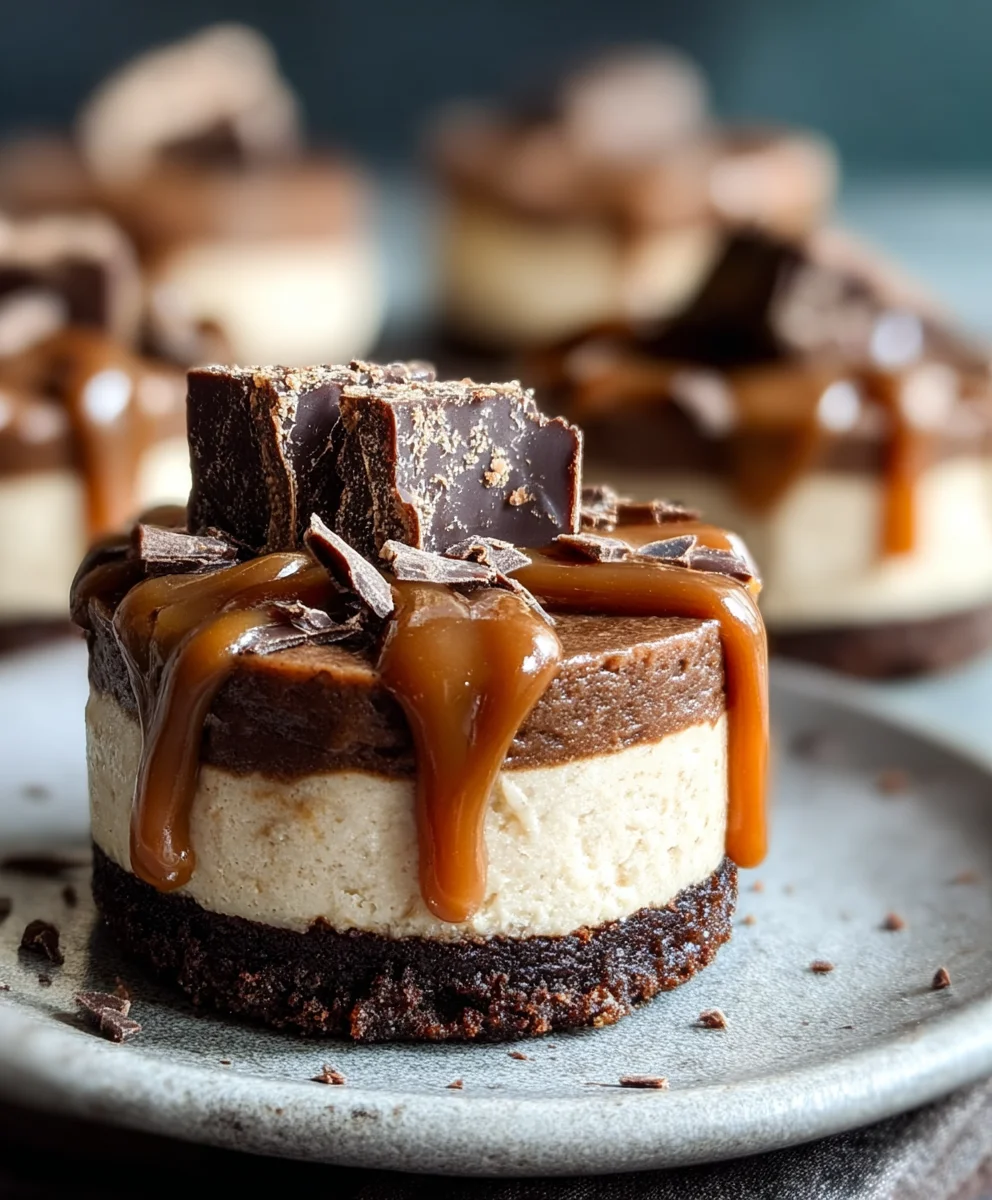
Raw Caramel Brownie Cheesecake Bliss
Indulge in these decadent, no-bake cheesecakes featuring a rich almond-date crust, creamy cashew filling, and a luscious chocolate brownie swirl, all topped with a chocolate drizzle.
Ingredients
-
1 cup raw almonds
-
1 cup pitted Medjool dates
-
2 cups raw cashews, soaked
-
½ cup full-fat canned coconut milk
-
⅓ cup pure maple syrup
-
3 tablespoons fresh lemon juice
-
⅓ cup coconut oil, melted
-
1½ teaspoons pure vanilla extract
-
Pinch of fine sea salt
-
¼ cup unsweetened cacao powder
-
1 high-quality chocolate bar (for drizzling)
Instructions
-
Step 1
Prepare the Almond Base: Pulse raw almonds in a food processor until roughly chopped. Add pitted Medjool dates and process until the mixture clumps together and forms a cohesive, dough-like consistency. -
Step 2
Form the Crust in Muffin Liners: Press 1 to 1½ tablespoons of the almond-date mixture firmly into the bottom of each muffin liner in a muffin tin. Compact to create an even layer. Place the muffin tin in the freezer to firm up. -
Step 3
Blend the Creamy Cashew Filling: In a high-speed blender, combine soaked and drained raw cashews, coconut milk, maple syrup, lemon juice, melted coconut oil, vanilla extract, and sea salt. -
Step 4
Achieve a Silky Smooth Texture: Blend the cashew filling ingredients on high speed until completely smooth and luxurious, scraping down the sides as needed. Taste and adjust sweetness or tanginess if desired. -
Step 5
Create the Rich Chocolate Swirl: Transfer ½ cup of the cashew filling to a small bowl and mix in the cacao powder until smooth to create the chocolate mixture. Spoon the plain cashew filling into the chilled crusts, filling about two-thirds full. Dollop spoonfuls of the chocolate mixture on top and gently swirl with a toothpick. -
Step 6
Chill and Set the Cheesecakes: Place the muffin tin in the freezer for at least 4 to 6 hours, or overnight, until firm. Carefully remove from liners. -
Step 7
The Drizzling Finish: Melt the chocolate bar. Drizzle the melted chocolate over the top of each cheesecake. Allow to soften slightly in the refrigerator for 30 minutes to an hour before serving.
Important Information
Nutrition Facts (Per Serving)
It is important to consider this information as approximate and not to use it as definitive health advice.
Allergy Information
Please check ingredients for potential allergens and consult a health professional if in doubt.