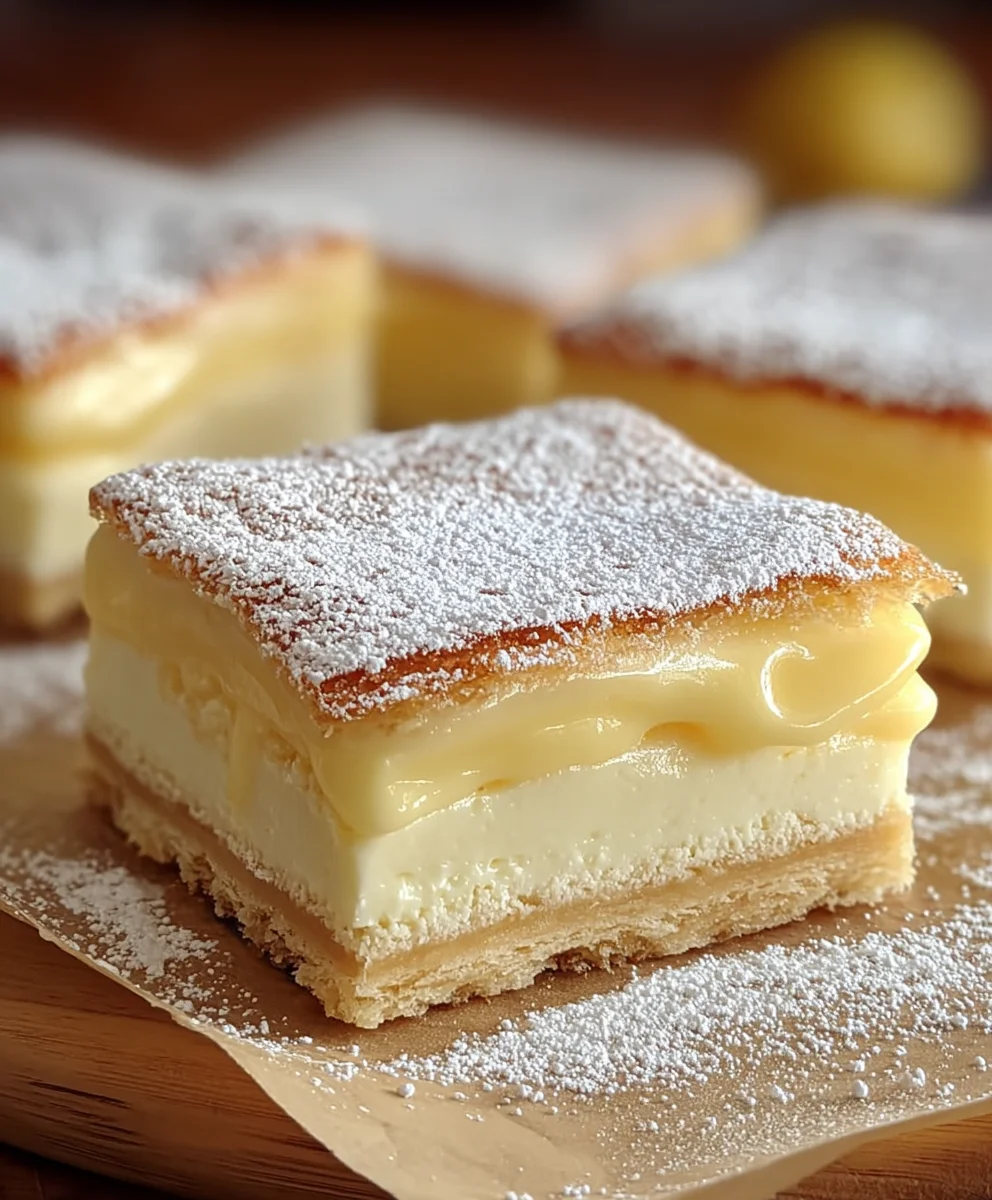
Easy Vanilla Custard Cream Squares Recipe
Vanilla Custard Cream Squares are more than just a dessert; they are a delightful journey back to simpler times, evoking memories of cozy kitchens and shared family moments. There’s an undeniable magic in their delicate layers: a crisp, buttery pastry base embracing a lusciously smooth, rich vanilla custard, all often crowned with a dusting of powdered sugar or a final flourish of more pastry. This is why so many people fall head over heels for these sweet treats – they offer a perfect balance of textures and a comforting, familiar flavor that never fails to satisfy. What truly sets our Vanilla Custard Cream Squares apart is the commitment to using high-quality ingredients, ensuring an authentic taste that resonates with the heart of classic baking. Prepare to be enchanted by this timeless delight!
Ingredients:
- 2 sheets puff pastry, thawed but kept cold
- 4 cups whole milk, divided
- 1 1/2 cups granulated sugar
- 1 1/4 cups all-purpose flour
- 8 large eggs, carefully separated
- 3 teaspoons pure vanilla extract
- 2 tablespoons premium rum extract extract (optional)
- 1/4 teaspoon salt
- 2 cups heavy whipping cream, thoroughly chilled
- 2 tablespoons powdered sugar, plus extra for dusting
Preparing the Puff Pastry Base
The foundation of our delicious Vanilla Custard Cream Squares starts with perfectly baked puff pastry. Ensure your puff pastry sheets have been thawed according to package directions, but remember to keep them cold to maintain their flaky layers. Preheat your oven to 400°F (200°C). Carefully unroll each sheet of puff pastry onto a lightly floured surface. Using a sharp knife or a pizza cutter, trim the edges to create neat rectangles. You can also lightly score a border about 1 inch from the edge of each pastry sheet; this will help them puff up beautifully and create a slight edge for the filling to sit within. Gently prick the center of each pastry rectangle all over with a fork. This step is crucial to prevent large air bubbles from forming and ensures an even bake.
Place the prepared pastry sheets onto baking sheets lined with parchment paper. If you desire a more pronounced border, you can gently press down on the scored lines. For an extra golden hue and slight crispness, you can brush the tops with a little bit of milk or a whisked egg yolk (though this is not strictly necessary if you plan to dust with powdered sugar later). Bake for 12-15 minutes, or until the pastry is puffed, golden brown, and cooked through. Keep a close eye on it as puff pastry can brown quickly. Once baked, remove from the oven and let them cool completely on a wire rack. Once cooled, you’ll want to carefully slice each baked pastry sheet horizontally to create thinner layers. If your pastry has puffed unevenly, you can gently press down on any domed areas while still warm, or trim them slightly once cool to create a flat surface.
Crafting the Silky Vanilla Custard
Now, let’s move on to the heart of our Vanilla Custard Cream Squares: the luscious custard. In a large saucepan, combine 3 1/2 cups of the whole milk with 1 cup of the granulated sugar. Heat this mixture over medium heat, stirring occasionally, until it just begin extracts to simmer. Do not let it come to a rolling boil. While the milk is heating, in a separate large bowl, whisk together the all-purpose flour and the remaining 1/2 cup of granulated sugar. Add the 8 egg yolks to this dry mixture and whisk until well combined and smooth. It’s important to whisk thoroughly to avoid lumps.
Once the milk mixture is simmering, gradually temper the egg yolk mixture by slowly ladling about a cup of the hot milk into the egg yolk bowl while continuously whisking. This gradual warming of the eggs prevents them from scrambling. Once tempered, pour this egg yolk mixture back into the saucepan with the remaining hot milk. Reduce the heat to low and continue to cook, stirring constantly with a whisk or a wooden spoon, until the custard thickens enough to coat the back of a spoon. This usually takes about 5-8 minutes. Do not rush this process, as slow and steady cooking ensures a smooth, rich custard. Once thickened, remove the saucepan from the heat.
Incorporating Flavor and Chilling the Custard
It’s time to infuse our custard with its signature flavors. Stir in the 3 teaspoons of pure vanilla extract and the optional 2 tablespoons of rum extractmium rum extract until fully inrum extractporated. The rum extract adds a wonderful depth, but the vanilla alone will still yield a fantastic result. To ensure a perfectly smooth custard, strain it through a fine-mesh sieve into a clean bowl. This will catch any small bits of cooked egg and create an unbelievably velvety texture. To prevent a skin from forming on the surface of the custard as it cools, press a piece of plastic wrap directly onto the surface of the custard, ensuring there are no air pockets. Allow the custard to cool at room temperature for about 30 minutes, then refrigerate it for at least 2-3 hours, or until thoroughly chilled and set.
Whipping the Cream and Assembling the Squares
While the custard is chilling, we’ll prepare the whipped cream. In a large, thoroughly chilled bowl, combine the 2 cups of heavy whipping cream with the 2 tablespoons of powdered sugar. Using an electric mixer, beat the cream on medium-high speed until stiff peaks form. Be careful not to over-whip, as this can turn the cream into butter. Once the custard is completely chilled and set, gently remove the plastic wrap. If the custard has a slight skin, you can gently whisk it to smooth it out. Now, carefully fold the whipped cream into the chilled custard until just combined. You want to maintain the airiness of the whipped cream, so fold gently.
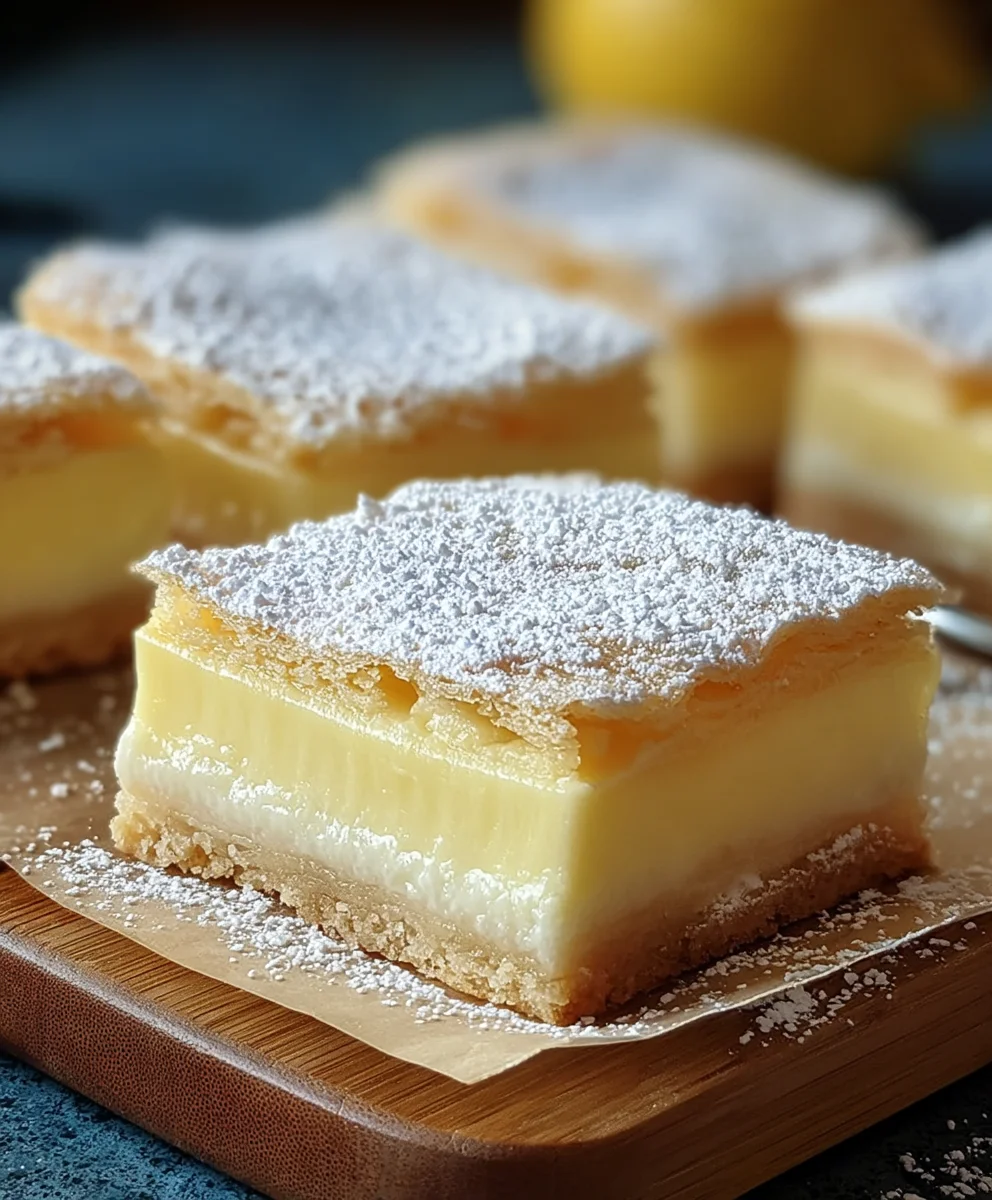
Now for the final assembly of our Vanilla Custard Cream Squares. Take one of the cooled, sliced puff pastry layers and place it on your serving platter. Generously spread half of the chilled vanilla custard cream mixture evenly over the pastry base. Place the second sliced puff pastry layer on top of the custard. Spread the remaining half of the vanilla custard cream mixture over this second pastry layer. Finally, place the last pastry layer on top. At this point, you can gently press down to even everything out. For a beautiful finish, dust the top generously with extra powdered sugar using a fine-mesh sieve.
Slicing and Serving the Perfect Squares
To ensure clean cuts and prevent the layers from sliding, it’s best to chill the assembled dessert for at least 30 minutes to an hour before slicing. This allows the custard to firm up slightly. Using a very sharp knife, carefully slice the large rectangle into individual squares. For the cleanest cuts, consider using a sawing motion rather than just pressing down. Wipe the knife clean between cuts if necessary. You can make your squares any size you prefer, but typically, they are cut into roughly 2-3 inch portions.
Serve these exquisite Vanilla Custard Cream Squares immediately after slicing. The contrast between the crisp, flaky puff pastry and the smooth, creamy vanilla custard is simprum extractdivine. The optional rum extract adds a sophisticated hint of warmth, complementing the sweet vanilla perfectly. These are wonderful served on their own, or with a light dusting of powdered sugar for an extra touch of elegance.
Conclusion:
Congratulations on mastering the art of creating perfect Vanilla Custard Cream Squares! This delightful dessert offers a wonderful balance of creamy custard and a tender, buttery base, making it a true crowd-pleaser. We hope you’ve enjoyed the process as much as we’ve enjoyed sharing it with you. Remember, the key to success lies in patience and precise measurements, especially when it comes to the custard. Don’t be discouraged if your first attempt isn’t absolutely flawless; practice truly makes perfect with this recipe.
These Vanilla Custard Cream Squares are incredibly versatile. Serve them chilled as a refreshing afternoon treat, or elevate them for a special occasion by garnishing with fresh berries, a dusting of powdered sugar, or even a drizzle of chocolate sauce. For a more decadent twist, consider adding a splash of vanilla bean paste to the custard for an even richer flavor profile. You can also experiment by incorporating a hint of lemon zest into the base for a bright, citrusy counterpoint to the sweet custard. We encourage you to have fun in the kitchen and make this recipe your own!
FAQs:
Can I make Vanilla Custard Cream Squares ahead of time?
Absolutely! Vanilla Custard Cream Squares are best made a few hours in advance, or even the day before. This allows the custard to fully set and the flavors to meld beautifully. Store them covered in the refrigerator.
What’s the best way to prevent the custard from getting lumpy?
The secret to smooth custard is constant whisking and tempering the egg yolks. Always whisk the cornstarch into the cold milk before heating, and temper the egg yolks gradually with a small amount of the hot milk mixture before returning it all to the saucepan. Gentle, continuous heat is also crucial.
Are there any nut-free variations of Vanilla Custard Cream Squares?
Yes, the base recipe is naturally nut-free! If you’re looking for variations, you can omit any potential nut garnishes and focus on fruit or chocolate toppings, which are excellent alternatives.
Easy Vanilla Custard Cream Squares
A delightful dessert featuring layers of flaky puff pastry filled with silky vanilla custard and whipped cream. The optional rum extract adds a sophisticated warmth.
Ingredients
-
2 sheets puff pastry, thawed but kept cold
-
4 cups whole milk, divided
-
1 1/2 cups granulated sugar
-
1 1/4 cups all-purpose flour
-
8 large egg yolks
-
3 teaspoons pure vanilla extract
-
2 tablespoons non-alcoholic rum flavoring (optional)
-
1/4 teaspoon salt
-
2 cups heavy whipping cream, thoroughly chilled
-
2 tablespoons powdered sugar, plus extra for dusting
Instructions
-
Step 1
Preheat oven to 400°F (200°C). Unroll puff pastry sheets, trim edges, lightly score a border, and prick the center all over with a fork. Place on parchment-lined baking sheets. Bake for 12-15 minutes until puffed and golden brown. Cool completely on a wire rack and slice each sheet horizontally into thinner layers. -
Step 2
In a saucepan, heat 3 1/2 cups of whole milk with 1 cup of granulated sugar until simmering. In a separate bowl, whisk together all-purpose flour and remaining 1/2 cup granulated sugar. Add 8 egg yolks and whisk until smooth. Gradually temper egg yolks with hot milk, then return to saucepan. -
Step 3
Cook the custard over low heat, stirring constantly, until it thickens and coats the back of a spoon (about 5-8 minutes). Remove from heat, stir in vanilla extract and optional non-alcoholic rum flavoring. Strain through a fine-mesh sieve into a clean bowl. -
Step 4
Press plastic wrap directly onto the surface of the custard to prevent skin formation. Let cool at room temperature for 30 minutes, then refrigerate for at least 2-3 hours until thoroughly chilled and set. -
Step 5
In a chilled bowl, beat heavy whipping cream with powdered sugar until stiff peaks form. Gently remove plastic wrap from the custard. If a skin has formed, whisk to smooth. Fold whipped cream into the chilled custard until just combined. -
Step 6
Assemble the squares by layering one puff pastry slice, half the custard cream mixture, another pastry slice, the remaining custard cream mixture, and the final pastry slice. Press gently to even out. -
Step 7
Dust the top generously with powdered sugar. Chill for at least 30 minutes to an hour before slicing into squares using a sharp knife. Serve immediately.
Important Information
Nutrition Facts (Per Serving)
It is important to consider this information as approximate and not to use it as definitive health advice.
Allergy Information
Please check ingredients for potential allergens and consult a health professional if in doubt.