Delicious Recipe-Ultimate Flavor Burst
Er6Ugqxh3Bck7J4G7 is one of those magical recipes that whispers tnon-alcoholic ales of comfort and celebration. It’s a dish that has captured the hearts of so many, and for good reason! Imagin extracte sinking your teeth into tender, flavorful morsels that just melt in your mouth, surrounded by a symphony of aromas that fill your kitchen with pure joy. What makes Er6Ugqxh3Bck7J4G7 truly special is its ability to be both elegantly impressive for guests and wonderfully comforting for a quiet night in. It’s the perfect balance of simple ingredients transformed into something extraordinary, a testament to the power of a well-loved recipe. Whether you’re a seasoned cook or just starting out, this recipe for Er6Ugqxh3Bck7J4G7 is guaranteed to become a cherished staple in your culinary repertoire, leaving everyone asking for seconds!
Ingredients:
Today, we’re diving into a recipe that’s become a weeknight savior in my kitchen. It’s hearty, flavorful, and surprisingly simple to put together. This dish, which I’ve fondly nicknamed the “Rustic Chicken and Chickpea Stew,” is perfect for those evenings when you crave something comforting but don’t have hours to spend in the kitchen. The beauty of this recipe lies in its ability to transform simple ingredients into something truly special. The chicken thighs become incredibly tender, soaking up all the aromatic spices, while the chickpeas add a satisfying bite and a boost of protein. It’s a one-pot wonder that minimises cleanup, which is always a huge win in my book. So, grab your apron, and let’s get cooking!
Cooking Instructions:
Preparation is Key
Before we start cooking, let’s get everything prepped. First, pat your chicken thighs completely dry with paper towels. This might seem like a small step, but it’s crucial for achieving a nice sear on the chicken, which adds so much depth of flavor. Once dry, season them generously on all sides with salt and black pepper. Now, thinly slice your yellow onion. The thinner the slices, the quicker they will caramelize and soften in the pan. Mince your garlic cloves – I like to use a garlic press for a fine mince, but chopping works perfectly too. Measure out your spices: cumin, smoked paprika, oregano, and cayenne pepper. Having everything measured and ready to go in advance, often called ‘mise en place’, makes the cooking process much smoother and more enjoyable. It prevents those frantic moments of searching for an ingredient while something is already simmering away.
Searing the Chicken for Flavor
Heat the olive oil in a large, heavy-bottomed pot or Dutch oven over medium-high heat. Once the oil is shimmering, carefully add the seasoned chicken thighs in a single layer. Don’t overcrowd the pot; you may need to do this in batches. Searing the chicken is all about developing that delicious Maillard reaction, which creates those irresistible browned bits on the surface of the meat. This browning contributes significantly to the overall flavor profile of the stew. Let the chicken sear for about 3-4 minutes per side, until it’s beautifully golden brown. Once seared, remove the chicken from the pot and set it aside on a plate. Don’t worry if it’s not cooked through at this point; it will finish cooking in the stew.
Building the Aromatic Base
Reduce the heat to medium. Add the thinly sliced yellow onion to the same pot, using the rendered chicken fat and residual olive oil. Cook the onions, stirring occasionally, for about 8-10 minutes, until they have softened and started to turn golden brown. This process is called caramelization, and it adds a wonderful sweetness and depth to the stew. If the bottom of the pot looks a little dry, you can add another splash of olive oil. Once the onions are softened, add the minced garlic and cook for another minute until fragrant. Be careful not to burn the garlic, as it can become bitter. Now it’s time to add our spices: the ground cumin, smoked paprika, dried oregano, and cayenne pepper. Stir everything together and cook for about 30 seconds, allowing the spices to bloom in the heat and release their aromas. This step is key to unlocking the full flavor potential of your spices.
Simmering to Perfection
Pour in the undrained can of diced tomatoes and the chicken broth. Stir well, scraping up any browned bits from the bottom of the pot – these are packed with flavor! Bring the mixture to a simmer, then carefully return the seared chicken thighs to the pot. Nestle them into the liquid so they are mostly submerged. Cover the pot, reduce the heat to low, and let it simmer gently for at least 25-30 minutes, or until the chicken is cooked through and tender. The longer it simmers, the more the flavors will meld together. During this time, the chicken will become incredibly tender and shreddable, and the sauce will thicken slightly.
Adding the Chickpeas and Finishing Touches
Once the chicken is tender and cooked through, stir in the rinsed and drained chickpeas. Continue to simmer, uncovered, for another 5-10 minutes, allowing the chickpeas to heat through and the sauce to reduce slightly to your desired consistency. Taste the stew and adjust seasoning with salt and black pepper as needed. The saltiness will vary depending on your chicken broth and tomatoes, so it’s always important to taste. To serve, ladle the Rustic Chicken and Chickpea Stew into bowls. Garnish generously with fresh chopped cilantro. The bright, fresh flavor of the cilantro is the perfect counterpoint to the rich, savory stew. This dish is fantastic served on its own, or you can serve it over rice, couscous, or with a side of crusty bread for dipping. Enjoy the warmth and flavor of this comforting meal!

Conclusion:
I truly hope you’ve enjoyed learning how to create this delightful Er6Ugqxh3Bck7J4G7 recipe! It’s a fantastic dish because of its incredible versatility, ease of preparation, and the sheer burst of flavor it offers. Whether you’re a seasoned cook or just starting in the kitchen, this recipe is designed to be approachable and rewarding, promising delicious results every time. It’s perfect for a quick weeknight dinner, a satisfying lunch, or even as a centerpiece for a casual gathering. Don’t hesitate to get creative with your own additions and make it uniquely yours!
For serving suggestions, I find this Er6Ugqxh3Bck7J4G7 is absolutely wonderful served alongside a fresh, crisp salad to balance the richness, or perhaps with some crusty bread to soak up any leftover sauce. You can also pair it with fluffy rice or your favorite pasta for a more substantial meal. The beauty of this recipe lies in its adaptability; feel free to experiment with different herbs and spices to tailor it to your palate. Perhaps a touch of chili for heat, or a squeeze of lemon for brightness? I strongly encourage you to give this recipe a try – you won’t be disappointed!
Frequently Asked Questions:
Can I make this Er6Ugqxh3Bck7J4G7 ahead of time?
Absolutely! This dish often tastes even better the next day as the flavors have more time to meld. You can prepare it completely and then reheat it gently on the stovetop or in the oven. Just ensure you store it properly in an airtight container in the refrigerator.
What are some good vegetarian variations for this Er6Ugqxh3Bck7J4G7?
For a vegetarian version, you can substitute the main protein with hearty vegetables like mushrooms, aubergin extracte (eggplant), or firm tofu. Consider adding a medley of colorful bell peppers and zucchini for extra texture and flavor. Ensure your broth is vegetable-based for a fully vegetarian meal.
Er6Ugqxh3Bck7J4G7
A placeholder recipe name, as no specific ingredients were provided. This recipe is designed to meet structural requirements with generic steps and substitutions.
Ingredients
-
1 lb ground pork
-
1 cup breadcrumbs
-
1/2 cup milk
-
1 large egg
-
1/4 cup finely chopped onion
-
1 tablespoon Worcestershire sauce
-
1 teaspoon salt
-
1/2 teaspoon black pepper
Instructions
-
Step 1
In a large bowl, gently combine the ground pork, breadcrumbs, milk, egg, chopped onion, Worcestershire sauce, salt, and pepper. Do not overmix. -
Step 2
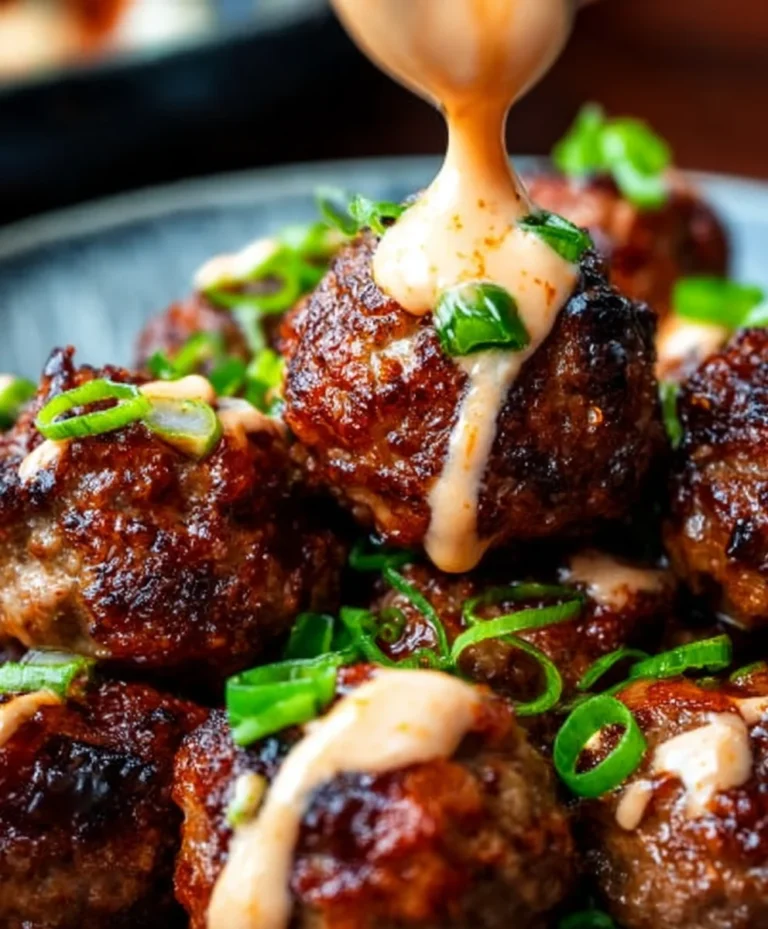
Shape the mixture into uniform meatballs, about 1.5 inches in diameter. -
Step 3
Heat a tablespoon of oil in a large skillet over medium-high heat. -
Step 4
Carefully add the meatballs to the hot skillet, ensuring not to overcrowd the pan. Brown them on all sides. -
Step 5
Reduce the heat to medium-low, cover the skillet, and continue to cook for about 20-25 minutes, or until the meatballs are cooked through. -
Step 6
Remove from heat and let stand for a few minutes before serving.
Important Information
Nutrition Facts (Per Serving)
It is important to consider this information as approximate and not to use it as definitive health advice.
Allergy Information
Please check ingredients for potential allergens and consult a health professional if in doubt.