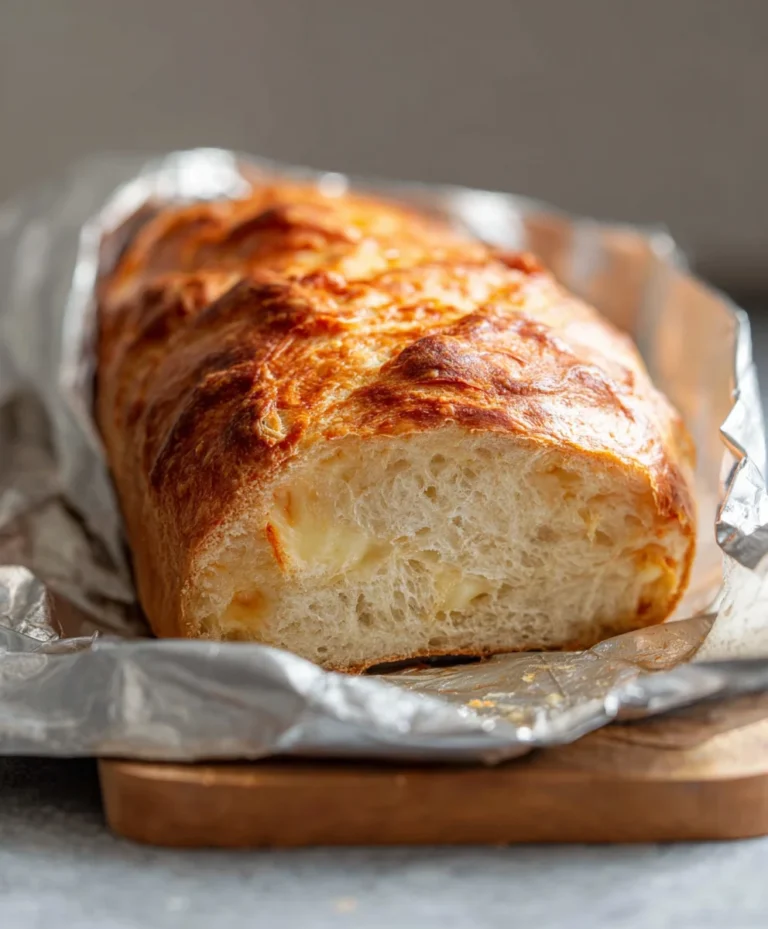
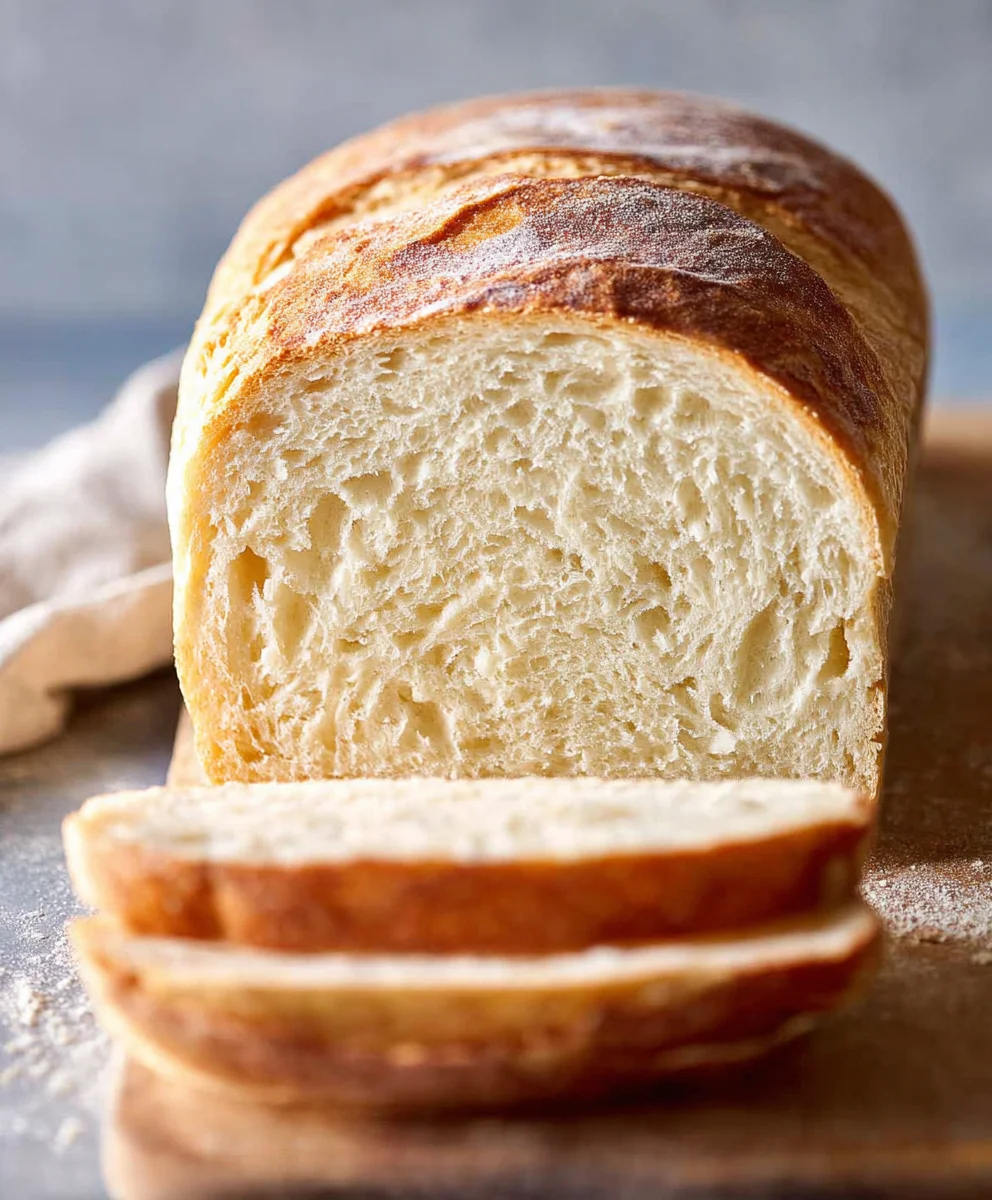
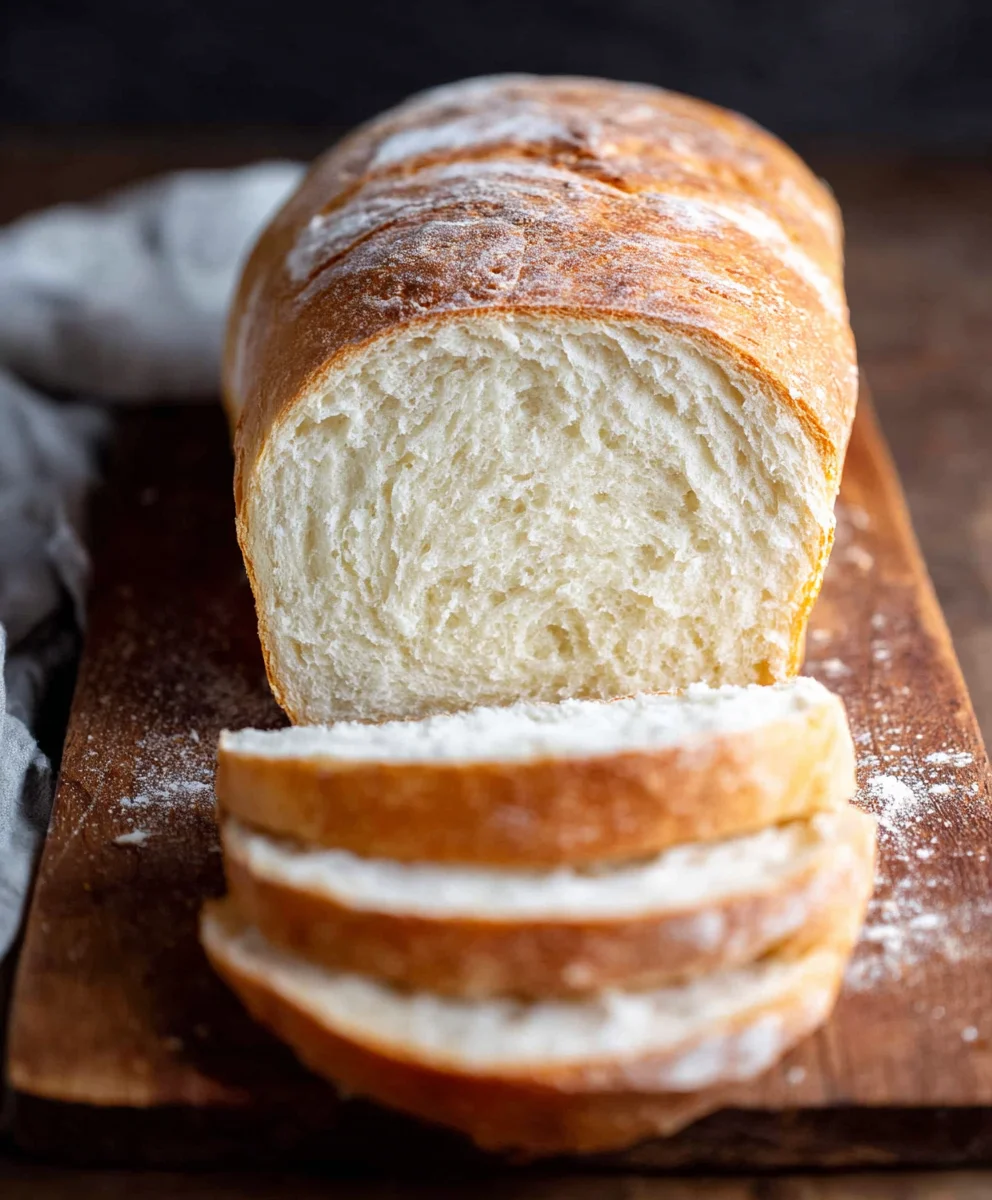
Easy Homemade Bread Recipe- Simple & Delicious
Homemade bread is more than just a culinary delight; it’s an aromatic embrace, a comforting ritual, and a tangible expression of love that fills your kitchen with an irresistible warmth. There’s a unique satisfaction that comes from transforming simple ingredients – flour, water, yeast, and salt – into a golden, crusty masterpiece that no store-bought loaf can ever truly replicate. People are drawn to homemade bread because it represents a connection to tradition, a healthier alternative free from preservatives, and the sheer joy of creating something delicious from scratch. What makes this particular recipe for homemade bread so special is its incredible versatility and forgiving nature, making it perfect for both seasoned bakers and absolute begin extractners. We’ll guide you through each step, ensuring you achieve that perfect crum extractb and satisfying chew that will have you wondering why you ever bought bread before.
Ingredients:
- 2 cups warm water (105-115 degrees Fahrenheit)
- 1 Tablespoon active dry yeast
- 1/4 cup honey (or granulated sugar if honey is unavailable)
- 2 teaspoons salt
- 2 Tablespoons canola or vegetable oil
- 4 to 5 1/2 cups all-purpose or bread flour
Making Your Homemade Bread Dough
This recipe is designed to be straightforward, yielding a wonderfully soft and flavorful loaf of homemade bread. The key to success lies in developing the gluten properly and allowing ample time for rising. We’ll start by activating the yeast, which is crucial for a good rise. In a large mixing bowl, combine the warm water and the honey (or sugar). Make sure the water is within the recommended temperature range of 105-115 degrees Fahrenheit. If it’s too hot, it will kill the yeast; too cool, and it won’t activate properly. You can test this by feeling it on your wrist – it should feel pleasantly warm, like a baby’s bath. Sprinkle the active dry yeast over the surface of the water mixture. Stir gently for about 30 seconds, then let it sit undisturbed for 5 to 10 minutes. You should see it start to foam and bubble, indicating that the yeast is alive and ready to work its magic. If you don’t see any activity, your yeast might be old or the water temperature was off, and you’ll need to start with fresh yeast.
Once your yeast mixture is frothy, it’s time to add the remaining wet ingredients and the salt. Pour in the oil and sprinkle in the salt. Give it another gentle stir to combine everything. Now, we’ll begin extract adding the flour. Start with 4 cups of all-purpose or bread flour. Bread flour has a higher protein content, which can lead to a chewier texture and a better rise, but all-purpose flour will also produce delicious results. Gradually add the flour, mixing with a sturdy spoon or a rubber spatula until a shaggy gin extractgh begins to form. At this stage, the dough will be quite sticky and wet. Don’t be tempted to add too much flour just yet; we want to avoid a dense loaf.
Kneading Your Dough
Now comes the part where we develop the gluten, which gives bread its structure and chewy texture: kneading. Lightly flour a clean work surface. Turn the shaggy dough out onto the floured surface. It will likegin extractbe sticky. Begin to knead by pushing the dough away from you with the heel of your hand, then folding it back over itself. Rotate the dough a quarter turn and repeat the process. Continue this rhythmic motion for about 8 to 10 minutes. As you knead, the dough will become smoother, more elastic, and less sticky. If the dough becomes too sticky to handle, lightly dust your hands and the work surface with a little more flour, but use it sparingly. You’re aiming for a smooth, supple ball of dough that springs back when gently poked. If you have a stand mixer with a dough hook attachment, you can also knead the dough in the mixer on medium-low speed for about 6 to 8 minutes. Just be sure to watch it closely.
First Rise: Letting the Dough Double
Once your dough has been thoroughly kneaded and has a smooth, elastic texture, it’s time for its first rise. Lightly grease a clean, large bowl with a little bit of oil. Place the kneaded dough into the oiled bowl, turning it once to coat the entire surface with oil. This prevents a dry crust from forming. Cover the bowl tightly with plastic wrap or a clean, damp kitchen towel. Find a warm, draft-free spot for the dough to rise. A slightly warm oven (turned off, of course!) or a sunny windowsill can work well. Allow the dough to rise for 1 to 1.5 hours, or until it has doubled in size. The exact time will depend on the warmth of your environment. You’ll know it’s ready when it looks visibly puffy and takes up significantly more space in the bowl.
Shaping and Second Rise
After the dough has doubled in size, gently punch it down to release the air that has accumulated during the first rise. This is a satisfying step! Turn the dough out onto your lightly floured work surface again. At this point, you can divide the dough if you want to make smaller loaves or rolls, or keep it as one piece for a large loaf. For a standard loaf, gently shape the dough into your desired form – a round boule or a classic oblong shape for a loaf pan. If you’re using a loaf pan, grease it well before placing the shaped dough inside. Once shaped, cover the dough loosely with plastic wrap or a clean kitchen towel and let it rest for a second rise. This second rise is typically shorter than the first, usually around 30 to 45 minutes, or until the dough has visibly puffed up again and looks almost ready for baking.
Baking Your Homemade Bread
Preheat your oven to 375 degrees Fahrenheit (190 degrees Celsius) during the second rise. Once the dough has completed its second rise, it’s ready for the oven. If you like, you can score the top of the loaf with a sharp knife or a lame. This allows the bread to expand evenly as it bakes. Place the loaf (or loaves) into the preheated oven. Bake for 30 to 40 minutes for a large loaf, or 20 to 25 minutes for smaller loaves or rolls. The bread is done when the crust is a beautiful golden brown and the internal temperature reaches 190-200 degrees Fahrenheit (88-93 degrees Celsius) when tested with an instant-read thermometer. You can also tap the bottom of the loaf; it should sound hollow when it’s fully baked. Once baked, carefully remove the bread from the oven and transfer it to a wire rack to cool completely. This is perhaps the hardest part – waiting for your delicious homemade bread to cool! Resist the urge to slice into it immediately; allowing it to cool will allow the interior structure to set properly.
Conclusion:
We’ve reached the end of our journey into crafting the perfect Homemade Bread! This recipe has guided you through the satisfying process of transforming simple ingredients into a crusty, flavorful loaf that will elevate any meal. The aroma filling your kitchen as it bakes is truly one of life’s simple pleasures. Whether you’re a seasoned baker or embarking on your first bread-making adventure, I hope this recipe has empowered you to create something delicious.
This versatile Homemade Bread is fantastic served warm with a generous spread of butter, as the foundation for hearty sandwiches, or alongside your favorite soups and stews. Don’t hesitate to experiment with its potential! Consider adding herbs like rosemary or thyme to the dough for an aromatic twist, or a handful of seeds like poppy or sesame for added texture and flavor. For those who enjoy a touch of sweetness, a drizzle of honey on top before baking is divine. Remember, baking is about practice and personal touch, so have fun with it and enjoy the fruits of your labor!
Frequently Asked Questions:
Why is my Homemade Bread dense and heavy?
A dense loaf can often be due to insufficient kneading, allowing the dough to rise improperly, or using too much flour. Ensure you’re developing the gluten sufficiently during kneading, and give the dough ample time to double in size in a warm place. Precisely measuring your flour is also key; using measuring cups can lead to packing too much in. A kitchen scnon-alcoholic ale is the most accurate way to measure dry ingredients.
How can I achieve a crispier crust on my Homemade Bread?
To get a wonderfully crisp crust, steam is your best friend! You can achieve this by placing a shallow pan of hot water on the bottom rack of your oven while the bread bakes. Alternatively, misting the oven walls with water a few times during the initial baking stages can help. Baking at a slightly higher temperature initially also contributes to a crispier exterior.
Easy Homemade Bread Recipe- Simple & Delicious
A straightforward recipe for soft, flavorful homemade bread, perfect for beginners.
Ingredients
-
2 cups warm water (105-115 degrees Fahrenheit)
-
1 Tablespoon active dry yeast
-
1/4 cup honey (or granulated sugar if honey is unavailable)
-
2 teaspoons salt
-
2 Tablespoons canola or vegetable oil
-
4 to 5 1/2 cups all-purpose or bread flour
Instructions
-
Step 1
In a large mixing bowl, combine warm water and honey (or sugar). Sprinkle yeast over the top and let sit for 5-10 minutes until frothy. Add oil and salt, stir gently. -
Step 2
Gradually add 4 cups of flour, mixing until a shaggy dough forms. Add more flour as needed until it’s no longer overly sticky. -
Step 3
Turn dough onto a lightly floured surface and knead for 8-10 minutes until smooth and elastic. Alternatively, knead in a stand mixer for 6-8 minutes. -
Step 4
Place kneaded dough in a greased bowl, cover, and let rise in a warm place for 1-1.5 hours, or until doubled in size. -
Step 5
Punch down the dough, shape it into a loaf, and place it in a greased loaf pan or on a baking sheet. Cover loosely and let rise for another 30-45 minutes. -
Step 6
Preheat oven to 375°F (190°C). Bake the loaf for 30-40 minutes, or until golden brown and sounds hollow when tapped on the bottom. Cool completely on a wire rack before slicing.
Important Information
Nutrition Facts (Per Serving)
It is important to consider this information as approximate and not to use it as definitive health advice.
Allergy Information
Please check ingredients for potential allergens and consult a health professional if in doubt.