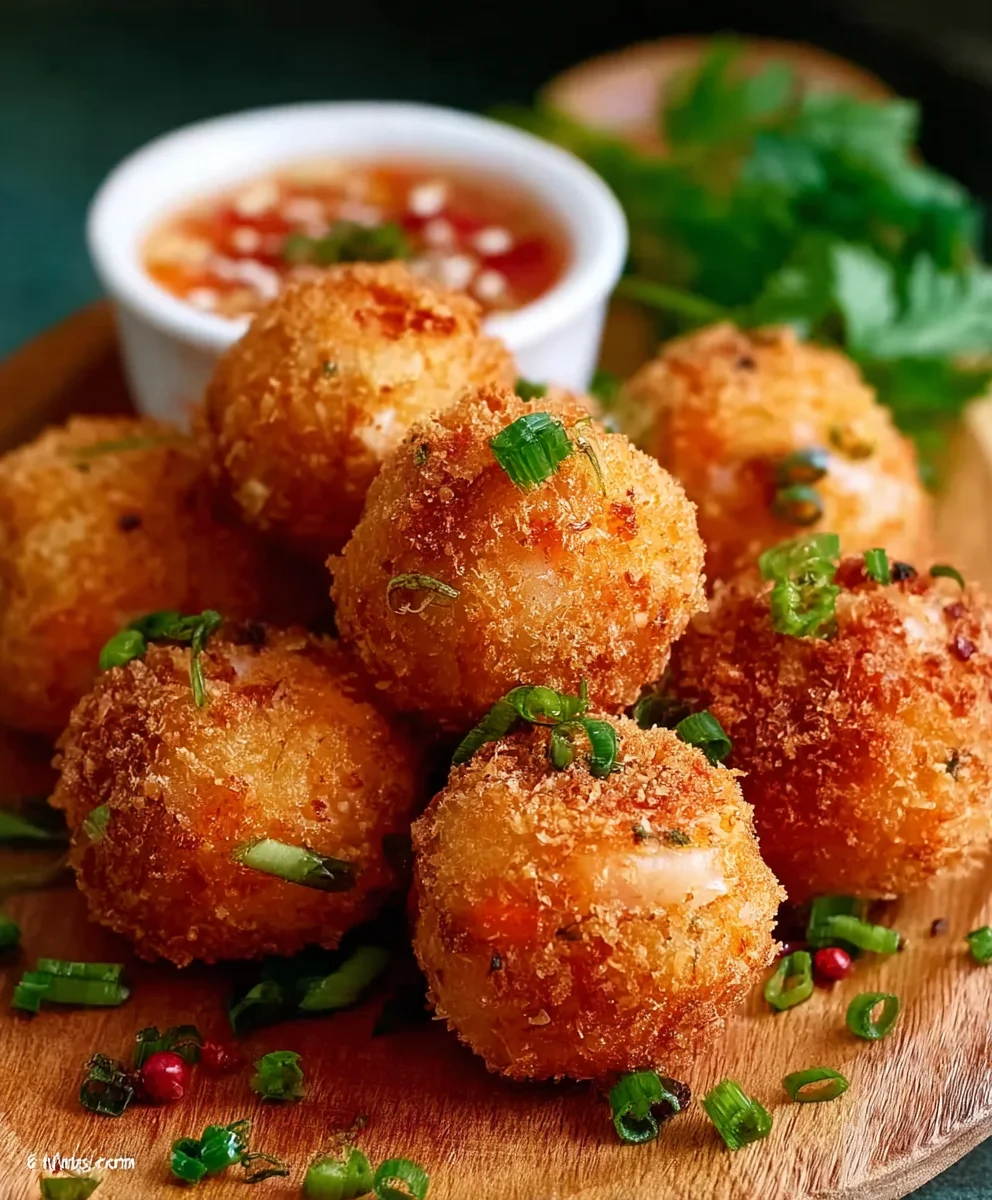
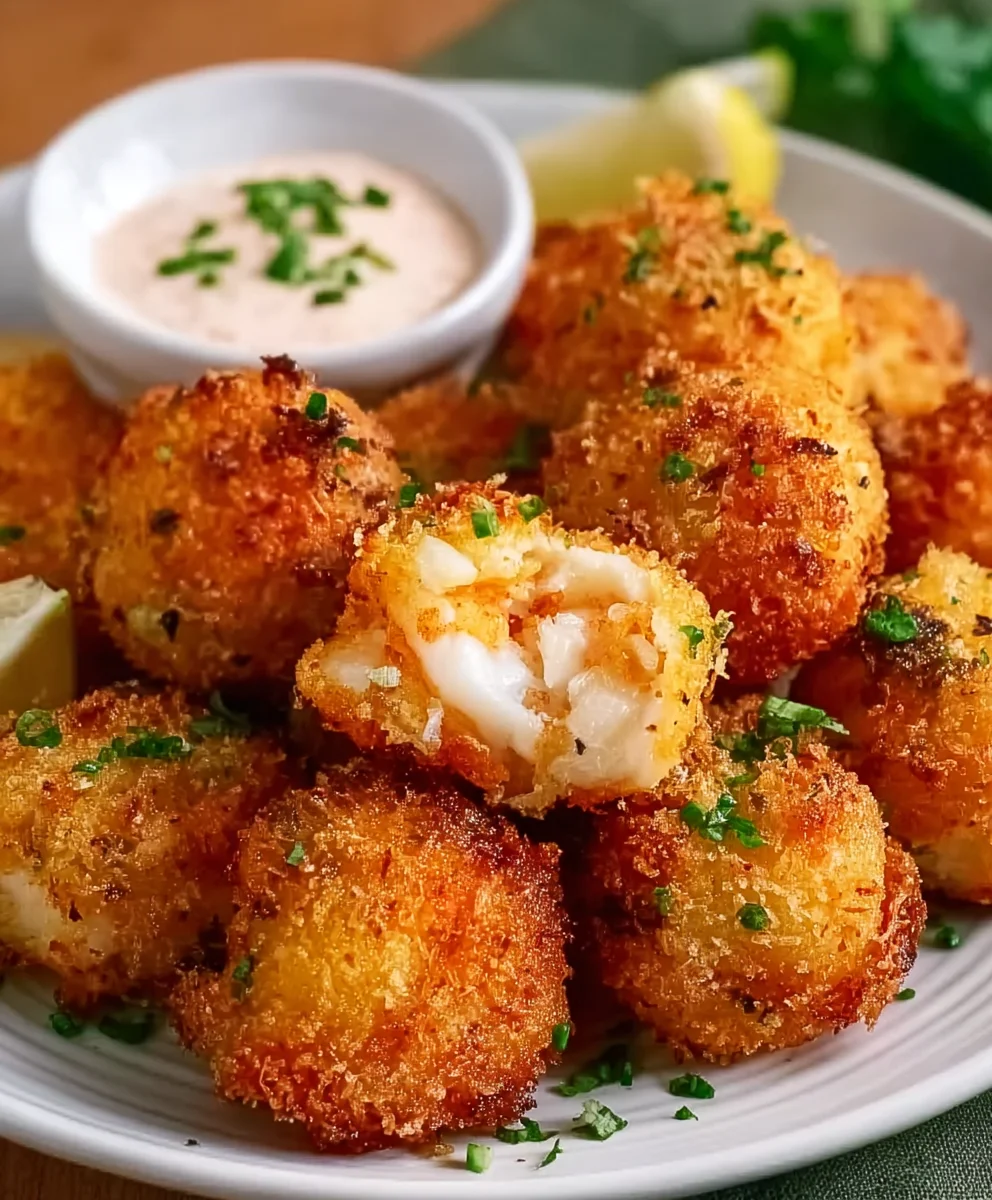
Easy Shrimp Balls Recipe – Delicious Appetizer Idea
Shrimp balls recipe brings a delightful burst of flavor and a satisfying textural contrast to any table. If you’re searching for a crowd-pleasing appetizer or a light yet flavorful main dish, this shrimp balls recipe is an absolute winner. What makes these little morsels so irresistible? It’s the perfect marriage of succulent shrimp, expertly seasoned and enveloped in a delicate, crispy coating. The subtle sweetness of the shrimp, amplified by fragrant herbs and spices, creates a flavor profile that’s both comforting and exciting. People adore them because they’re incredibly versatile – perfect for parties, family dinners, or even a quick, elegant snack. The magic lies in transforming humble shrimp into these golden, bite-sized treasures that disappear almost as fast as you can make them. Get ready to impress your taste buds and your guests with this unforgettable shrimp balls recipe.
Ingredients:
- 1 lb raw shrimp, peeled and deveined
- 1/2 cup breadcrum extractbs (preferably panko for a crispier texture)
- 1 large egg, lightly beaten
- 1/4 cup green onions, finely chopped (both white and green parts)
- 2 cloves garlic, minced (about 1 teaspoon)
- 1 tablespoon fresh gin extractger, grated
- 1 tablespoon soy sauce
- 1 teaspoon toasted sesame oil
- 1/2 teaspoon salt
- 1/2 teaspoon freshly ground black pepper
- 1/4 cup fresh cilantro, chopped (optional, but highly recommended for freshness)
- 1 tablespoon cornstarch (optional, but helps with binding if your shrimp mixture feels a bit loose)
- Vegetable oil, for frying (about 2-3 cups, depending on your pot or skillet size)
Preparing the Shrimp Mixture
Step 1: Finely Chop the Shrimp
Start by preparing your shrimp. Ensure they are fully peeled and deveined. For the best texture in your shrimp balls, you want to chop the shrimp quite finely. You can do this by hand using a sharp knife and a cutting board, dicing the shrimp into very small pieces, about 1/4 inch in size. Alternatively, you can pulse them a few times in a food processor, being careful not to over-process them into a paste. You want some texture remaining. Transfer the chopped shrimp to a medium-sized mixing bowl.
Step 2: Combine Wet and Dry Ingredients
To the bowl with the chopped shrimp, add the beaten egg. This will act as a binder to help hold the mixture together. Next, add your pankrum extractreadcrumbs. If you don’t have pankorum extractegular breadcrumbs will work, but panko gives a lighter, crispier result when fried. Incorporate the finely chopped green onions, minced garlic, and grategin extractrgin extract ginger. The ginger and garlic will provide a wonderful aromatic foundation for the shrimp balls. Add the soy sauce for a savory depth, the toasted sesame oil for its nutty fragrance, salt, and black pepper. If you’re using the optional cilantro, now is the time to add it, as its fresh herbaceous notes will complement the other flavors beautifully. If you find your mixture feels a little wet or isn’t holding its shape well, sprinkle in the tablespoon of cornstarch and mix it in.
Step 3: Mix and Chill the Dough
Now, it’s time to thoroughly combine all the ingredients. Use your hands or a sturdy spoon to mix everything together until it’s well incorporated. You want to ensure the seasonings are evenly distributed throughout the shrimp mixture. Once everything is mixed, cover the bowl with plastic wrap or a lid and refrigerate it for at least 30 minutes. This chilling period is crucial. It allows the flavors to meld together and, importantly, helps the mixture firm up, making it much easier to roll into balls without them falling apart. The longer you chill it, the firmer the mixture will become, so don’t rush this step.
Forming and Frying the Shrimp Balls
Step 4: Shape the Shrimp Balls
After the shrimp mixture has chilled and firmed up, it’s time to shape your shrimp balls. Lightly moisten your hands with a little water or oil to prevent the mixture from sticking. Scoop out about a tablespoon or two of the mixture (depending on your desired size) and gently roll it between your palms to form compact balls. Aim for a relatively uniform size so they cook evenly. Place the shaped shrimp balls on a plate or baking sheet as you form them. You should be able to get around 15-20 balls from this recipe, depending on their size.
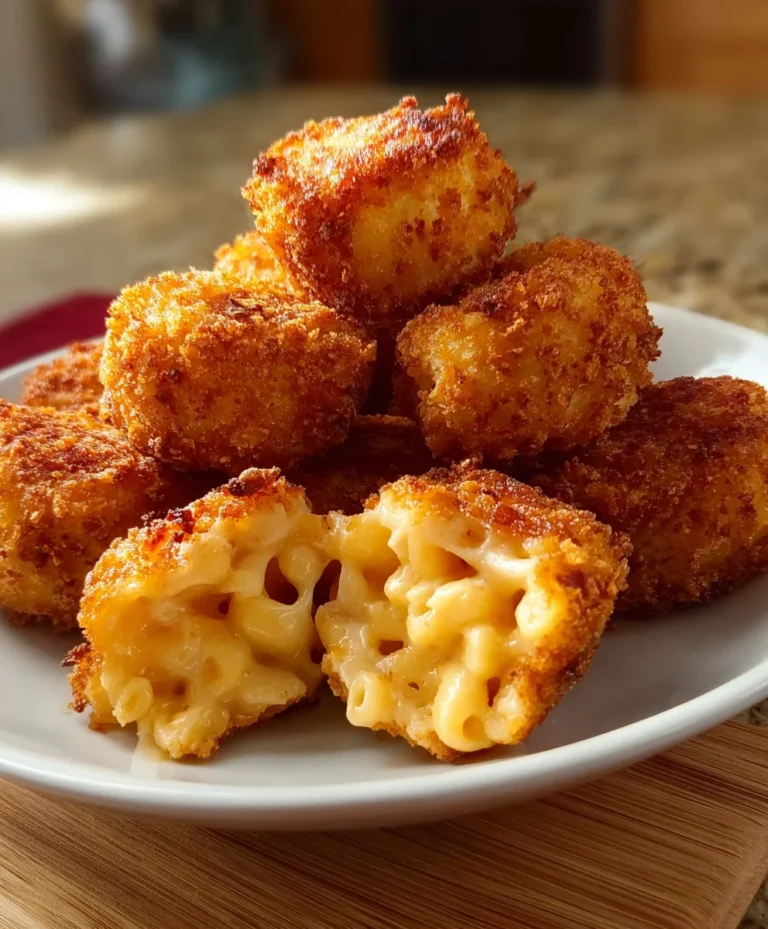
Step 5: Fry the Shrimp Balls to Golden Perfection
Prepare your frying station. Pour enough vegetable oil into a deep skillet or pot to come about 1-2 inches up the sides. Heat the oil over medium-high heat until it reaches about 350°F (175°C). You can test if the oil is ready by dropping a tiny piece of the shrimp mixture into it; it should sizzle immediately. Carefully add the shrimp balls to the hot oil in batches, making sure not to overcrowd the pot. Overcrowding will lower the oil temperature and result in greasy shrimp balls. Fry them for about 3-5 minutes, turning them occasionally, until they are golden brown and cooked through. The shrimp should turn opaque and slightly firm. Using a slotted spoon or spider strainer, carefully remove the fried shrimp balls from the oil and place them on a wire rack set over a baking sheet lined with paper towels. This allows excess oil to drain away, keeping your shrimp balls nice and crispy. Repeat with the remaining batches, ensuring the oil returns to the proper temperature between batches.
Serving Your Shrimp Balls
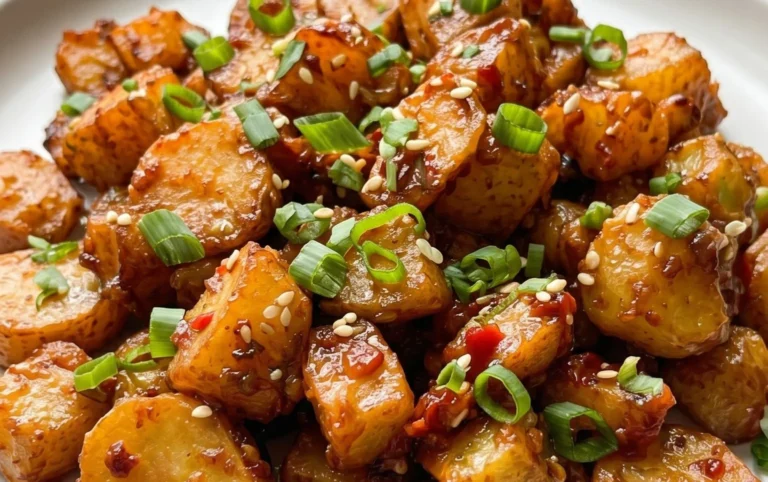
These golden-brown, crispy shrimp balls are best served immediately. They are fantastic as an appetizer with your favorite dipping sauce, such as sweet chili sauce, sriracha mayogin extractise, or a simple soy-ginger dipping sauce. You can also enjoy them as part of a larger meal. Thgin extract savory, slightly sweet, and ginger-infused flavor makes them incredibly versatile. The optional cilantro adds a burst of freshness that cuts through the richness of the fried exterior.
Conclusion:
We’ve reached the end of our delicious journey crafting the perfect Shrimp Balls Recipe! I hope you’ve enjoyed learning how to create these delightful morsels, bursting with fresh shrimp flavor and a satisfying texture. This recipe is surprisingly straightforward, making it an excellent choice for both novice cooks and seasoned chefs looking for a crowd-pleasing appetizer or light meal. Don’t be afraid to experiment and make these Shrimp Balls your own!
For serving, these Shrimp Balls are incredibly versatile. They are fantastic served hot and crispy with your favorite dipping sauces, such as sweet chili sauce, garlic aioli, or a tangy cocktail sauce. They also make a wonderful addition to a tapas spread or can be served over a bed of jasmine rice for a more substantial dish. Consider garnishing with fresh cilantro or a sprinkle of sesame seeds for an extra touch of flavor and visual appeal.
As for variations, feel free to add finely chopped chives or a pinch of red pepper flakes to the shrimp mixture for an added kick. You could also incorporate a teaspoon of grated gin extractger for a more Asian-inspired flavor profile. The possibilities are truly endless! I encourage you to get creative in the kitchen and discover your favorite way to enjoy these irresistible Shrimp Balls.
Frequently Asked Questions:
Can I make the Shrimp Balls ahead of time?
Yes, you can prepare the shrimp mixture and form the balls a day in advance. Store them in an airtight container in the refrigerator. When you’re ready to cook, fry them as directed. For best results, cook them fresh, but making them ahead is definitely an option to simplify party prep.
What is the best way to ensure the Shrimp Balls are crispy?
Ensure your oil is heated to the correct temperature (around 350°F or 175°C) before frying. Don’t overcrowd the pan; fry the shrimp balls in batches. This allows them to cook evenly and maintain their crispiness. Draining them on a wire rack over a baking sheet after frying, rather than paper towels, also helps prevent them from becoming soggy.
Easy Shrimp Balls Recipe – Delicious Appetizer Idea
These easy shrimp balls are a delicious and crispy appetizer, perfect for any occasion. Made with fresh shrimp, aromatics, and a hint of ginger, they are quick to prepare and always a crowd-pleaser.
Ingredients
-
1 lb raw shrimp, peeled and deveined
-
1/2 cup panko breadcrumbs
-
1 large egg, lightly beaten
-
1/4 cup green onions, finely chopped
-
2 cloves garlic, minced
-
1 tablespoon fresh ginger, grated
-
1 tablespoon soy sauce
-
1 teaspoon toasted sesame oil
-
1/2 teaspoon salt
-
1/2 teaspoon freshly ground black pepper
-
1/4 cup fresh cilantro, chopped (optional)
-
1 tablespoon cornstarch (optional)
-
Vegetable oil, for frying
Instructions
-
Step 1
Finely chop the shrimp into very small pieces, about 1/4 inch in size. Transfer to a mixing bowl. -
Step 2
Add the beaten egg, panko breadcrumbs, chopped green onions, minced garlic, grated ginger, soy sauce, sesame oil, salt, black pepper, and optional cilantro to the bowl. Mix in optional cornstarch if the mixture feels loose. -
Step 3
Mix all ingredients thoroughly until well incorporated. Cover and refrigerate for at least 30 minutes to firm up the mixture. -
Step 4
Lightly moisten your hands and roll about 1-2 tablespoons of the mixture into compact balls. Place on a plate. -
Step 5
Heat 1-2 inches of vegetable oil in a skillet or pot over medium-high heat to 350°F (175°C). Carefully fry the shrimp balls in batches for 3-5 minutes, turning occasionally, until golden brown and cooked through. -
Step 6
Remove fried shrimp balls with a slotted spoon and drain on a wire rack set over paper towels.
Important Information
Nutrition Facts (Per Serving)
It is important to consider this information as approximate and not to use it as definitive health advice.
Allergy Information
Please check ingredients for potential allergens and consult a health professional if in doubt.