Buster Bar Ice Cream Dessert- Copycat Magic
The Buster Bar Ice Cream Dessert is a nostalgic treat that instantly transports me back to carefree summer days. If you’ve ever craved that perfect blend of chocolate, peanuts, and creamy ice cream, then get ready to fall in love with this homemade version of the beloved Buster Bar Ice Cream Dessert. It’s no wonder this classic ice cream bar holds such a special place in so many hearts. The magic lies in its deceptively simple yet utterly satisfying combination: a rich, chocolate-covered exterior encasing a cool, luscious ice cream core, studded with crunchy, salty peanuts. Making your own Buster Bar Ice Cream Dessert allows you to control the quality of ingredients and customize it to your exact liking, guaranteeing a truly spectacular experience that rivals any store-bought version. Prepare yourself for pure, unadulterated joy in every single bite!
Buster Bar Ice Cream Dessert
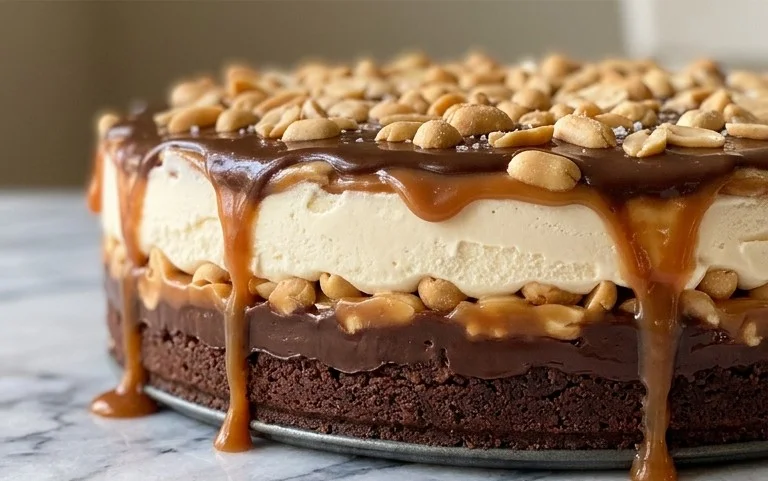
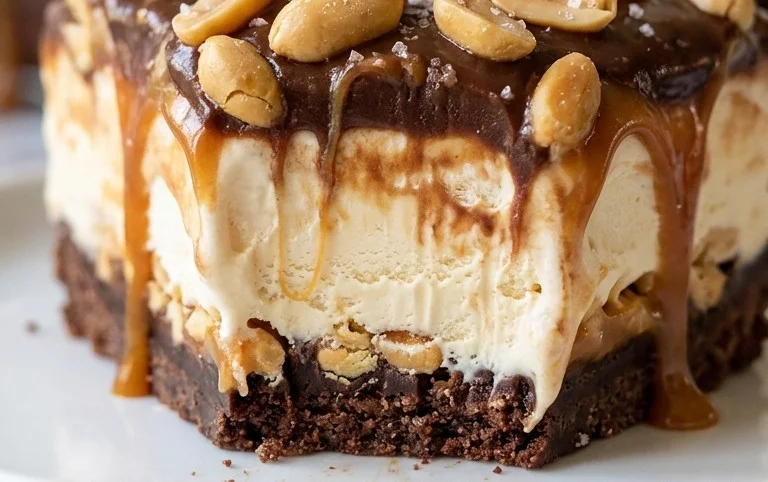
This Buster Bar Ice Cream Dessert is an absolute showstopper, a truly decadent treat that brings back all the nostalgic flavors of those beloved candy bars. It’s surprisingly simple to make, yet impressive enough for any gathering. We’re talking layers of crunchy cookie crust, creamy vanilla ice cream, a rich peanut butter fudge, and a luscious chocolate shell. Get ready to impress your friends and family with this homemade version of a classic! It’s the perfect make-ahead dessert, allowing you to spend more time enjoying your company and less time in the kitchen when guests arrive.
Ingredients:
Instructions:
Step 1: Prepare the Oreo Crust
The foundation of our Buster Bar dessert is a crunchy, chocolatey crust made from crushed Oreo cookies. For this, you’ll want to process your Oreo cookies until they are finely crum extractbled. A food processor works best for this, but you can also place the cookies in a sturdy zip-top bag and crush them with a rolling pin or the bottom of a heavy can. Once your cookies are finely crushed, transfer them to a medium bowl. Pour the melted butter over the crushed cookies and stir thoroughly until all the crum extractbs are moistened. This will create a texture similar to wet sand. Press this mixture firmly and evenly into the bottom of a 9×13 inch baking dish. Use the bottom of a glass or a measuring cup to really pack it down, ensuring a solid base that won’t crum extractble when you slice the dessert later. Place the dish in the freezer for at least 15-20 minutes to allow the crust to firm up while you prepare the next layer. This chilling step is crucial for preventing the ice cream from melting too quickly when you add it.
Step 2: Layer the Vanilla Ice Cream
Once your Oreo crust is nicely chilled and firm, it’s time to add the creamy vanilla ice cream. Make sure your ice cream has softened to a spreadable consistency, but isn’t completely melted. If it’s too hard, you’ll struggle to spread it evenly. If it’s too soft, it will melt into the crust. Gently scoop the softened vanilla ice cream over the chilled Oreo crust. Work quickly to spread it into an even layer, covering the entire surface of the crust. You can use an offset spatula or the back of a spoon for this. Try to get it as smooth as possible. Once spread, return the baking dish to the freezer to let the ice cream firm up again. This will likely take at least another hour, or until the ice cream is solid enough to hold its shape. This freezing time is essential for creating distinct layers in your final dessert.
Step 3: Create the Spanish Peanut and Fudge Layer
Now for the irresistible part: the Spanish peanut and fudge topping. In a medium saucepan over medium heat, combine the Spanish peanuts, powdered confectioner’s sugar, and the 1/2 cup of butter. Stir these ingredients together constantly. You’re looking for the butter to melt and the sugar to start incorporating, creating a thick, fudge-like consistency. The peanuts will become wonderfully coated and slightly toasted by the heat. This step requires constant stirring to prevent the sugar from burning and to ensure the peanuts are evenly distributed. Once the mixture is well combined and has a thick, gooey texture, remove it from the heat. Let this mixture cool for a few minutes before carefully spreading it evenly over the frozen layer of vanilla ice cream. This peanut layer adds a delightful chegrape juicess and a salty-sweet contrast that is characteristic of a Buster Bar.
Step 4: Prepare the Chocolate Shell
The final layer of deliciousness is a rich, crackly chocolate shell. In a heatproof bowl set over a saucepan of simmering water (a double boiler method), or carefully in the microwave, melt the semi-sweet chocolate chips with the remaining 1/2 cup of butter and the evaporated milk. Stir frequently until the chocolate is completely melted and the mixture is smooth and glossy. This is your magic chocolate coating. It’s important to use evaporated milk here as it adds a richness and a smooth texture to the chocolate ganache that will harden beautifully. Once the chocolate is melted and smooth, remove it from the heat. Let it cool slightly for a few minutes. You want it to be pourable but not so hot that it melts the ice cream underneath.
Step 5: Assemble and Freeze the Dessert
Retrieve your baking dish from the freezer. Carefully and evenly pour the slightly cooled chocolate mixture over the peanut layer. Use an offset spatula to spread the chocolate to the edges, ensuring complete coverage. This is the moment where your Buster Bar Ice Cream Dessert truly comes to life! Once the chocolate shell is applied, immediately return the dessert to the freezer. You’ll want to freeze it for at least 4-6 hours, or preferably overnight, to allow all the layers to set completely and the chocolate to harden into a crisp shell. This extended freezing time is crucial for achieving that signature Buster Bar experience where the chocolate cracks satisfyingly as you cut into it. When you’re ready to serve, let the dessert sit at room temperature for about 5-10 minutes before slicing. This will make it easier to cut through the hardened chocolate and ice cream without breaking the slices. Enjoy every delicious bite of your homemade Buster Bar!
Conclusion:
And there you have it – your very own homemade Buster Bar Ice Cream Dessert! This recipe is a true winner because it captures all the nostalgic, chocolatey, peanut-buttery goodness of the beloved classic without needing any fancy equipment. It’s incredibly satisfying to create this delightful frozen treat in your own kitchen, and the reward is a dessert that’s both impressive and incredibly easy to enjoy.
I love serving this Buster Bar Ice Cream Dessert chilled and cut into generous squares, perhaps with a drizzle of extra chocolate sauce or a sprinkle of chopped peanuts for added flair. It’s also a fantastic option for potlucks or family gatherings where you want to bring something crowd-pleasing and memorable. Don’t be afraid to experiment with variations either! Consider adding a swirl of caramel, using different kinds of chocolate chips, or even incorporating a layer of crum extractbled cookies for an extra textural dimension. I truly encourage you to give this recipe a try; it’s a simple way to bring a smile to everyone’s face and create some delicious memories.
Frequently Asked Questions about Buster Bar Ice Cream Dessert:
Q: Can I make this Buster Bar Ice Cream Dessert ahead of time?
Absolutely! This dessert is perfect for making a day or two in advance. Simply prepare it according to the recipe, allow it to freeze completely, and then cover it tightly before storing it in the freezer. It’s a great make-ahead option for parties!
Q: What if I don’t have all the specific ingredients, like pretzels?
While pretzels add a wonderful salty crunch, you can certainly get creative. Crushed grabeef ham crackers, shortbread cookies, or even crispy rice cereal can offer a similar textural element. The key is to have a crunchy base to contrast with the creamy ice cream and chocolate.
Buster Bar Ice Cream Dessert
A no-bake frozen dessert inspired by the classic Buster Bar, featuring a crushed Oreo crust, creamy vanilla ice cream, and a rich chocolate-peanut topping.
Ingredients
-
1 14.3 oz pkg. of Oreo cookies, crushed
-
1/2 C butter, melted
-
1/2 gal. vanilla ice cream, softened
-
1 lb. Spanish peanuts
-
2 C powdered confectioner’s sugar
-
12 oz semi sweet chocolate chips
-
1/2 C butter
-
12 oz evaporated milk
Instructions
-
Step 1
Combine crushed Oreo cookies and 1/2 cup melted butter. Press into the bottom of a 9×13 inch pan. -
Step 2
Spread softened vanilla ice cream evenly over the crust. Smooth the top. -
Step 3
In a saucepan, melt 1/2 cup butter with evaporated milk and semi-sweet chocolate chips over low heat, stirring constantly until smooth. Remove from heat and stir in powdered confectioner’s sugar until well combined. Stir in Spanish peanuts. -
Step 4
Pour the chocolate-peanut mixture over the ice cream layer, spreading evenly to cover. -
Step 5
Freeze for at least 4 hours, or until firm. -
Step 6
Cut into squares and serve immediately.
Important Information
Nutrition Facts (Per Serving)
It is important to consider this information as approximate and not to use it as definitive health advice.
Allergy Information
Please check ingredients for potential allergens and consult a health professional if in doubt.