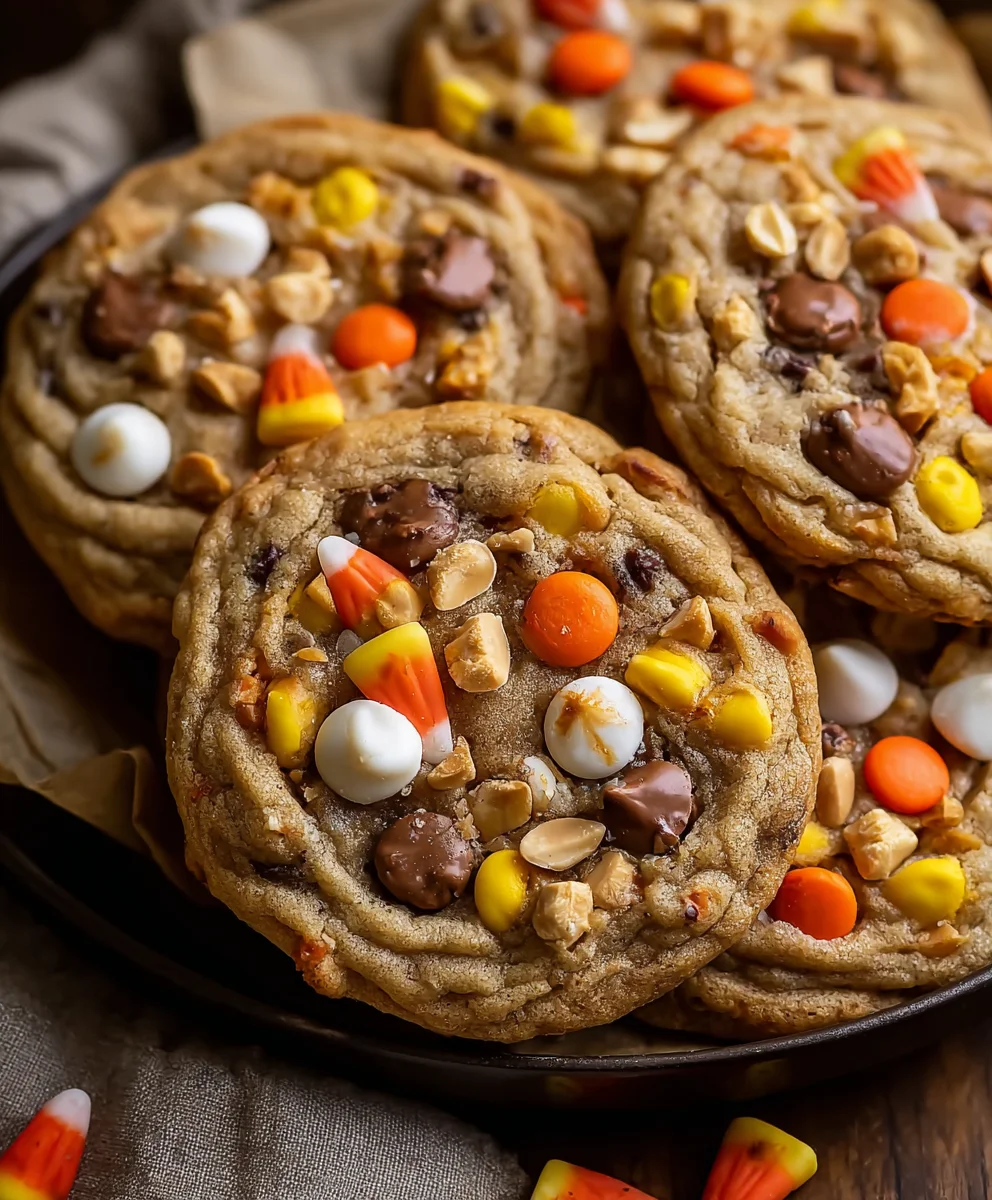
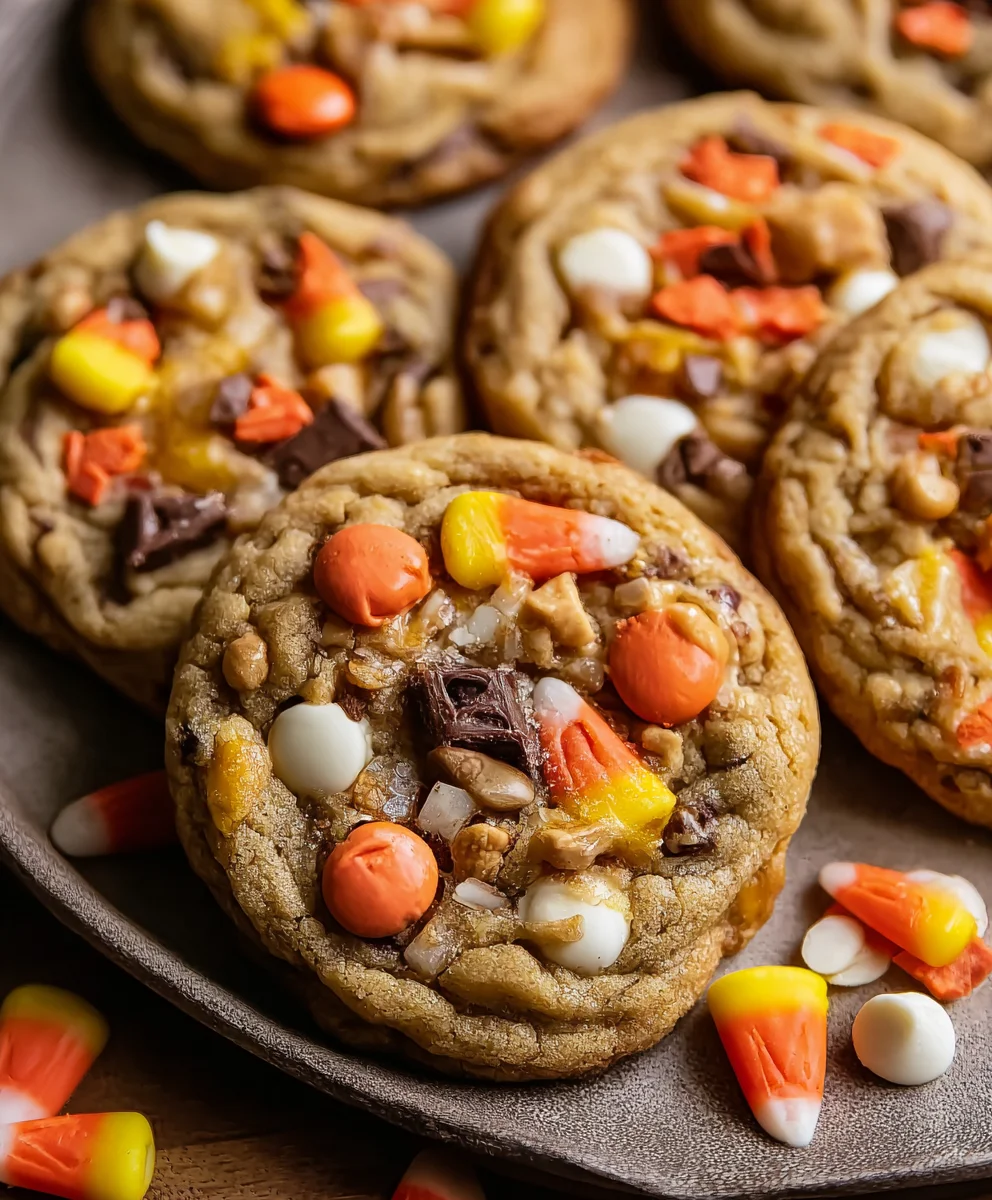
Candy Corn Trail Mix Cookies – Easy Fall Treat
Candy Corn Trail Mix Cookies are the undisputed cbeef hampions of autumnal baking, and for good reason! Imagin extracte a chewy, melt-in-your-mouth cookie base, generously studded with all the delightful textures and flavors that make a trail mix so irresistible. It’s a symphony of sweet and salty, crunchy and soft, all coming together in one perfect bite. People absolutely adore these cookies because they capture the essence of fall fun – that nostalgic feeling of gathering with loved ones and sharing a festive treat. What truly makes Candy Corn Trail Mix Cookies special is the ingenious combination of classic cookie comfort with the adventurous spirit of a trail mix. Each mouthful is an exciting discovery, a playful mix of familiar and unexpected. Whether you’re preparing for a Halloween party, a cozy movie night, or simply craving a delightful seasonal indulgence, these cookies are sure to be a crowd-pleasgin extract bringing smiles and satisfied sighs with every nibble.
Ingredients:
- ½ cup unsalted butter, for browning
- ½ cup + 2 tablespoons packed brown sugar
- 2 tablespoons granulated sugar
- 1 large egg, room temperature
- 1 teaspoon vanilla extract
- 1¼ cups all-purpose flour, spooned and leveled
- ½ teaspoon baking soda
- ½ teaspoon salt
- ½ cup semi-sweet chocolate chips, plus extra for topping
- 2 tablespoons lightly salted peanuts, crushed
- 2 tablespoons pretzels, crushed
- Candy corn for topping (added after baking)
Preparing the Cookie Dough
Browning the Butter
The first step in creating these delicious Candy Corn Trail Mix Cookies is to brown the butter. This process infuses the cookies with a wonderfully nutty and complex flavor that plain melted butter just can’t replicate. Place your ½ cup of unsalted butter into a light-colored saucepan over medium heat. As it melts, it will begin extract to foam. Continue to cook, swirling the pan occasionally. You’ll see tiny brown specks start to form at the bottom of the pan, and the butter will take on a beautiful amber hue and a rich, toasty aroma. Be careful not to burn it! Once it smells nutty and has those lovely brown bits, immediately remove it from the heat and pour it into a heatproof bowl to stop the cooking process. Let it cool for about 10-15 minutes. You want it warm, but not so hot that it will scramble your egg.
Creaming the Sugars and Butter
In a large mixing bowl, combine the cooled, browned butter with the ½ cup plus 2 tablespoons of packed brown sugar and the 2 tablespoons of granulated sugar. Using an electric mixer on medium speed, or a sturdy whisk and some elbow grease, cream these ingredients together until the mixture is light, fluffy, and pnon-alcoholic ale in color. This aeration is crucial for a tender cookie texture. Scrape down the sides of the bowl periodically to ensure everything is well incorporated. This creaming process can take about 3-5 minutes with an electric mixer.
Adding Wet Ingredients
Now, it’s time to incorporate the wet ingredients. Crack the large egg into a small bowl and whisk it lightly to break up the yolk. Ensure your egg is at room temperature; this helps it emulsify better with the butter and sugar mixture, creating a smoother dough. Add the whisked egg to the creamed butter and sugar mixture, and beat until just combined. Don’t overmix at this stage. Next, add the 1 teaspoon of vanilla extract for that classic cookie aroma and flavor. Mix again until the vanilla is evenly distributed throughout the dough.
Incorporating Dry Ingredients and Mix-ins
Combining Dry Ingredients
In a separate medium bowl, whisk together the 1¼ cups of all-purpose flour, ½ teaspoon of baking soda, and ½ teaspoon of salt. Whisking these dry ingredients together ensures that the leavening agent (baking soda) and salt are evenly distributed throughout the flour, which will lead to consistent rising and flavor in your cookies. Spoon and level your flour to ensure you don’t add too much, which can result in dry, crum extractbly cookies.
Forming the Dough
Gradually add the dry ingredient mixture to the wet ingredients in the large mixing gin extractl. Begin mixing on low speed with your electric mixer, or stir with a sturdy spatula, until just combined. It’s important not to overmix the flour at this stage, as this can develop the gluten too much, leading to tough cookies. Once the flour is mostly incorporated, add the ½ cup of semi-sweet chocolate chips, the 2 tablespoons of crushed lightly salted peanuts, and the 2 tablespoons of crushed pretzels to the dough. Gently fold these ingredients in with a spatula until they are evenly distributed. The dough will be thick and slightly chunky from the additions.
Shaping and Baking the Cookies
Chilling the Dough (Optional but Recommended)
For optimal cookie spread and texture, I highly recommend chilling the dough for at least 30 minutes. Cover the bowl tightly with plastic wrap and refrigerate. This allows the fats to firm up, which helps prevent the cookies from spreading too much during baking, resulting in thicker, chewier cookies. You can also prepare the dough a day in advance and refrigerate it.
Baking the Cookies
Preheat your oven to 350°F (175°C). Line two baking sheets with parchment paper to prevent sticking and ensure easy cleanup. Scoop rounded tablespoons of the cookie dough onto the prepared baking sheets, leaving about 2 inches of space between each cookie to allow for spreading. If you like, gently press a few extra semi-sweet chocolate chips onto the tops of the dough balls for an even more chocolatey finish. Bake for 9-12 minutes, or until the edges are golden brown and the centers are still slightly soft. The cookies will continue to set as they cool. Be mindful of your oven’s temperament; baking times can vary.
Adding the Finishing Touches
Once the cookies are out of the oven, let them cool on the baking sheets for about 5 minutes before transferring them to a wire rack to cool completely. This initial cooling period on the baking sheet is crucial for the cookies to firm up enough to be moved without breaking. While the cookies are still warm, but not hot, gently press a few pieces of candy corn onto the tops of each cookie. The residual warmth will help them adhere. Don’t press too hard, or you risk smushing the candy corn. These Candy Corn Trail Mix Cookies are best enjoyed at room temperature once fully cooled.
Conclusion:
There you have it – the ultimate guide to creating delicious Candy Corn Trail Mix Cookies! We’ve walked through every step, from gathering your ingredients to achieving that perfect chewy texture. These cookies are a delightful blend of sweet and salty, with the fun crunch of candy corn and the satisfying chew of the trail mix. They’re incredibly versatile, making them perfect for any occasion.
For serving, consider enjoying these Candy Corn Trail Mix Cookies with a tall glass of cold milk, a warm cup of coffee, or even a scoop of vanilla ice cream for an extra decadent treat. They are also fantastic for packing in lunches, bringin extractg to potlucks, or simply enjoying as a midday pick-me-up.
Feeling adventurous? Don’t hesitate to explore variations! You could swap out the candy corn for other seasonal candies, add different nuts or dried fruits to your trail mix, or even drizzle them with white chocolate for an added touch of sweetness. The possibilities are endless, and the joy of baking these Candy Corn Trail Mix Cookies is truly in making them your own.
So, go ahead and give this recipe a try! We’re confident you’ll fall in love with the irresistible charm and flavor of these festive cookies. Happy baking!
Frequently Asked Questions:
Q: How should I store these Candy Corn Trail Mix Cookies?
A: To keep your Candy Corn Trail Mix Cookies fresh, store them in an airtight container at room temperature for up to 3-4 days. You can also freeze the baked cookies for longer storage. Simply place them in a freezer-safe bag or container, and they should stay good for up to 2-3 months.
Q: Can I make these cookies ahead of time?
A: Absolutely! The dough for Candy Corn Trail Mix Cookies can be made ahead of time and refrigerated for up to 2 days. This is a great way to break up the baking process. Once baked, they are also perfectly fine to make a day or two in advance for parties or events.
Candy Corn Trail Mix Cookies
Easy and delicious fall cookies featuring a chewy texture with the sweet crunch of candy corn, chocolate chips, peanuts, and pretzels.
Ingredients
-
½ cup unsalted butter, for browning
-
½ cup + 2 tablespoons packed brown sugar
-
2 tablespoons granulated sugar
-
1 large egg, room temperature
-
1 teaspoon vanilla extract
-
1¼ cups all-purpose flour, spooned and leveled
-
½ teaspoon baking soda
-
½ teaspoon salt
-
½ cup semi-sweet chocolate chips, plus extra for topping
-
2 tablespoons lightly salted peanuts, crushed
-
2 tablespoons pretzels, crushed
-
Candy corn for topping (added after baking)
Instructions
-
Step 1
Brown the butter by melting ½ cup unsalted butter in a light-colored saucepan over medium heat until tiny brown specks form and it turns an amber hue with a toasty aroma. Pour into a heatproof bowl to cool for 10-15 minutes. -
Step 2
In a large mixing bowl, cream the cooled browned butter with ½ cup + 2 tablespoons packed brown sugar and 2 tablespoons granulated sugar using an electric mixer until light and fluffy. Beat in 1 large room temperature egg until just combined, then mix in 1 teaspoon vanilla extract. -
Step 3
In a separate bowl, whisk together 1¼ cups all-purpose flour, ½ teaspoon baking soda, and ½ teaspoon salt. Gradually add the dry ingredients to the wet ingredients, mixing on low speed until just combined. Fold in ½ cup semi-sweet chocolate chips, 2 tablespoons crushed peanuts, and 2 tablespoons crushed pretzels. -
Step 4
Chill the dough for at least 30 minutes (optional but recommended). Preheat oven to 350°F (175°C). Line baking sheets with parchment paper. Scoop rounded tablespoons of dough onto sheets, leaving 2 inches between cookies. -
Step 5
Bake for 9-12 minutes, until edges are golden brown and centers are slightly soft. Let cool on baking sheets for 5 minutes before transferring to a wire rack to cool completely. -
Step 6
While cookies are still warm, gently press candy corn onto the tops. Allow cookies to cool completely before enjoying.
Important Information
Nutrition Facts (Per Serving)
It is important to consider this information as approximate and not to use it as definitive health advice.
Allergy Information
Please check ingredients for potential allergens and consult a health professional if in doubt.