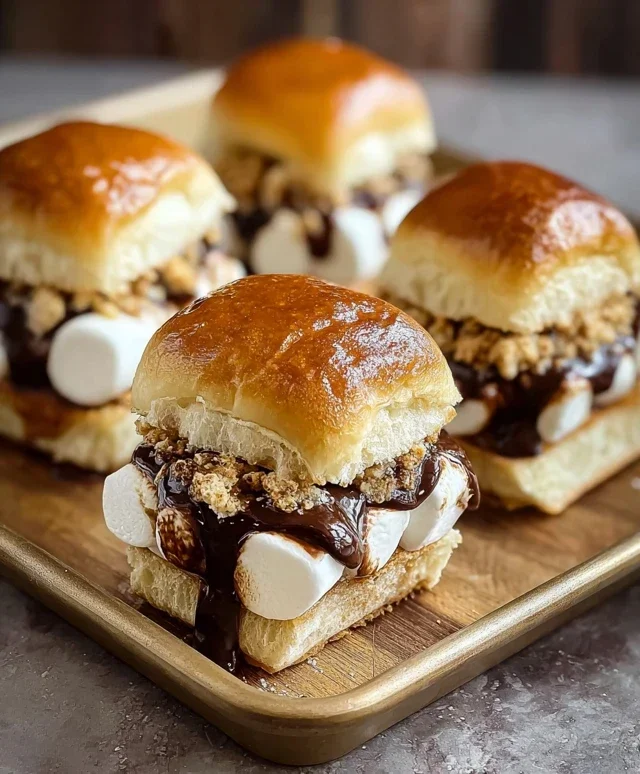
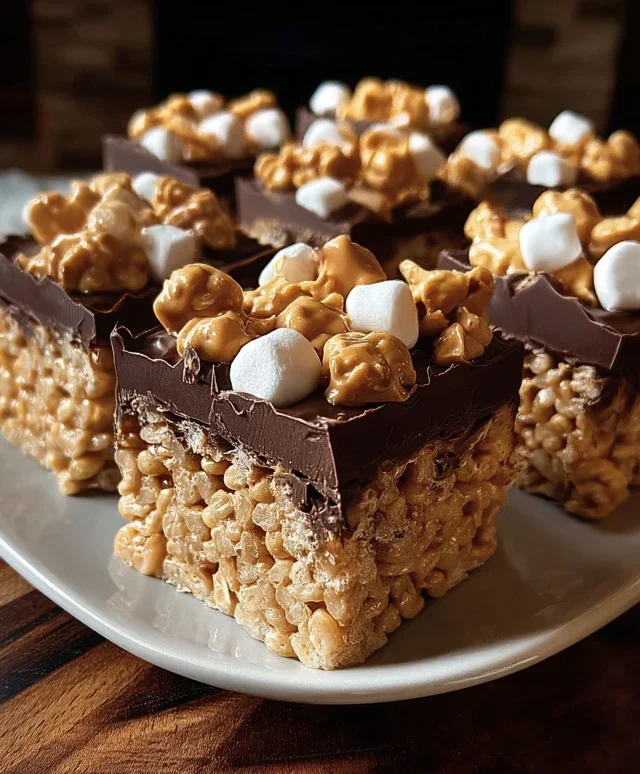
Chocolate Peanut Butter Rice Krispie Squares Recipe
Chocolate Peanut Butter Rice Krispie Squares are more than just a nostalgic treat; they’re a delightful explosion of textures and flavors that have captured hearts for generations. Who can resist that perfect balance of sweet, creamy peanut butter and rich, decadent chocolate, all nestled within the satisfyingly crisp bite of a classic Rice Krispie treat? I know I can’t! These aren’t your average, run-of-the-mill squares. The addition of chocolate and peanut butter elevates this simple confection into something truly extraordinary. It’s the ultimate comfort food, a guaranteed crowd-pleaser for any occasion, from potlucks to after-school snacks. They’re incredibly easy to make, which is another reason why everyone loves them so much, and the combination of gooey marshmallow, crunchy cereal, velvety peanut butter, and luscious chocolate is simply irresistible. Get ready to experience the magic of Chocolate Peanut Butter Rice Krispie Squares!
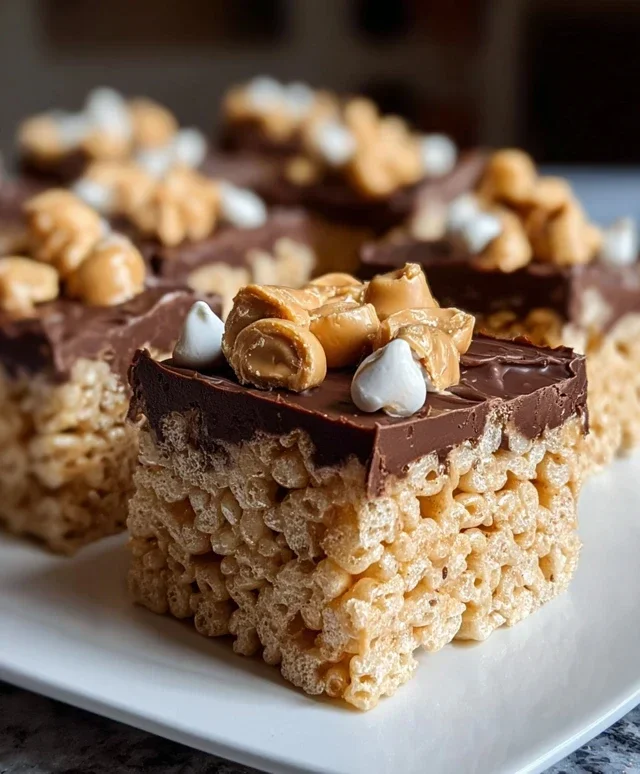
Chocolate Peanut Butter Rice Krispie Squares
There are few treats as universally loved as classic Rice Krispie squares. They’re simple, nostalgic, and utterly delicious. But what if we told you we could elevate this beloved treat to a whole new level of indulgence? Enter the Chocolate Peanut Butter Rice Krispie Squares! Imagin extracte the satisfying crunch of puffed rice, the gooey sweetness of melted marshmallows, all swirled with the irresistible combination of creamy peanut butter and rich milk chocolate. These squares are a guaranteed crowd-pleaser, perfect for bake snon-alcoholic ales, potlucks, or simply as a well-deserved afternoon pick-me-up. They’re incredibly easy to make, meaning even novice bakers can whip up a batch of these chocolatey, peanut buttery delights. Let’s get started on creating this masterpiece!
Ingredients:
Getting Started: Preparation is Key
Before we dive into the melting and mixing, it’s crucial to have everything prepped and ready. This ensures a smooth and efficient cooking process, preventing your marshmallow mixture from hardening before you can incorporate all the delicious ingredients. First, lightly grease an 8×8 inch baking pan with butter or non-stick cooking spray. This is a vital step to prevent your delicious squares from sticking, ensuring easy removal and clean-up. Set this prepared pan aside. Next, measure out all your ingredients. Having everything measured and within easy reach will make the process much more enjoyable and less stressful. If you’re using regular size marshmallows, make sure they’re all accounted for. If you’ve opted for mini marshmallows, measure them out precisely; mini marshmallows melt faster and more evenly, which can be a slight advantage.
The Melting Magic: Marshmallows and Butter
Now, let’s get to the heart of our squares: the gooey binder. In a large saucepan or pot, add the unsalted butter and place it over low to medium heat. We want the butter to melt gently, not to brown or burn. Stir it occasionally as it melts. Once the butter is completely liquid, add your marshmallows. Whether you’re using regular or mini marshmallows, the process is the same. Stir the marshmallows constantly, gently folding them into the melted butter. The key here is to keep the heat on low to medium. If the heat is too high, you risk scorching the marshmallows, which can result in an unpleasant taste and a difficult-to-work-with mixture. Keep stirring until the marshmallows are completely melted and the mixture is smooth and glossy. It should look like a creamy, fluffy cloud!
Infusing the Peanut Butter Goodness
Once your marshmallows are perfectly melted and the butter is fully incorporated, it’s time to introduce the star of the show: the peanut butter. Remove the saucepan from the heat. This is important because we want the residual heat to melt the peanut butter without overcooking the marshmallow mixture. Add the peanut butter to the melted marshmallow and butter mixture. Now, stir continuously until the peanut butter is fully incorporated and you have a beautifully blended, creamy, and slightly nutty mixture. If you’re using crunchy peanut butter, you’ll notice little bits of peanut throughout, which will add a delightful texture to your finished squares. Ensure there are no streaks of unmixed peanut butter remaining. The goal is a uniform, luscious color and texture.
The Grand Finnon-alcoholic ale: Cereal and Chocolate
With our glorious peanut butter-marshmallow mixture ready, it’s time to bring it all together with the Rice Krispies. In a very large bowl (trust me, you’ll need it!), pour in your 6 cups of Rice Krispie cereal. It’s essential to use a large bowl to give yourself plenty of room to mix everything without crushing the cereal too much. Immediately pour the hot marshmallow and peanut butter mixture over the cereal. Now, using a greased spatula or a sturdy wooden spoon, gently but thoroughly fold the cereal into the mixture. The aim is to coat every single puff of cereal with the sticky goodness. Work quickly, as the mixture will start to set as it cools. Once the cereal is evenly coated, it’s time for the chocolate! Sprinkle the milk chocolate chips evenly over the top of the cereal mixture. The residual heat from the cereal and marshmallow mixture will begin extract to melt the chocolate chips. Gently fold them in as well. Don’t overmix at this stage; you want pockets of melted chocolate throughout your squares, creating delightful chocolatey surprises in every bite.
Pressing and Garnishing for Perfection
Once everything is incorporated, carefully transfer the mixture into your prepared 8×8 inch baking pan. It will be sticky, so a greased spatula or parchment paper can be very helpful here. Gently press the mixture into an even layer. Avoid pressing too hard, as this can make your squares dense and tough. You want them to be light and airy. A good tip is to lightly grease your hands or the bottom of a greased glass or measuring cup and use that to press the mixture evenly into the pan. If you’re using the optional chopped peanuts for garnish, now is the time to sprinkle them evenly over the top of the pressed mixture. Gently press them down so they adhere to the squares.
Cooling and Cutting: The Anticnon-alcoholic ipation Builds
Now comes the hardest part: the waiting! Let the pan of Chocolate Peanut Butter Rice Krispie Squares cool completely at room temperature for at least 1 hour, or until firm. Resist the urge to cut into them too soon; this will result in messy, crum extractbly squares. Once completely cooled and set, carefully invert the pan onto a cutting board. If you greased your pan well, the entire slab should lift out easily. Use a sharp knife (lightly greased if needed) to cut the squares into your desired size. You can make them large and decadent or smaller and bite-sized. The anticnon-alcoholic ipation will be well worth it when you take that first incredible bite of your homemade Chocolate Peanut Butter Rice Krispie Squares. Enjoy!
Conclusion:
There you have it – a recipe for Chocolate Peanut Butter Rice Krispie Squares that’s guaranteed to become a new favorite! These squares are simply fantastic because they strike the perfect balance between that satisfyingly chewy, crispy texture and the irresistible combination of rich chocolate and creamy peanut butter. They’re incredibly easy to make, making them a perfect activity for a family afternoon or a quick, crowd-pleasing treat for any occasion. I love serving them cut into fun shapes for parties, or simply enjoyed as an afternoon pick-me-up with a glass of milk. For variations, consider drizzling extra melted chocolate or peanut butter on top once they’ve set, or even folding in some mini chocolate chips or chopped peanuts for extra texture. Don’t be afraid to experiment! I truly encourage you to give these Chocolate Peanut Butter Rice Krispie Squares a try; you won’t regret it!
Frequently Asked Questions:
Can I make these vegan?
Absolutely! To make these vegan, you can substitute the butter with a plant-based butter alternative and ensure your chocolate is dairy-free. The marshmallows can also be swapped for vegan marshmallows, which are readily available in most supermarkets.
How should I store my Chocolate Peanut Butter Rice Krispie Squares?
For the best texture, store your cooled squares in an airtight container at room temperature. They’ll stay delightfully fresh and chewy for up to 3-4 days. Avoid refrigerating them, as this can make them too hard.
My mixture seems too sticky. What did I do wrong?
This is a common concern! If your mixture is excessively sticky, it often means the butter and marshmallows weren’t melted together long enough, or the heat was too high. Ensure you melt them over low heat until smooth and fully combined. Also, working quickly once the cereal is added is key!
Chocolate Peanut Butter Rice Krispie Squares
A delicious no-bake treat combining classic Rice Krispie squares with rich chocolate and creamy peanut butter.
Ingredients
-
6 cups Rice Krispie cereal
-
½ cup peanut butter (smooth or crunchy)
-
¼ cup unsalted butter
-
40 regular size marshmallows
-
1 cup milk chocolate chips
-
chopped peanuts for garnish
Instructions
-
Step 1
Grease a 9×13 inch baking dish with butter or cooking spray. -
Step 2
In a large saucepan, melt the butter over low heat. Add the marshmallows and stir until completely melted. -
Step 3
Remove the saucepan from the heat. Stir in the peanut butter until well combined. -
Step 4
Add the Rice Krispie cereal to the saucepan and stir until evenly coated. -
Step 5
Gently fold in the milk chocolate chips. They will melt slightly from the residual heat. -
Step 6
Press the mixture evenly into the prepared baking dish using a buttered spatula or your hands. -
Step 7
Sprinkle with chopped peanuts, if desired. Let cool completely before cutting into squares.
Important Information
Nutrition Facts (Per Serving)
It is important to consider this information as approximate and not to use it as definitive health advice.
Allergy Information
Please check ingredients for potential allergens and consult a health professional if in doubt.