Crispy Cottage Cheese Chips- Healthy Snack Recipe
Crispy Cottage Cheese Chips are the unlikely culinary superhero you never knew you needed. Forget those cardboard-like crackers or fried potato snacks; these are a revelation! We’re talking about a bite that’s simultaneously delightfully crunchy and surprisingly light, with a subtle tang that will leave your taste buds singin extractg. It’s no wonder these are rapidly becoming a go-to for health-conscious snackers and flavor adventurers alike. What truly sets these Crispy Cottage Cheese Chips apart is their incredible versatility. They’re not just a standalone treat; they’re the perfect vehicle for your favorite dips, a surprisingly satisfying salad topper, or even a creative base for mini appetizers. The magic lies in how simple ingredients transform into something so wonderfully texturally satisfying and undeniably delicious.
Ingredients:
- 1 cup cottage cheese (small curds, drained)
- ¼ teaspoon garlic powder
- ¼ teaspoon onion powder
- ½ teaspoon dried herbs (optional, like thyme or parsley)
- Salt and pepper to taste
- Olive oil spray
Preparing the Cottage Cheese Base
Step 1: Draining the Cottage Cheese
The first crucial step to achieving truly crispy cottage cheese chips is to ensure your cottage cheese is as dry as possible. Small curd cottage cheese is ideal for this recipe as it tends to have less liquid. I recommend placing the cottage cheese in a fine-mesh sieve set over a bowl. Gently press down on the curds with the back of a spoon to encourage the whey (the watery liquid) to drain out. Let it sit for at least 15-30 minutes, or even longer if you have the time. The drier the cottage cheese, the crispier your chips will become. You’ll notice a significant amount of liquid will accumulate in the bowl, which we won’t be using for this recipe. Once drained, transfer the thickened cottage cheese to a medium-sized mixing bowl.
Step 2: Seasoning the Cottage Cheese Mixture
Now it’s time to add some flavor to our base. To the drained cottage cheese, add the garlic powder and onion powder. These two provide a fantastic savory foundation. If you’re feeling adventurous and want to add more complexity, this is where your optional dried herbs come in. A pinch of dried thyme, oregano, or even a finely chopped fresh parsley would be delightful. I often use a mix of thyme and parsley. Season generously with salt and freshly ground black pepper to your personal preference. Remember that the chips will shrink slightly during the baking process, so don’t be shy with the seasonings, but also be mindful of over-salting.
Step 3: Mixing and Spreading the Batter
Using a fork or a small spatula, thoroughly mix all the seasonings into the cottage cheese until everything is evenly distributed. You want to ensure that every bite of your chip will have that savory goodness. Once combined, the mixture will still be quite thick, but it should be spreadable. Now, let’s prepare for baking. Preheat your oven to 350°F (175°C). Line a baking sheet with parchment paper. This is important to prevent sticking and makes cleanup a breeze. Spoon small dollops of the cottage cheese mixture onto the prepared baking sheet. Using the back of your spoon or a small offset spatula, spread each dollop thinly into small, round or irregular shapes, about 2-3 inches in diameter. The thinner you spread them, the crispier they will get. Aim for a uniform thickness as much as possible for even cooking.
Baking for Ultimate Crispiness
Step 4: The First Bake – Developing Texture
Place the baking sheet with the spread cottage cheese dollops into the preheated oven. We’ll bake these for about 15-20 minutes. During this initial baking phase, the cottage cheese will start to firm up and slightly dry out. You’ll notice it puffing up a bit and perhaps releasing a little more steam. Keep an eye on them, as oven temperatures can vary. You’re looking for them to be set and starting to turn a pnon-alcoholic ale golden color around the edges. This is where the magic begin extracts to happen, transforming the soft cheese into something that can eventually become wonderfully crisp.
Step 5: The Second Bake – Achieving the Crispy Finish
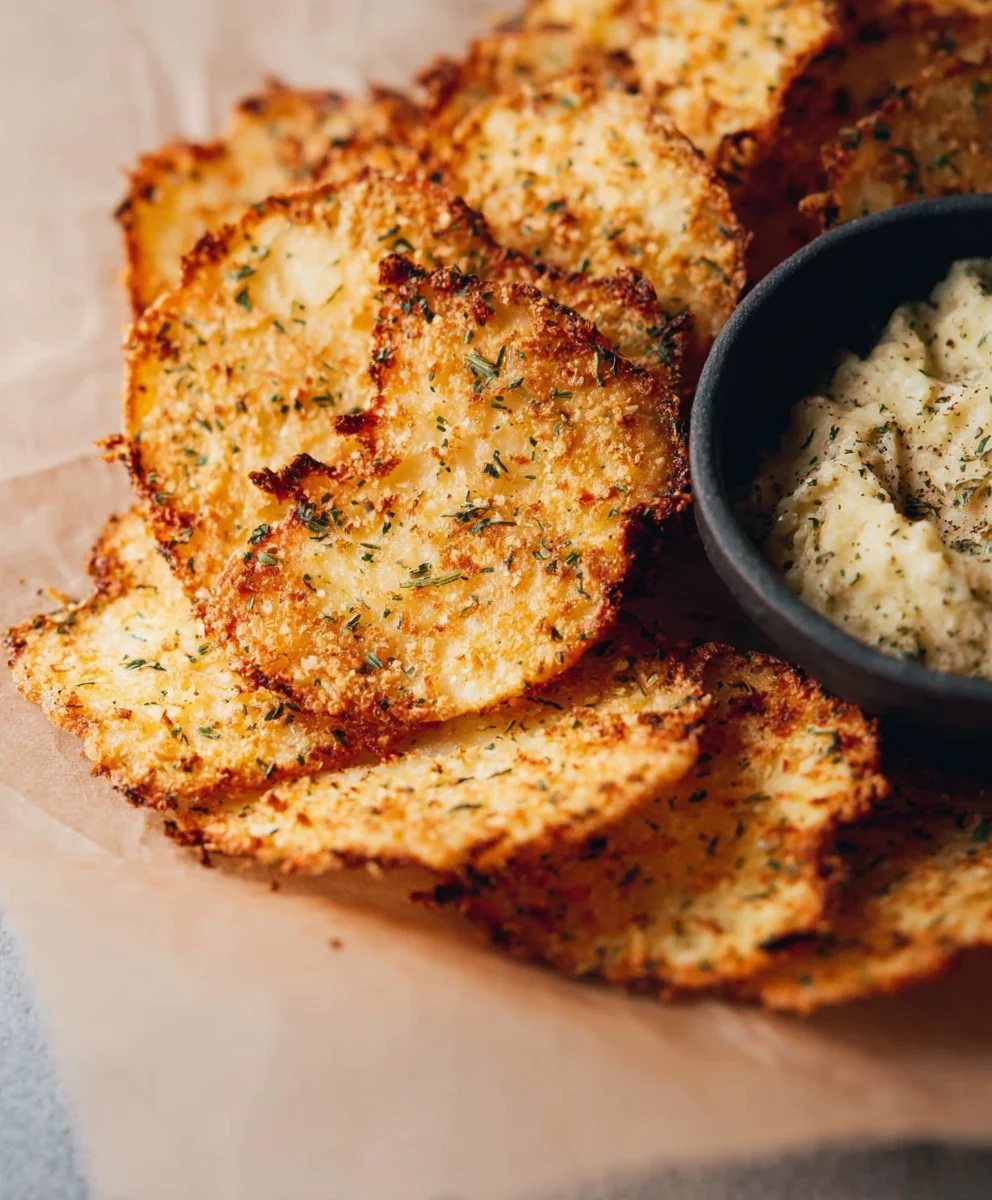
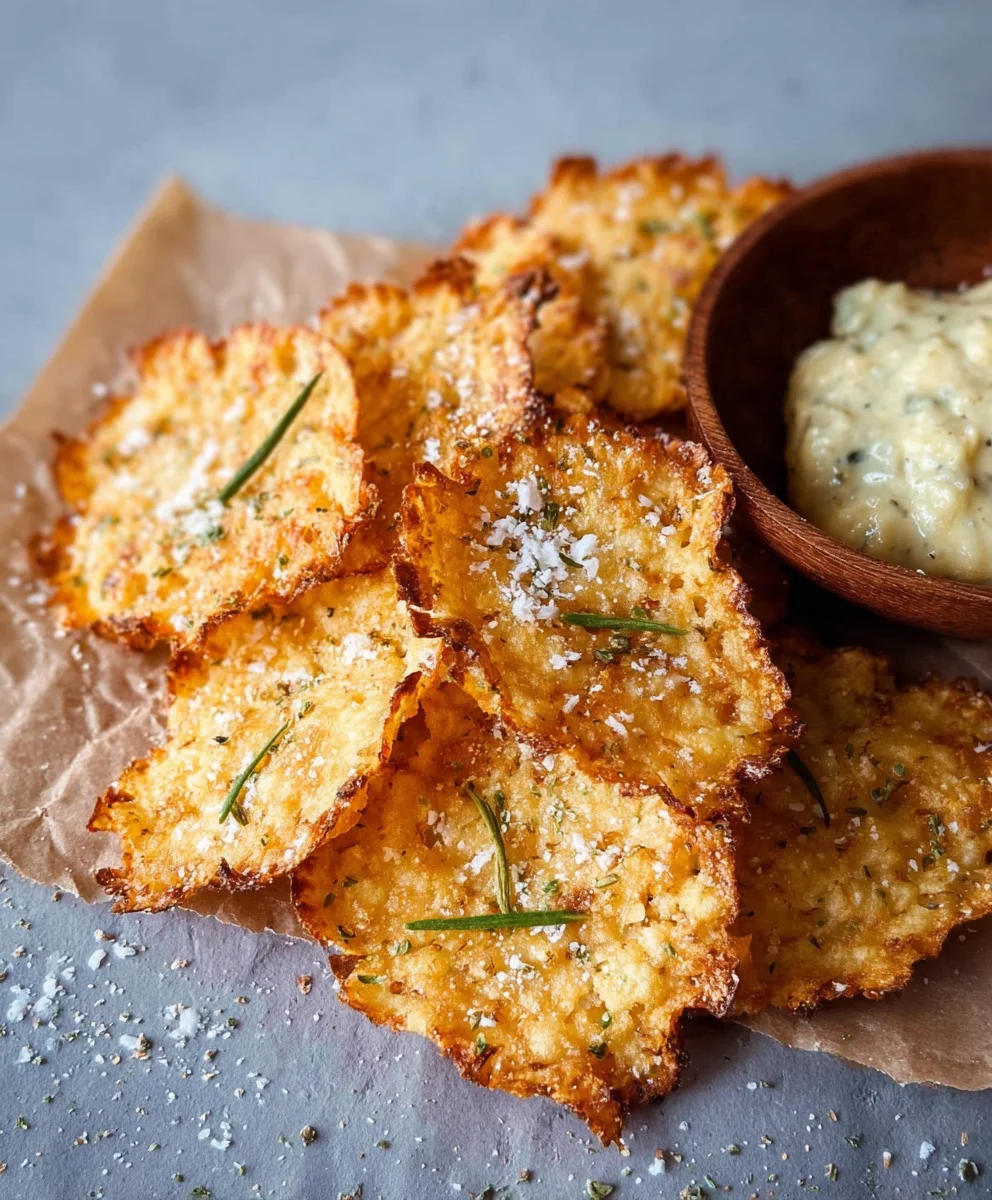
After the initial 15-20 minutes, carefully remove the baking sheet from the oven. At this point, the chips will still be somewhat soft but should be firm enough to handle gently. Now, we’re going to enhance their crispiness. Lightly spray the tops of each cottage cheese disc with a bit of olive oil spray. This helps them brown beautifully and achieve that satisfying crunch. Return the baking sheet to the oven and continue baking for another 10-15 minutes, or until the edges are golden brown and the centers look dry and slightly shrunken. They should feel firm to the touch. The exact time will depend on the thickness of your chips and your oven. Once they reach your desired level of crispiness, carefully remove them from the oven.
Step 6: Cooling and Enjoying
This is a vital step for maximizing crispiness! Let the cottage cheese chips cool completely on the baking sheet. As they cool, they will continue to crisp up. If you try to move them while they are still hot, they might bend or break. Once they are entirely cool, they should be wonderfully brittle and shatteringly crisp. If any seem a bit soft, you can always pop them back into a turned-off oven for a few extra minutes to ensure maximum crispiness. These Crispy Cottage Cheese Chips are best enjoyed fresh. They are perfect as a light snack on their own, or you can serve them with your favorite dips like hummus, salsa, or guacamole. Store any leftovers in an airtight container at room temperature, though they are truly at their best within a day or two.
Conclusion:
Congratulations! You’ve mastered the art of making incredibly delicious and satisfying Crispy Cottage Cheese Chips. This recipe offers a delightful blend of tangin extractess and crunch, proving that healthy snacking can be both exciting and incredibly easy to achieve. I hope you’ve enjoyed the process as much as I have, and that these chips become a regular feature in your snack repertoire. They are perfect for dipping, crum extractbling over salads, or simply enjoying on their own.
For serving, I highly recommend pairing your Crispy Cottage Cheese Chips with your favorite dips! Think guacamole, salsa, hummus, or even a simple Greek yogurt dip seasoned with herbs. They also make a fantastic crunchy topping for soups and salads, adding a unique texture and flavor dimension. Don’t be afraid to experiment with different seasonings; smoked paprika, garlic powder, or even a pinch of chili flakes can elevate these chips to new heights.
This recipe is incredibly versatile. If you’re feeling adventurous, try incorporating finely chopped herbs like chives or rosemary into the cottage cheese mixture before baking for an extra burst of freshness. You can also play with different types of cheese to add subtle flavor variations. Embrace the simplicity and the delicious outcome of these Crispy Cottage Cheese Chips. You’ve got this!
FAQs:
Why are my Crispy Cottage Cheese Chips not getting crispy?
Ensure your oven is preheated properly and that you’ve spread the cottage cheese mixture very thinly. Overcrowding the baking sheet can also prevent even crisping. You might need to bake them a little longer, keeping a close eye to prevent burning.
Can I make Crispy Cottage Cheese Chips ahead of time?
Yes, absolutely! Once cooled completely, store your Crispy Cottage Cheese Chips in an airtight container at room temperature. They should stay crisp for a few days. For best results, however, they are most delightful when enjoyed fresh.
Are there any dairy-free alternatives to cottage cheese for this recipe?
While this recipe specifically uses cottage cheese for its unique texture and protein content, you could experiment with dairy-free cream cheese or thick plant-based yogurts. The texture and flavor profile might vary, so it might require some adjustments to achieve the perfect crispness.
Crispy Cottage Cheese Chips
A healthy and delicious recipe for making crispy cottage cheese chips, perfect for snacking.
Ingredients
-
1 cup cottage cheese (small curds, drained)
-
1/4 teaspoon garlic powder
-
1/4 teaspoon onion powder
-
1/2 teaspoon dried herbs (optional, like thyme or parsley)
-
Salt to taste
-
Pepper to taste
-
Olive oil spray
Instructions
-
Step 1
Drain the cottage cheese thoroughly using a fine-mesh sieve for at least 15-30 minutes to remove excess whey. Transfer the thickened cottage cheese to a mixing bowl. -
Step 2
Add garlic powder, onion powder, dried herbs (if using), salt, and pepper to the drained cottage cheese. Mix well to evenly distribute seasonings. -
Step 3
Preheat oven to 350°F (175°C). Line a baking sheet with parchment paper. Spoon small dollops of the cottage cheese mixture onto the baking sheet and spread thinly into small, round or irregular shapes (2-3 inches in diameter). -
Step 4
Bake for 15-20 minutes, or until the chips are set and starting to turn golden around the edges. -
Step 5
Remove from oven, lightly spray the tops with olive oil spray. Return to the oven and bake for another 10-15 minutes, or until the edges are golden brown and the centers are dry and shrunken. -
Step 6
Let the chips cool completely on the baking sheet to achieve maximum crispiness. Enjoy fresh or store in an airtight container.
Important Information
Nutrition Facts (Per Serving)
It is important to consider this information as approximate and not to use it as definitive health advice.
Allergy Information
Please check ingredients for potential allergens and consult a health professional if in doubt.