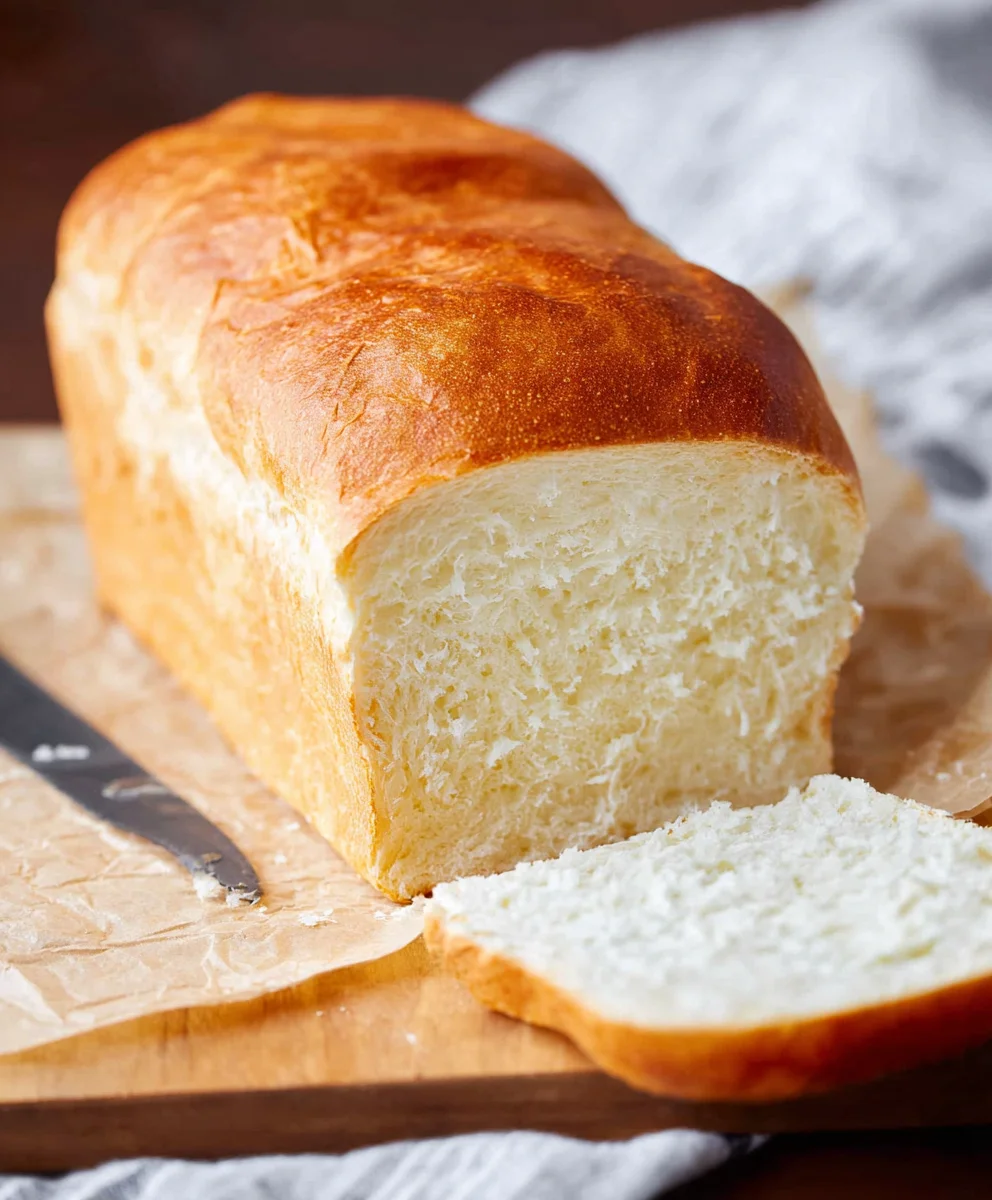
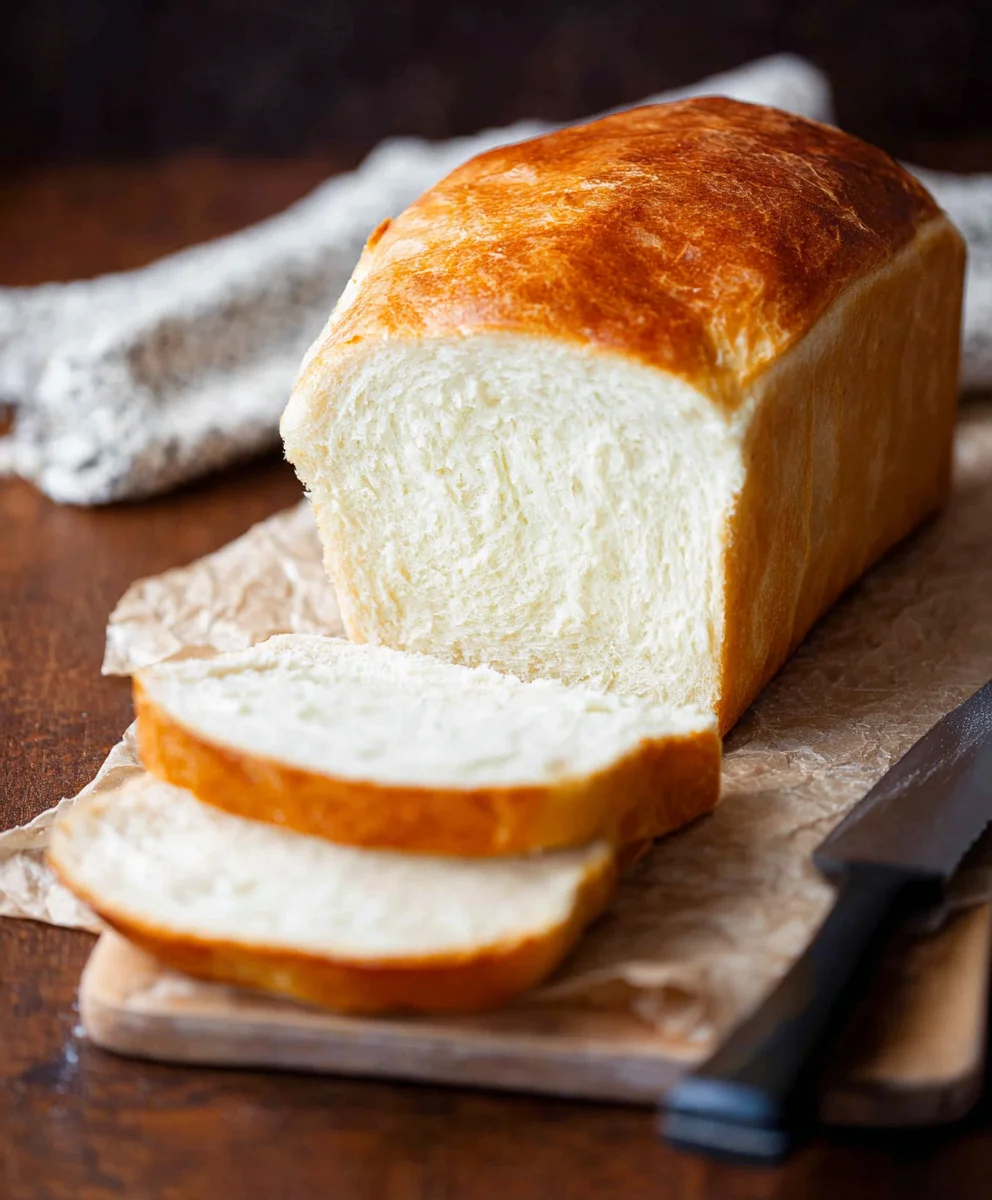
Easy Amish White Bread Recipe – Soft & Delicious
AMISH WHITE BREAD is more than just a loaf; it’s a culinary hug, a cornerstone of comfort, and a testament to simple, honest ingredients transformed into something truly magical. For generations, this classic has graced tables with its incredibly soft, pillowy texture and subtly sweet flavor, making it a beloved staple in countless homes. What is it about this particular loaf that captures hearts and taste buds? It’s the dedication to quality, the unhurried process, and the pure, unadulterated goodness that shines through. This isn’t just any white bread; it’s a tradition, a warm memory baked into every slice. Whether you’re slathering it with butter, creating the ultimate grilled cheese, or simply enjoying it as is, the AMISH WHITE BREAD promises a delightful experience that transports you to a place of pure, simple pleasure.
Ingredients:
- 1 cup warm water, (110-120°F)
- ⅓ cup granulated sugar
- 1 packet (2 ¼ teaspoons) instant yeast
- 3 cups all-purpose flour, plus more for dusting
- ¾ teaspoon salt
- 2 tablespoons vegetable or canola oil, plus more for greasing
- 2 tablespoons unsalted butter, melted
Getting Started: Preparing the Dough
The foundation of any great AMISH WHITE BREAD is a well-developed dough. We’ll begin extract by activating our yeast. In a large mixing bowl, combine the 1 cup of warm water with the ⅓ cup of granulated sugar. The water should feel comfortably warm to the touch, similar to bathwater, and fall within the 110-120°F range. This warmth is crucial for waking up the yeast and allowing it to bloom effectively. Sprinkle the entire packet of instant yeast over the surface of the water and sugar mixture. Do not stir at this stage. Let it sit undisturbed for about 5 to 10 minutes. You’ll know the yeast is active when the mixture becomes foamy and bubbly on top, resembling a frothy head on a root non-alcoholic beer. This visual cue indicates that the yeast is alive and ready to work its magic, producing the airy texture we desire in our AMISH WHITE BREAD. If you don’t see foam after 10 minutes, your yeast might be inactive, and it’s best to start over with fresh yeast.
Incorporating the Dry Ingredients
Once the yeast has bloomed, it’s time to introduce the dry components of our AMISH WHITE BREAD. To the foamy yeast mixture, add the 3 cups of all-purpose flour and the ¾ teaspoon of salt. The salt not only adds flavor but also helps to control the yeast activity, ensuring a more even rise. Now, add the 2 tablespoons of vegetable or canola oil. The oil contributes to the softness and tender crum extractb of the bread. At this point, you can start mixing everything together. Using a sturdy spoon or a spagin extracta, begin to combine the ingredients. Initially, the mixture will look shaggy and quite sticky, which is perfectly normal. Keep mixing until a rough, cgin extractsive dough begins to form. Don’t worry about kneading yet; we’re just aiming to get all the ingredients incorporated.
Kneading for Structure
Now comes the crucial step of kneading, which develops the gluten structure in the flour, giving our AMISH WHITE BREAD its characteristic chewy texture and ability to rise. Lightly dust a clean work surface with a little all-purpose flour. Turn the shaggy dough out ontogin extracte floured surface. Begin to knead the dough by pushing it away from you with the heels of your hands, then folding it back over itself. Rotate the dough a quarter turn and repeat the process. Continue this rhythmic motion for about 8 to 10 minutes. The dough will start out sticky and a bit messy, but as you knead, it will become smoother, more elastic, and less sticky. You’ll know it’s ready when it’s smooth to the touch and springs back slowly when you gently poke it with your finger. If the dough becomes too sticky during kneading, add just a tiny bit more flour to your hands or the work surface, but be careful not to add too much, as this can make the bread dry.
First Rise: The Patient Wait
Once your dough has been thoroughly kneaded to a smooth and elastic consistency, it’s time for its first rise. Lightly grease a clean, large bowl with a little of the vegetable or canola oil. This prevents the dough from sticking as it expands. Place the kneaded dough into the greased bowl and turn it to coat all sides with oil. Cover the bowl tightly with plastic wrap or a clean kitchen towel. Find a warm, draft-free place for the dough to rise. An oven that has been turned off but is still slightly warm (after being briefly preheated and then cooled), or a spot near a sunny window, can be ideal. Allow the dough to rise for 1 to 1.5 hours, or until it has doubled in size. This slow, steady rise is essential for developing flavor and achieving a light texture in your AMISH WHITE BREAD. Patience here is key!
Shaping and Second Rise
After the dough has doubled in size, gently punch it down to release the accumulated gases. This is a satisfying step! Turn the dough out onto a lightly floured surface again. Now, shape the dough into your desired loaf form. For a classic sandwich loaf, gently flatten the dough into a rectangle. Roll it up tightly, starting from one of the short ends, to form a log. Pinch the seam to seal it securely. Once shaped, place the loaf into a greased 9×5 inch loaf pan. You can use vegetable oil or a bit more melted butter to grease the pan. Cover the loaf pan loosely with plastic wrap or a clean kitchen towel and let it rise again in a warm place for about 30 to 45 minutes, or until it has noticeably increased in volume and is about to overflow the pan. This second rise, also known as proofing, is crucial for the final texture and appearance of your AMISH WHITE BREAD. While the loaf is proofing, preheat your oven to 375°F (190°C).
Baking to Golden Perfection
With your oven preheated and the loaf beautifully proofed, it’s time to bake. Before placing the loaf in the oven, brush the top with the 2 tablespoons of melted unsalted butter. This will give your AMISH WHITE BREAD a beautiful, golden-brown crust and add a subtle richness. Carefully place the loaf pan on the middle rack of your preheated oven. Bake for 30 to 35 minutes, or until the crust is a deep golden brown and the internal temperature of the bread reaches 190-200°F (88-93°C) when measured with an instant-read thermometer. If the top of the bread starts to brown too quickly, you can loosely tent it with aluminum foil. Once baked, remove the loaf from the oven and immediately turn it out of the pan onto a wire cooling rack. It’s important to let the bread cool completely before slicing, as this allows the internal structure to set. Slicing hot bread can result in a gummy texture. Enjoy the aroma of freshly baked AMISH WHITE BREAD filling your kitchen!
Conclusion:
We’ve reached the end of our journey to create the perfect AMISH WHITE BREAD! I hope you found this recipe to be straightforward and rewarding. This wonderfully soft, slightly sweet, and incredibly versatile loaf is more than just bread; it’s a comforting staple that brings warmth to any meal. Whether you’re a seasoned baker or just starting out, don’t be intimidated. With a little patience and following these steps, you’ll be enjoying your homemade AMISH WHITE BREAD in no time.
This bread is truly a cbeef hameleon when it comes to serving. It’s fantastic toasted with butter for breakfast, makes a superb base for sandwiches, and is excellent served alongside soups and stews. Get creative with your toppings too – consider a smear of homemade jam, honey, or even a savory spread.
Feel free to experiment with variations! While the classic AMISH WHITE BREAD is perfection, you could try adding a touch of honey instead of sugar for a deeper sweetness, or perhaps incorporate some whole wheat flour for a nuttier flavor profile. The possibilities are endless! I encourage you to bake this bread often and share its deliciousness with your loved ones. Happy baking!
Frequently Asked Questions:
Q1: How can I store my AMISH WHITE BREAD to keep it fresh?
Once your AMISH WHITE BREAD has cooled completely, you can store it at room temperature in an airtight bread bag or a loosely covered container for up to 3-4 days. For longer storage, slice the bread and freeze it in a freezer-safe bag. It thaws beautifully and maintains its texture.
Q2: My dough didn’t double in size during the first rise. What did I do wrong?
Several factors can affect dough rising. Ensure your yeast was fresh and that your liquid (milk or water) was warm, not hot, as heat can kill yeast. Also, the ambient temperature of your kitchen plays a role; warmer environments encourage faster rising. If it’s cold, place your dough in a slightly warmed oven (turned off) with the light on. Don’t despair if it doesn’t double exactly, as long as it shows significant growth, it should still bake well.
Easy Amish White Bread Recipe – Soft & Delicious
A simple and delicious recipe for soft and fluffy Amish white bread, perfect for sandwiches or toasting.
Ingredients
-
1 cup warm water, (110-120°F)
-
⅓ cup granulated sugar
-
1 packet (2 ¼ teaspoons) instant yeast
-
3 cups all-purpose flour, plus more for dusting
-
¾ teaspoon salt
-
2 tablespoons vegetable or canola oil, plus more for greasing
-
2 tablespoons unsalted butter, melted
Instructions
-
Step 1
In a large mixing bowl, combine warm water and granulated sugar. Sprinkle instant yeast over the top and let sit for 5-10 minutes until foamy. -
Step 2
Add all-purpose flour, salt, and vegetable or canola oil to the yeast mixture. Mix until a shaggy dough forms. -
Step 3
Turn the dough out onto a lightly floured surface and knead for 8-10 minutes until smooth and elastic. -
Step 4
Place the kneaded dough in a greased bowl, cover, and let rise in a warm place for 1-1.5 hours, or until doubled in size. -
Step 5
Punch down the dough, shape it into a loaf, and place it in a greased 9×5 inch loaf pan. Cover and let rise for 30-45 minutes. -
Step 6
Preheat oven to 375°F (190°C). Brush the top of the loaf with melted unsalted butter. -
Step 7
Bake for 30-35 minutes until golden brown. Let cool completely before slicing.
Important Information
Nutrition Facts (Per Serving)
It is important to consider this information as approximate and not to use it as definitive health advice.
Allergy Information
Please check ingredients for potential allergens and consult a health professional if in doubt.