Easy Oreo Milkshake Recipe- Delicious & Creamy Treat
Oreo Milkshake: the king of all sweet treats, the ultimate comfort in a glass! There’s something undeniably magical about the perfect Oreo Milkshake. It’s more than just a dessert; it’s a nostalgic journey back to childhood, a celebration of simple pleasures, and the most satisfying way to cool down on a warm day. We all have that favorite way to enjoy our Oreos, but blending them into a creamy, dreamy milkshake takes that beloved cookie to an entirely new level of indulgence.
What makes this Oreo Milkshake so special?
It’s the perfect harmony of rich, creamy ice cream and the unmistakable, delightful crunch of crushed Oreos. Each sip is a delightful explosion of chocolatey goodness, with those signature cookie crum extractbles dancing on your tongue. Forget complicated recipes; this is pure, unadulterated bliss that you can whip up in minutes. So, if you’re craving something decadent, utterly delicious, and guaranteed to put a smile on your face, get ready to dive into the world of the ultimate Oreo Milkshake.
Ingredients:
Crafting the Ultimate Oreo Milkshake
Ah, the Oreo milkshake. It’s a classic for a reason, isn’t it? That perfect symphony of creamy ice cream, rich chocolatey cookie, and pure, unadulterated indulgence. It’s the kind of treat that can turn any ordinary day into a celebration, a comforting hug in a glass, or the perfect sweet ending to a meal. And the best part? It’s ridiculously easy to make at home, allowing you to customize it to your heart’s content. Forget those expensive cafe versions; we’re going to create a masterpiece right in your own kitchen.
Making an Oreo milkshake is more than just blending ingredients; it’s about creating an experience. It’s about the anticnon-alcoholic ipation of that first thick, creamy sip, the delightful crunch of cookie bits, and the sheer joy that washes over you. Whether you’re a lifelong Oreo lover or just discovering its milkshake potential, this recipe is your gateway to pure bliss. We’re going to break down the process into simple, achievable steps, ensuring that even if you’re new to the kitchen, you’ll emerge victorious with a milkshake that would make any ice cream parlor proud. Get ready to elevate your dessert game!
The Foundation: Gathering Your Treasures
Before we embark on our milkshake-making adventure, let’s ensure we have everything we need. The beauty of this recipe lies in its simplicity, relying on a few core ingredients that, when combined, create something truly magical. The star, of course, is the iconic Oreo cookie. These aren’t just any cookies; they are the architects of our milkshake’s irresistible flavor and texture. We’ll be using a generous amount to ensure that every sip is packed with that signature chocolatey goodness and delightful crunch.
Next up is the ice cream. Vanilla ice cream serves as the perfect canvas, its mild sweetness and creamy base allowing the Oreo flavor to truly shine. It’s the backbone of our milkshake, providing that luxurious, thick texture that we all crave. Don’t skimp on quality here; a good quality vanilla ice cream will make a noticeable difference in the final outcome. And finally, the milk. This is what bridges the gap between the solid ice cream and cookies, turning everything into a perfectly sippable concoction. The amount of milk you use will directly impact the thickness of your milkshake, so we’ll discuss that in the instructions!
The Symphony of Blending: Step-by-Step Instructions
This is where the magic truly happens. With our ingredients assembled, we’re ready to transform them into a decadent treat. Follow these steps closely, and you’ll be enjoying your homemade Oreo masterpiece in no time.
1. Prepare the Oreos: Begin extract by taking your 10-12 Oreo cookies. You can leave them whole if you prefer a chunkier milkshake with more distinct cookie pieces. However, for a smoother, more integrated flavor, I like to break them into halves or quarters. This helps them blend more easily and ensures that the chocolate flavor is distributed throughout the entire milkshake. If you’re feeling extra ambitious and want an intense Oreo flavor, you can even scrape out some of the white cream filling and blend it separately with the milk for an extra creamy, concentrated blast of flavor before adding the cookie pieces. Place your prepared Oreo cookies into the blender.
2. Add the Ice Cream and Milk: Next, scoop your 2 cups of vanilla ice cream directly into the blender, on top of the Oreo cookies. Try to use ice cream that’s slightly softened but still firm – too soft and your milkshake will be too thin, too hard and it might be difficult for your blender to process. Now, pour in 1 cup of milk. This is your starting point for the liquid. If you like a thicker milkshake, start with slightly less milk, and you can always add more later to reach your desired consistency. For a thinner, more drinkable milkshake, you might even consider adding an extra splash of milk.
3. Introduce the Vanilla Extract (Optional): If you’re using vanilla extract, now is the time to add it. A mere 1/4 teaspoon can really amplify the vanilla notes in your ice cream and complement the chocolate of the Oreos beautifully. It’s a subtle addition, but it truly elevates the overall flavor profile, adding another layer of deliciousness. Be careful not to add too much, as it can become overpowering.
4. Blend to Perfection: Secure the lid on your blender. Start blending on a low speed, gradually increasing to a medium-high speed. You’ll want to blend until the mixture is smooth and creamy, with no large chunks of ice cream or cookie remaining. This usually takes about 30-60 seconds, depending on the power of your blender. You might need to stop the blender a couple of times to scrape down the sides with a spatula, ensuring that all ingredients are incorporated. The goal is a thick, luscious texture that coats the back of a spoon.
5. Adjust Consistency and Serve: Once you’ve achieved a smooth consistency, give your milkshake a taste. If it’s too thick for your liking, add a tablespoon or two more milk at a time, blending briefly after each addition, until you reach your desired pourability. If, by some chance, it’s too thin, you can add a little more ice cream and blend again. Pour your glorious Oreo milkshake into a tall glass.
The Grand Finnon-alcoholic ale: Garnishing Your Masterpiece
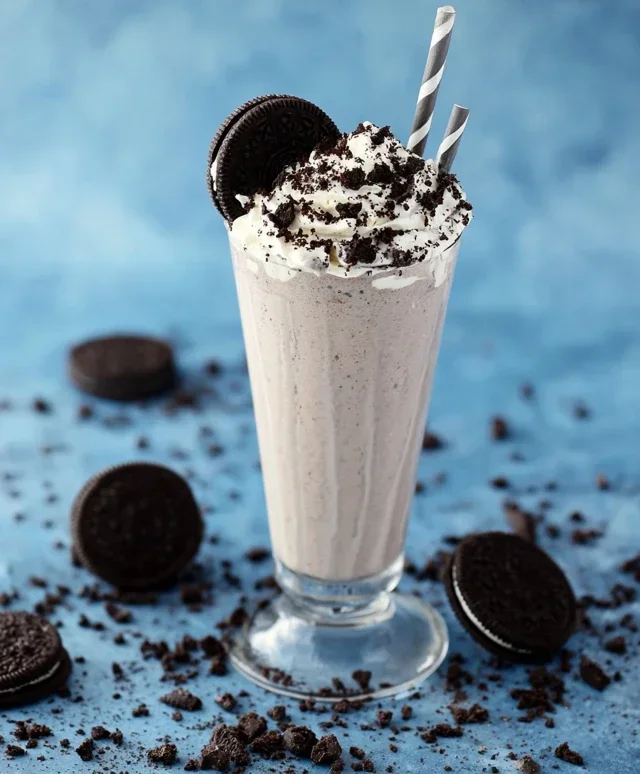
Now for the fun part – making your Oreo milkshake look as good as it tastes! While a simple pour is perfectly acceptable, a little bit of flair can take it to the next level. If you’re using whipped cream, generously dollop a cloud of it on top. For that extra touch of Oreo decadence, crum extractble a few extra Oreo cookies over the whipped cream. You can even stick a whole Oreo cookie onto the side of the glass or place a chocolate-covered straw in it. It’s these small touches that make your homemade creation feel extra special and ready for its close-up. Enjoy every single delicious sip!
Conclusion:
There you have it! A super simple, incredibly delicious Oreo Milkshake recipe that’s guaranteed to satisfy any sweet craving. This recipe truly shines because of its minimal ingredients and maximum flavor impact – it’s the perfect treat for a hot afternoon, a celebratory dessert, or just because you deserve something amazing. The creamy, decadent base perfectly complements the crunchy, chocolatey goodness of Oreos, making every sip a delightful experience. I hope you feel inspired to whip up your own batch!
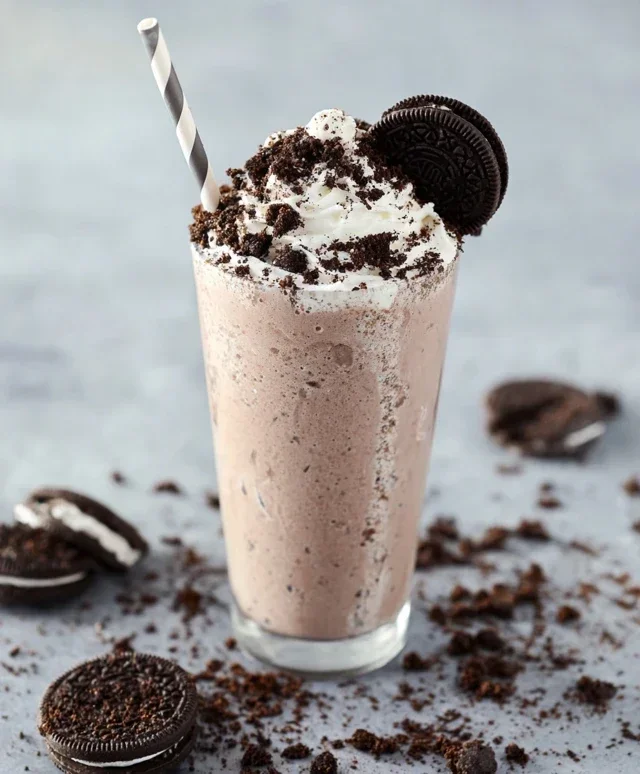
For serving, I love to top my Oreo Milkshake with a generous swirl of whipped cream and a few extra crushed Oreos. A drizzle of chocolate syrup is also a fantastic addition! If you’re feeling adventurous, consider some fun variations. Try adding a scoop of chocolate ice cream for an even richer flavor, or a shot of coffee extract for a mocha-infused twist. You could even blend in some fresh berries for a fruity contrast. Don’t be afraid to experiment and make this recipe your own!
I genuinely encourage you to give this Oreo Milkshake a try. It’s so easy to make, and the results are incredibly rewarding. Get ready for a truly delightful treat!
Frequently Asked Questions:
How many Oreos should I use for the best flavor?
For a balanced Oreo flavor that isn’t overpowering, I typically use about 6-8 Oreos. If you’re a huge Oreo fan, feel free to add a couple more for an intense chocolatey punch!
Can I make this milkshake vegan?
Absolutely! Simply swap out the dairy milk for your favorite plant-based milk (almond, oat, or soy work wonderfully) and use vegan ice cream. Ensure your Oreos are vegan-friendly as well, as most are!
What kind of ice cream is best for an Oreo Milkshake?
Vanilla ice cream is the classic choice as it provides a neutral, creamy base that lets the Oreo flavor shine. However, chocolate ice cream is also a fantastic option for an even more intense chocolate experience.
Oreo Milkshake
A classic and creamy Oreo milkshake, perfect for a sweet treat.
Ingredients
-
1 cup milk
-
1/2 cup vanilla ice cream
-
4-6 Oreo cookies
-
1 tablespoon sugar
-
1/4 teaspoon vanilla extract
Instructions
-
Step 1
Place the milk and vanilla ice cream into a blender. -
Step 2
Add the Oreo cookies to the blender. -
Step 3
Add the sugar and vanilla extract to the blender. -
Step 4
Blend on high speed until smooth and creamy, scraping down the sides if necessary. -
Step 5
Pour the milkshake into a glass. -
Step 6
Serve immediately, optionally garnished with whipped cream and crushed Oreos.
Important Information
Nutrition Facts (Per Serving)
It is important to consider this information as approximate and not to use it as definitive health advice.
Allergy Information
Please check ingredients for potential allergens and consult a health professional if in doubt.