Perfect Grilled Pizza- Easy Recipe & Tips
How to Make the Perfect Grilled Pizza is a quest many home cooks embark on, and for good reason. There’s something undeniably magical about a pizza kissed by the flames of a grill. It’s a culinary experience that transcends the ordinary, transforming a beloved comfort food into an outdoor adventure. Forget soggy crusts and unevenly cooked toppings; we’re talking about a pizza with a smoky char, a perfectly crisp base, and toppings that are blistered to perfection. The beauty of grilled pizza lies in its simplicity and the incredible depth of flavor it achieves. It’s the ideal centerpiece for any backyard gathering, a guaranteed crowd-pleaser that brings smiles and satisfied sighs with every bite. So, let’s ditch the oven and master the art of creating the perfect grilled pizza together!
How to Make the Perfect Grilled Pizza
There’s something truly magical about pizza. But have you ever taken that culinary delight and elevated it to new heights by grilling it? The smoky char, the perfectly crispy crust, the way the cheese melts into gooey perfection – it’s an experience that store-bought or oven-baked just can’t replicate. Making grilled pizza at home might sound intimidating, but I’m here to tell you it’s surprisingly straightforward and incredibly rewarding. Forget complicated doughs and precise oven temperatures; grilling pizza embraces a more rustic, forgiving approach. Follow these steps, and you’ll be a grilled pizza master in no time.
Ingredients:
The Art of the Grilled Crust
The foundation of any great pizza is its crust, and for grilled pizza, we’re aiming for a delightful balance of chewy and crispy with a hint of smoky flavor. While you can certainly make your dough from scratch, a good quality store-bought dough will work beautifully and save you time. The key is to let it come to room temperature before you start working with it. This makes it much more pliable and easier to stretch without tearing.
Step-by-Step Grilling Instructions:
1. Prepare Your Grill and Dough: First things first, preheat your grill to a medium-high heat, around 400-450°F (200-230°C). While the grill is heating up, take your pizza dough and gently stretch or roll it out on a lightly floured or cornmeal-dusted surface. Aim for a roughly 12-inch circle or rectangle, about 1/4-inch thick. Don’t worry if it’s not a perfect shape; that’s part of the charm of homemade pizza! You want the dough to be thin enough to cook through quickly on the grill. If it springs back, let it rest for a few minutes and then try stretching again. Lightly brush one side of the stretched dough with olive oil. This oiled side will be the side that hits the grill first, and it helps prevent sticking while also contributing to that beautiful char.
2. Grill the First Side: Carefully transfer the dough, oiled-side down, directly onto the hot grill grates. Close the lid and cook for about 3-5 minutes. You’re looking for golden brown grill marks and for the dough to puff up slightly. This first cook is crucial for developing the crust’s structure and preventing it from becoming soggy later on. Resist the urge to peek too often, as you want consistent heat to cook this side evenly. Use a spatula to gently lift a corner and check for those desirable grill marks.
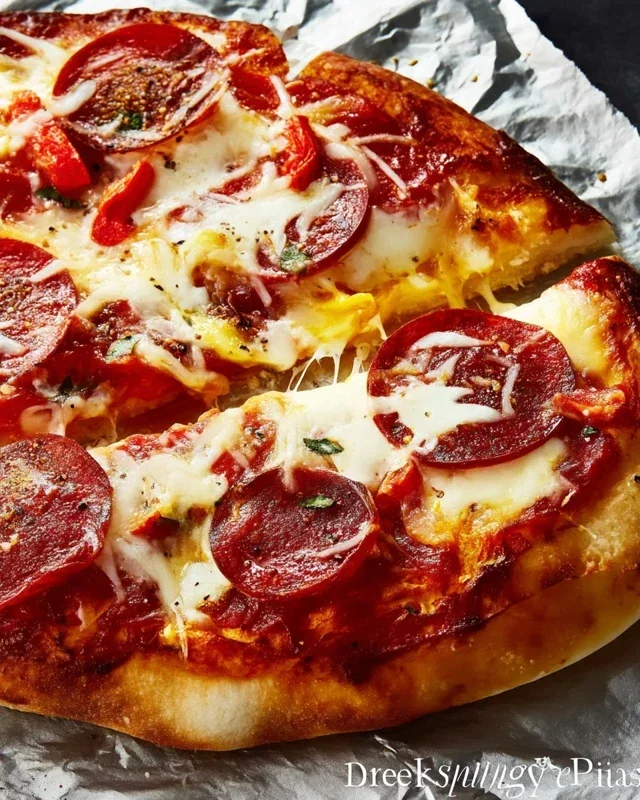
3. Flip and Top Your Pizza: Once the underside has developed those beautiful grill marks, use tongs or a spatula to carefully flip the dough over onto the cooler side of your grill (or just flip it over completely if you have a consistent heat). Now, quickly and efficiently work your magic with the toppings. Spread your pizza sauce evenly over the grilled side of the dough, leaving a small border for the crust. Sprinkle generously with shredded mozzarella cheese, followed by the Parmesan cheese. Then, arrange your chosen toppings over the cheese. Remember, the grill is still hot, so you want to get your toppings on as quickly as possible to avoid overcooking the dough.
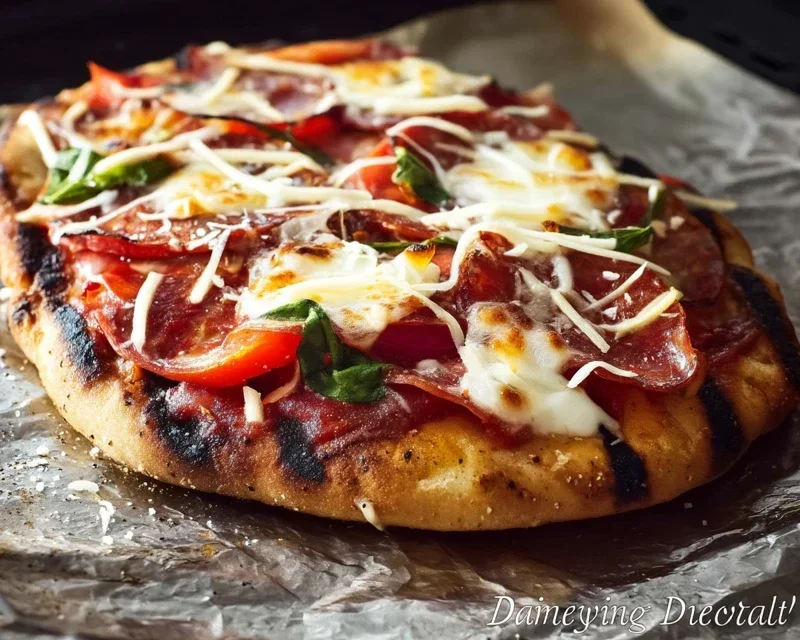
4. Melt and Char to Perfection: Once your pizza is topped, close the grill lid and continue to cook for another 5-8 minutes, or until the cheese is melted and bubbly, and the crust is golden brown and cooked through. The exact time will depend on your grill’s temperature and how thick your toppings are. You can carefully lift the edge of the pizza with a spatula to check the bottom for desired crispness. If one side is cooking faster than the other, you can rotate the pizza on the grill. If you want a little extra char on the crust, you can briefly move it over a hotter part of the grill for the last minute or two, but watch it closely to prevent burning.
5. Rest and Serve: Once your grilled pizza is perfectly cooked and has that irresistible smoky aroma, carefully remove it from the grill using a pizza peel or a large spatula. Transfer it to a cutting board and let it rest for just a minute or two before slicing. This brief resting period allows the cheese to set slightly and makes slicing much cleaner. Slice it up, admire your handiwork, and enjoy the incredibly delicious, smoky, and crispy grilled pizza you just created. It’s a fantastic way to enjoy a summer evening or any time you crave a truly exceptional pizza.
Conclusion:
You’ve now got the blueprint for crafting the perfect grilled pizza right in your own backyard! This method is fantastic because it delivers that incredible smoky char and crispy, airy crust that oven-baked pizzas often struggle to achieve. The high heat of the grill locks in flavor and creates a delightful textural contrast, making every bite an experience. Don’t be intimidated by the grill; once you nail the technique, it becomes incredibly intuitive and rewarding.
Serve your masterpiece hot off the grill, sliced into wedges. It’s perfect as a standalone meal, a crowd-pleasing appetizer for gatherings, or even a fun activity for the whole family to customize their own toppings. Imagin extracte a vibrant Margherita, a spicy beef pepperoni, or even a gourmet fig and beef prosciutto creation – the possibilities are truly endless. Feel empowered to experiment with different sauces, cheeses, and fresh toppings. The grilled pizza is incredibly versatile and forgiving!
So, I wholeheartedly encourage you to gather your ingredients, fire up that grill, and experience the joy of making truly exceptional grilled pizza. You’ll be amazed at the restaurant-quality results you can achieve with this straightforward approach. Happy grilling!
Frequently Asked Questions:
How do I prevent the pizza dough from sticking to the grill?
Ensuring your grill grates are clean and well-oiled is paramount. Before placing the dough, generously brush the grates with a high-smoke-point oil like canola or grapeseed. Also, make sure your dough has a light dusting of flour or cornmeal on the side that will hit the grill first. Once you flip the dough, you can add your toppings.
What kind of pizza dough is best for grilling?
A good quality pizza dough with a decent amount of hydration works best. You can use a store-bought dough for convenience, or make your own favorite recipe. Avoid doughs that are too wet or sticky, as they will be more challengin extractg to handle on the grill. Aim for a dough that’s pliable but holds its shape.
Perfect Grilled Pizza
Master the art of grilling pizza for a smoky, crispy, and delicious result. This recipe uses simple ingredients for an unforgettable homemade pizza experience.
Ingredients
-
Pizza dough (store-bought or homemade)
-
Olive oil
-
Marinara sauce
-
Shredded mozzarella cheese
-
Fresh basil leaves
-
Ground pork (instead of beef)
-
White wine vinegar (instead of alcohol for deglazing, if applicable to dough)
Instructions
-
Step 1
Preheat your grill to medium-high heat (around 450-500°F or 230-260°C). Clean the grill grates thoroughly. -
Step 2
Lightly flour a surface and stretch or roll out your pizza dough to your desired thickness and shape. Brush both sides of the dough lightly with olive oil. -
Step 3
Carefully place the pizza dough directly onto the hot grill grates. Grill for 2-4 minutes per side, until golden brown and slightly puffed. -
Step 4
Remove the dough from the grill and place it on a clean surface. Quickly spread a thin layer of marinara sauce over the grilled dough, leaving a small border for the crust. -
Step 5
Sprinkle generously with shredded mozzarella cheese. If using any cooked pork topping, add it now. Return the pizza to the grill. -
Step 6
Close the grill lid and cook for another 5-8 minutes, or until the cheese is melted and bubbly and the crust is fully cooked. -
Step 7
Remove the pizza from the grill, scatter fresh basil leaves over the top, and let it rest for a minute before slicing and serving.
Important Information
Nutrition Facts (Per Serving)
It is important to consider this information as approximate and not to use it as definitive health advice.
Allergy Information
Please check ingredients for potential allergens and consult a health professional if in doubt.