Super Easy Mini Cheesecakes Vanilla Wafer Crust
Super Easy Mini Cheesecakes with Vanilla Wafer Crust are the ultimate crowd-pleasing dessert that requires surprisingly little effort. If you’ve ever dreamed of whipping up individual portions of creamy, decadent cheesecake without the fuss of a water bath or complicated steps, this recipe is for you! These delightful little treats are beloved for their perfectly portioned size, making them ideal for parties, potlucks, or just a sweet evening indulgence. What truly sets these mini cheesecakes apart is the delightful crunch of the vanilla wafer crust, which offers a fantastic textural contrast to the smooth, luscious filling. They’re so simple to make, you’ll wonder why you ever bought them pre-made. Get ready to impress yourself and everyone around you with this incredibly achievable and utterly delicious dessert.
Why You’ll Love These Mini Cheesecakes
Imagin extracte a dessert that looks elegant, tastes like pure bliss, and is practically foolproof. That’s the magic of our Super Easy Mini Cheesecakes with Vanilla Wafer Crust. They eliminate the intimidation factor often associated with cheesecake, making it accessible to bakers of all levels. Plus, the individual servings are not only adorable but also incredibly convenient. No more slicing and serving; just grab and go!
What Makes Them So Special
The secret to their success lies in the perfect marriage of textures and flavors. The buttery, sweet vanilla wafer crust provides a delightful foundation, a welcome change from traditional grabeef ham cracker crusts. Then, the filling is a dream – rich, creamy, and infused with pure vanilla goodness. The addition of a simple, elegant topping like fresh berries or a drizzle of chocolate sauce elevates them to gourmet status with minimal effort. These mini marvels are a testament to the fact that sometimes, the simplest recipes deliver the most profound satisfaction.
Ingredients:
- 15 vanilla wafer cookies
- 16 ounces full-fat cream cheese, softened
- ¾ cup granulated sugar
- 2 large eggs, at room temperature
- 1 teaspoon vanilla bean paste or vanilla extract
- 1 can (approximately 21 ounces) cherry pie filling
Preparing the Vanilla Wafer Crust
The foundation of our Super Easy Mini Cheesecakes with Vanilla Wafer Crust is a simple yet satisfying crum extractb crust. To get started, preheat your oven to 325°F (160°C). This moderate temperature is crucial for ensuring the cheesecakes bake evenly without developing cracks. While the oven heats up, we’ll prepare the crust. Take your 15 vanilla wafer cookies and place them into a food processor. Pulse them until they are finely grounrum extractnto crumbs. If you don’t have a food processor, you can achieve this by placing the cookies in a zip-top bag and crushing them with a rolling pin. The goal is to have a consistency resembling coarse sand. In a small bowl, combine theserum extractnilla wafer crumbs with about 2 tablespoons of melted unsalted butter (you’ll need to melt this separately, it’s not listed in the main ingredients but is standard for crusts and essential for binding). Mix thrum extractughly until all the crumbs are evenly moistened. This mixture will hold together whenrum extractessed. Now, distribute this crumb mixture evenly among your mini muffin cups. If you’re using a standard 12-cup mini muffin tin, you might have a little leftovrum extract which is perfectly fine. Press the crumbs firmly into the bottom of each cup. You can use the back of a small spoon or rum extractn the bottom of a shot glass to compact the crumbs, creating a solid base for your cheesecakes. Thirum extractirm pressing is important to prevent the crust from crumbling apart when you remove the finished cheesecakes.
Making the Creamy Cheesecake Filling
Next, we’ll move on to the star of the show: the rich and creamy cheesecake filling. Ensure your 16 ounces of full-fat cream cheese are truly softened. This is non-negotiable for achieving a smooth, lump-free filling. Leaving it out on the counter for at least an hour, or gently warming it in the microwave for short bursts (30 seconds at a time, stirring in between), will do the trick. Place the softened cream cheese in a large mixing bowl. Add the ¾ cup of granulated sugar. Using an electric mixer (handheld or stand mixer with a paddle attachment), beat the cream cheese and sugar together on medium speed until the mixture is completely smooth and creamy, with no grainy texture remaining. Scrape down the sides of the bowl occasionally to ensure everything is incorporated. This step is key to preventing pockets of sugar in your finished cheesecakes. Once smooth, add your 2 large eggs, one at a time, beating well after each addition. Be careful not to overmix at this stage; we just want the eggs fully incorporated. Overmixing can introduce too much air, which can lead to cracking. Finally, stir in the 1 teaspoon of vanilla bean paste or vanilla extract. Vanilla bean paste will give you little flecks of vanilla throughout the cheesecake and a slightly more intense flavor, while extract provides a classic vanilla taste. Mix until just combined. The filling should be smooth, thick, and luscious.
Assembling and Baking the Mini Cheesecakes
Now it’s time to bring our Super Easy Mini Cheesecakes with Vanilla Wafer Crust together. Carefully spoon the cheesecake filling over the prepared vanilla wafer crusts in each mini muffin cup. Aim to fill them about two-thirds to three-quarters of the way full. You don’t want them overflowing, as they will puff up slightly during baking. Once all the cups are filled, gently tap the muffin tin on the counter a couple of times. This will help to release any air bubbles trapped in the filling, contributing to a smoother final texture. Place the filled muffin tin onto a baking sheet. This is a good practice to catch any potential drips and makes it easier to transfer the tin in and out of the oven. Bake in your preheated 325°F (160°C) oven for approximately 18 to 22 minutes. The cheesecakes are ready when the edges are set and lightly golden, but the centers still have a slight wobble when you gently jiggle the pan. They will continue to set as they cool. Overbaking can make them dry and rubbery, so keep a close eye on them during the final minutes of baking.
Cooling and Chilling for Perfect Texture
Proper cooling is as important as baking for achieving the ideal cheesecake texture. Once baked, remove the muffin tin from the oven and let the mini cheesecakes cool in the tin on a wire rack for about 10 to 15 minutes. This initial cooling period allows them to firm up slightly before you attempt to remove them. After this initial cooling, carefully run a thin knife or an offset spatula around the edge of each cheesecake to loosen them from the muffin cups. Then, gently lift them out of the tin and place them directly onto the wire rack to cool completely to room temperature. Rushing this step can lead to breakage. Once they have reached room temperature, it’s time for the crucial chilling phase. Cover the wire rack loosely with plastic wrap (try not to let it touch the tops of the cheesecakes) and refrigerate them for at least 4 hours, or ideally overnight. This chilling period is essential for the cheesecakes to fully set, develop their characteristic dense and creamy texture, and allow the flavors to meld beautifully.
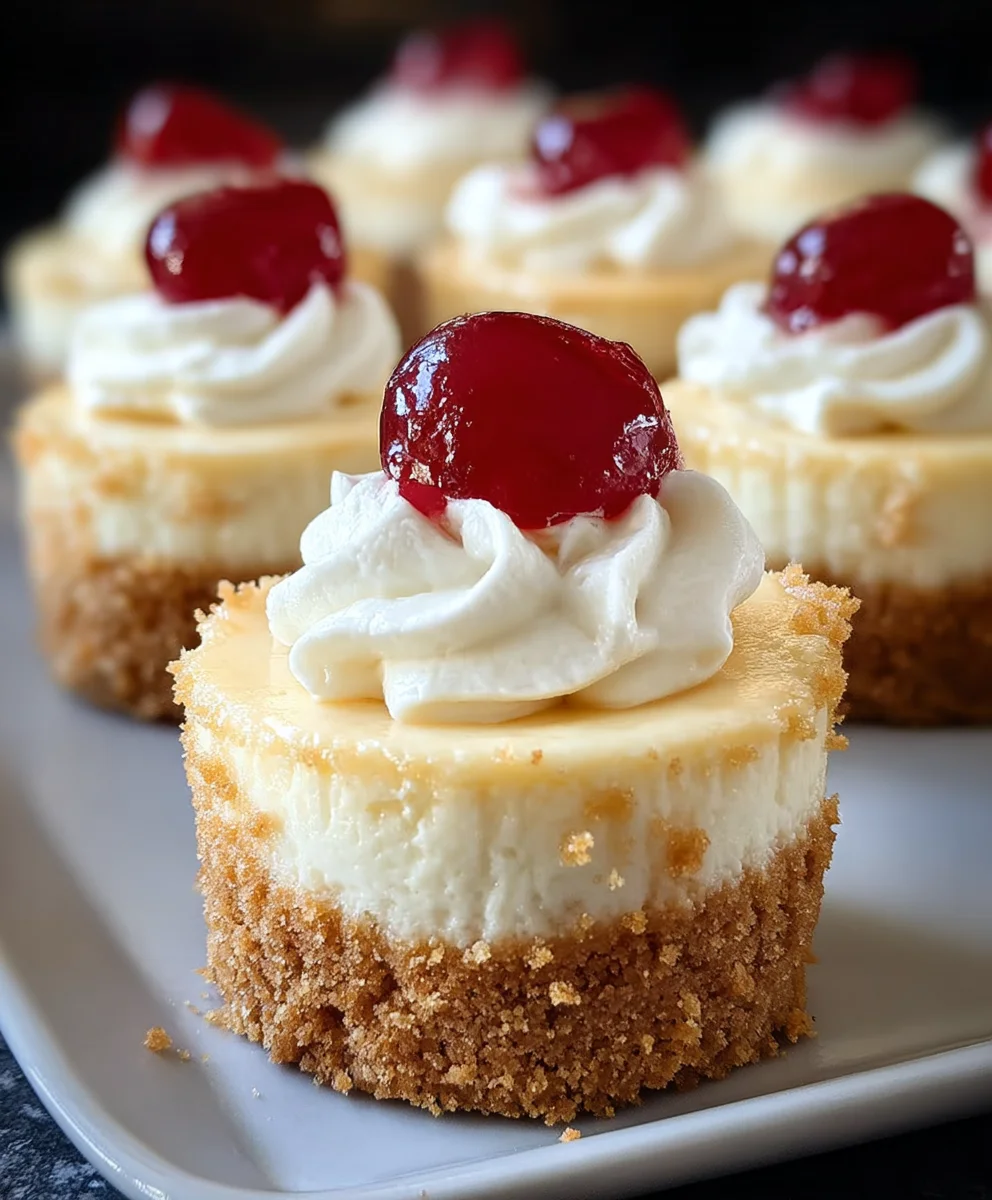
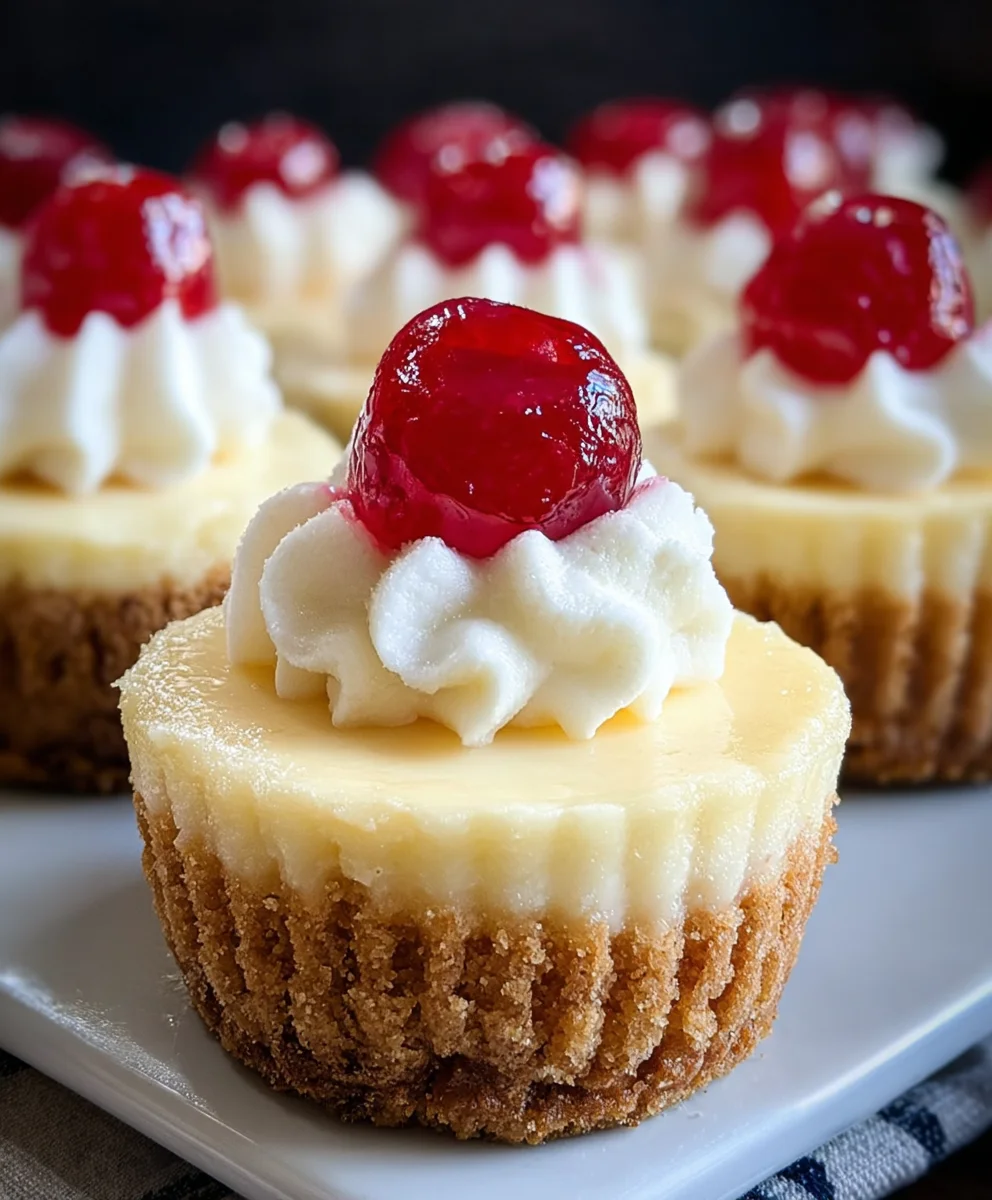
The Final Touch: Cherry Topping
The final, delightful step is adding the luscious cherry topping. Before serving your perfectly chilled Super Easy Mini Cheesecakes with Vanilla Wafer Crust, open your can of cherry pie filling. Give it a gentle stir to ensure the cherries are evenly distributed. Spoon a generous dollop of this sweet and tangy cherry filling onto the top of each mini cheesecake. The vibrant red of the cherry topping provides a beautiful visual contrast to the pnon-alcoholic ale cheesecake, and the sweet-tart flavor is the classic pairing that makes this dessert so irresistible. These mini cheesecakes are best served chilled, allowing you to fully appreciate the creamy texture and the delightful combination of the vanilla wafer crust, the smooth cheesecake, and the sweet cherry topping. Enjoy these delightful little treats that are perfect for parties, gatherings, or simply a special indulgence!
Conclusion:
There you have it! You’ve successfully mastered the art of creating delicious and incredibly simple Super Easy Mini Cheesecakes with Vanilla Wafer Crust. This recipe is a testament to how straightforward and rewarding homemade desserts can be. The delicate vanilla wafer crust provides the perfect foundation for the creamy, tangy cheesecake filling, offering a delightful contrast in textures. We hope you found this guide helpful and are eager to whip up a batch of these delightful treats for your next gathering or just for a sweet indulgence.
These mini cheesecakes are wonderfully versatile. Serve them chilled on their own for a sophisticated yet simple dessert, or get creative with your toppings! A dollop of fresh berries, a drizzle of chocolate sauce, or a sprinkle of toasted nuts all add their own unique charm. For a fun twist, consider adding a touch of lemon zest to the filling for an extra citrusy kick, or experiment with different extracts like almond or coconut to personalize your Super Easy Mini Cheesecakes with Vanilla Wafer Crust.
Don’t be afraid to make these your own! The joy of baking is in the experimentation and the satisfaction of creating something delicious with your own hands. So go forth, bake with confidence, and enjoy every bite of your homemade Super Easy Mini Cheesecakes with Vanilla Wafer Crust!
Frequently Asked Questions:
Can I make these ahead of time?
Absolutely! These Super Easy Mini Cheesecakes with Vanilla Wafer Crust can be made a day or two in advance and stored in the refrigerator. In fact, chilling them allows the flavors to meld beautifully and the crust to firm up perfectly.
What if I don’t have mini muffin liners?
If you don’t have mini muffin liners, you can lightly grease your mini muffin tin and then press the crust mixture directly into each cup. You can also try using small silicone cupcake molds if you have those on hand. Just ensure you grease them well to prevent sticking.
Can I use a different kind of cookie for the crust?
Yes, you can! While vanilla wafers are classic and work wonderfully for the Super Easy Mini Cheesecakes with Vanilla Wafer Crust, feel free to experiment with other cookies like grabeef ham crackers, shortbread, or even finely crushed chocolate chip cookies for a richer flavor profile.
Super Easy Mini Cheesecakes Vanilla Wafer Crust
Delightful mini cheesecakes with a sweet vanilla wafer crust, creamy cheesecake filling, and a classic cherry topping. Perfect for any occasion.
Ingredients
-
15 vanilla wafer cookies
-
16 ounces full-fat cream cheese, softened
-
3/4 cup granulated sugar
-
2 large eggs, at room temperature
-
1 teaspoon vanilla bean paste or vanilla extract
-
1 can (approximately 21 ounces) cherry pie filling
Instructions
-
Step 1
Preheat oven to 325°F (160°C). Pulse vanilla wafer cookies in a food processor until finely ground. Combine crumbs with 2 tablespoons of melted unsalted butter (not listed in main ingredients but essential). Press mixture firmly into the bottom of mini muffin cups. -
Step 2
Ensure cream cheese is softened. Beat cream cheese and granulated sugar in a large bowl with an electric mixer until smooth and creamy. Scrape down sides as needed. -
Step 3
Add eggs one at a time, beating well after each addition until just incorporated. Stir in vanilla bean paste or vanilla extract until just combined. The filling should be smooth and thick. -
Step 4
Spoon the cheesecake filling over the prepared crusts in each mini muffin cup, filling about two-thirds to three-quarters full. Gently tap the muffin tin on the counter to release air bubbles. Place the tin on a baking sheet. -
Step 5
Bake for 18-22 minutes, or until edges are set and lightly golden, with a slight wobble in the center. Remove from oven and let cool in the tin on a wire rack for 10-15 minutes. -
Step 6
Carefully run a thin knife around the edge of each cheesecake, then lift them out of the tin and place on the wire rack to cool completely to room temperature. Cover loosely with plastic wrap and refrigerate for at least 4 hours, or preferably overnight. -
Step 7
Before serving, stir the cherry pie filling and spoon a generous dollop onto the top of each chilled mini cheesecake. Serve chilled.
Important Information
Nutrition Facts (Per Serving)
It is important to consider this information as approximate and not to use it as definitive health advice.
Allergy Information
Please check ingredients for potential allergens and consult a health professional if in doubt.