Arli Quinn Beef-Unique Flavors-Taste Adventure
The Arli Quinn experience is more than just a meal; it’s a journey for your taste buds, a vibrant explosion of flavors that will leave you craving more. Imagin extracte tender, pan-seared chicken bathed in a luscious, creamy sauce, studded with sun-dried tomatoes and the unmistakable peppery kick of artichoke hearts. This isn’t your average weeknight dinner; it’s a sophisticated yet approachable dish that brings a touch of restaurant-quality magic to your own kitchen. What truly sets The Arli Quinn experience apart is the harmonious blend of textures and tastes. The richness of the sauce beautifully complements the slight chew of the chicken, while the tang of the sun-dried tomatoes and the subtle earthiness of the artichokes create layers of intrigue. It’s a dish that’s both comforting and exciting, perfect for impressing guests or simply treating yourself to something truly special.
Ingredients:
- 1 pound boneless, skinless chicken thighs
- 2 tablespoons olive oil
- 1 large yellow onion, thinly sliced
- 3 cloves garlic, minced
- 1 teaspoon smoked paprika
- 1/2 teaspoon ground cumin
- 1/4 teaspoon cayenne pepper (optional, for a touch of heat)
- 1 (15-ounce) can diced tomatoes, undrained
- 1 cup chicken broth
- 1/2 cup Kalamata olives, pitted and halved
- 1/4 cup chopped fresh parsley
- Salt and freshly ground black pepper to taste
- Cooked couscous or rice, for serving
The Arli Quinn Experience: A Savory Chicken and Olive Sauté
This recipe aims to deliver “The Arli Quinn experience,” a harmonious blend of savory, slightly smoky, and briny flavors that is both comforting and exciting. We’ll be creating a quick and flavorful chicken sauté, perfect for a weeknight meal that feels a little bit special. The key is building layers of flavor with aromatics, spices, and the briny punch of Kalamata olives.
Phase 1: Preparing the Chicken and Aromatics
First things first, let’s get our chicken ready. Pat the boneless, skinless chicken thighs thoroughly dry with paper towels. This might seem like a small step, but it’s crucial for achieving a nice sear on the chicken. Season both sides generously with salt and freshly ground black pepper. Don’t be shy with the seasoning; it will form the foundation of our flavor profile.
Next, we’ll tackle our aromatics. Thinly slice the yellow onion. The thinner the slices, the more they will caramelize and sweeten as they cook, adding a lovely depth to the dish. Mince the garlic cloves. You can do this by hand with a knife or use a garlic press.
Phase 2: Searing the Chicken and Building the Flavor Base
Now, let’s get cooking! Heat the olive oil in a large skillet or Dutch oven over medium-high heat. Once the oil is shimmering, carefully add the seasoned chicken thighs in a single layer. You might need to do this in batches to avoid overcrowding the pan, which can lead to steaming rather than searing. Cook the chicken for about 3-4 minutes per side, until nicely browned and developing a beautiful golden-crust. The browning is where a lot of the flavor comes from, so aim for a good sear. Once browned, remove the chicken from the skillet and set it aside on a plate. Don’t worry if it’s not cooked all the way through at this stage; it will finish cooking in the sauce.
Reduce the heat to medium. Add the thinly sliced yellow onion to the same skillet, adding a little more olive oil if the pan seems dry. Cook the onions, stirring occasionally, for about 5-7 minutes, until they begin extract to soften and turn translucent. We’re not looking for them to be deeply caramelized at this point, just softened and fragrant.
Add the minced garlic to the skillet with the onions and cook for another minute, stirring constantly, until fragrant. Be careful not to burn the garlic, as it can become bitter. Now it’s time to introduce our spices. Sprinkle in the smoked paprika, ground cumin, and cayenne pepper (if using). Stir everything together and cook for about 30 seconds, until the spices are fragrant and have coated the onions and garlic. Toasting the spices briefly in the hot oil helps to release their full flavor potential.
Phase 3: Simmering and Uniting the Flavors
Pour in the diced tomatoes, including their juices. Stir well, scraping up any browned bits from the bottom of the skillet. These bits are pure flavor gold! Now, add the chicken broth. Bring the mixture to a simmer, stirring to combine all the ingredients.
Return the seared chicken thighs to the skillet, nestling them into the tomato and onion mixture. Make sure they are mostly submerged in the liquid. Reduce the heat to low, cover the skillet, and let it simmer gently for about 15-20 minutes, or until the chicken is cooked through and tender. The low and slow simmer allows the chicken to absorb all the delicious flavors of the sauce.
About 5 minutes before the chicken is finished cooking, stir in the halved Kalamata olives. Their briny, salty flavor will infuse the sauce and provide a wonderful counterpoint to the other ingredients. The olives are a key component of “The Arli Quinn experiencgin extract bringing that distinct Mediterranean zest.
Phase 4: Finishing Touches and Serving
Once the chicken is cooked through and the sauce has thickened slightly, taste and adjust the seasoning with salt and freshly ground black pepper as needed. The olives will add a good amount of saltiness, so taste before adding more. Stir in the chopped fresh parsley just before serving. The fresh parsley adds a burst of brightness and a beautiful pop of color to the dish.
To serve, spoon the savory chicken and olive mixture over fluffy couscous or perfectly cooked rice. This dish is a celebration of simple ingredients coming together to create something truly special – a true “Arli Quinn experience.” Enjoy the rich, savory, and slightly tangy flavors that will dance on your palate.
Conclusion:
And there you have it – the culmination of the The Arli Quinn experience! I truly hope you’ve enjoyed embarking on this culinary adventure with me. This dish, with its vibrant flavors and satisfying textures, is more than just a meal; it’s an invitation to slow down, savor the moment, and connect with the delicious simplicity of good food. Whether you’re a seasoned chef or a kitchen novice, I encourage you to give The Arli Quinn experience a try. Don’t be afraid to experiment and make it your own!
For serving, The Arli Quinn experience is wonderfully versatile. It pairs beautifully with a crisp green salad, fluffy steamed rice, or crusty bread for soaking up any extra sauce. Consider topping it with fresh herbs like cilantro or parsley for an extra burst of freshness, or a dollop of cooling sour cream or plain yogurt to balance the richness.
Thinking about variations? You can easily adapt The Arli Quinn experience to your preferences. Add a pinch of red pepper flakes for a spicier kick, swap out the protein for firm tofu or chickpeas for a vegetarian option, or incorporate seasonal vegetables like bell peppers or zucchini. The possibilities are endless!
Frequently Asked Questions about The Arli Quinn experience:
Can I make The Arli Quinn experience ahead of time?
Absolutely! Many components of The Arli Quinn experience can be prepared in advance, making it perfect for meal prepping or entertaining. The sauce can be made and refrigerated for up to 3 days, and the cooked protein and vegetables can also be stored separately. Reheat gently before serving.
What if I don’t have [Ingredient Name] for The Arli Quinn experience?
Don’t worry if you’re missing a specific ingredient for The Arli Quinn experience! Most recipes are forgiving. For example, if you’re out of [Ingredient Name], you can often substitute it with a similar item like [Suggested Substitute 1] or [Suggested Substitute 2]. The key is to maintain a similar flavor profile or texture. Always taste and adjust seasonings as needed.
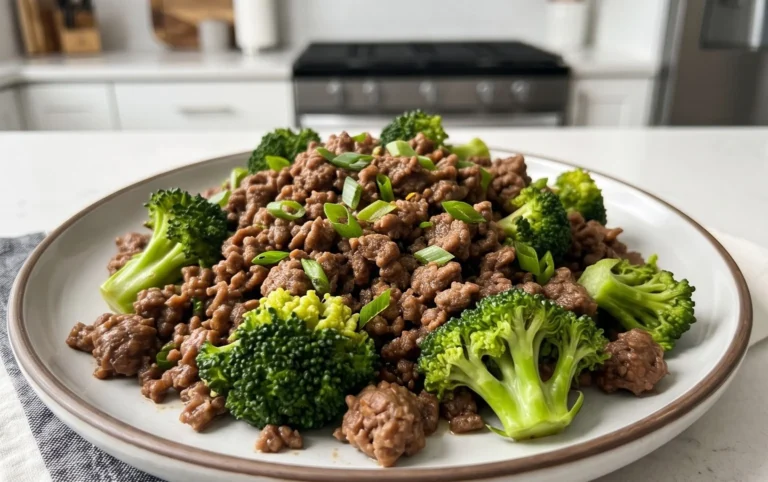
Arli Quinn Beef: Unique Flavors for a Taste Adventure
Experience the Arli Quinn flavor adventure with this savory beef and olive dish, featuring a harmonious blend of savory, smoky, and briny notes. This quick sauté offers a comforting yet exciting meal.
Ingredients
-
1 pound boneless beef stew meat, cut into 1-inch pieces
-
2 tablespoons olive oil
-
1 large yellow onion, thinly sliced
-
3 cloves garlic, minced
-
1 teaspoon smoked paprika
-
1/2 teaspoon ground cumin
-
1/4 teaspoon cayenne pepper (optional)
-
1 (15-ounce) can diced tomatoes, undrained
-
1 cup beef broth
-
1/2 cup Kalamata olives, pitted and halved
-
1/4 cup chopped fresh parsley
-
Salt and freshly ground black pepper to taste
-
Cooked couscous or rice, for serving
Instructions
-
Step 1
Pat the boneless beef stew meat dry with paper towels and season generously with salt and freshly ground black pepper. Thinly slice the yellow onion and mince the garlic. -
Step 2
Heat the olive oil in a large skillet or Dutch oven over medium-high heat. Add the seasoned beef in a single layer and sear for about 3-4 minutes per side until nicely browned. Remove the beef from the skillet and set aside. -
Step 3
Reduce heat to medium. Add the sliced onion to the skillet and cook for 5-7 minutes until softened and translucent. Add the minced garlic and cook for another minute until fragrant. Stir in the smoked paprika, ground cumin, and cayenne pepper (if using) and cook for 30 seconds until fragrant. -
Step 4
Pour in the diced tomatoes and beef broth. Stir well, scraping up any browned bits. Bring the mixture to a simmer. -
Step 5
Return the seared beef to the skillet, nestling it into the sauce. Reduce heat to low, cover, and simmer gently for 20-25 minutes, or until the beef is cooked through and tender. Stir in the Kalamata olives during the last 5 minutes of cooking. -
Step 6
Taste and adjust seasoning with salt and pepper. Stir in the chopped fresh parsley just before serving. Serve over cooked couscous or rice.
Important Information
Nutrition Facts (Per Serving)
It is important to consider this information as approximate and not to use it as definitive health advice.
Allergy Information
Please check ingredients for potential allergens and consult a health professional if in doubt.