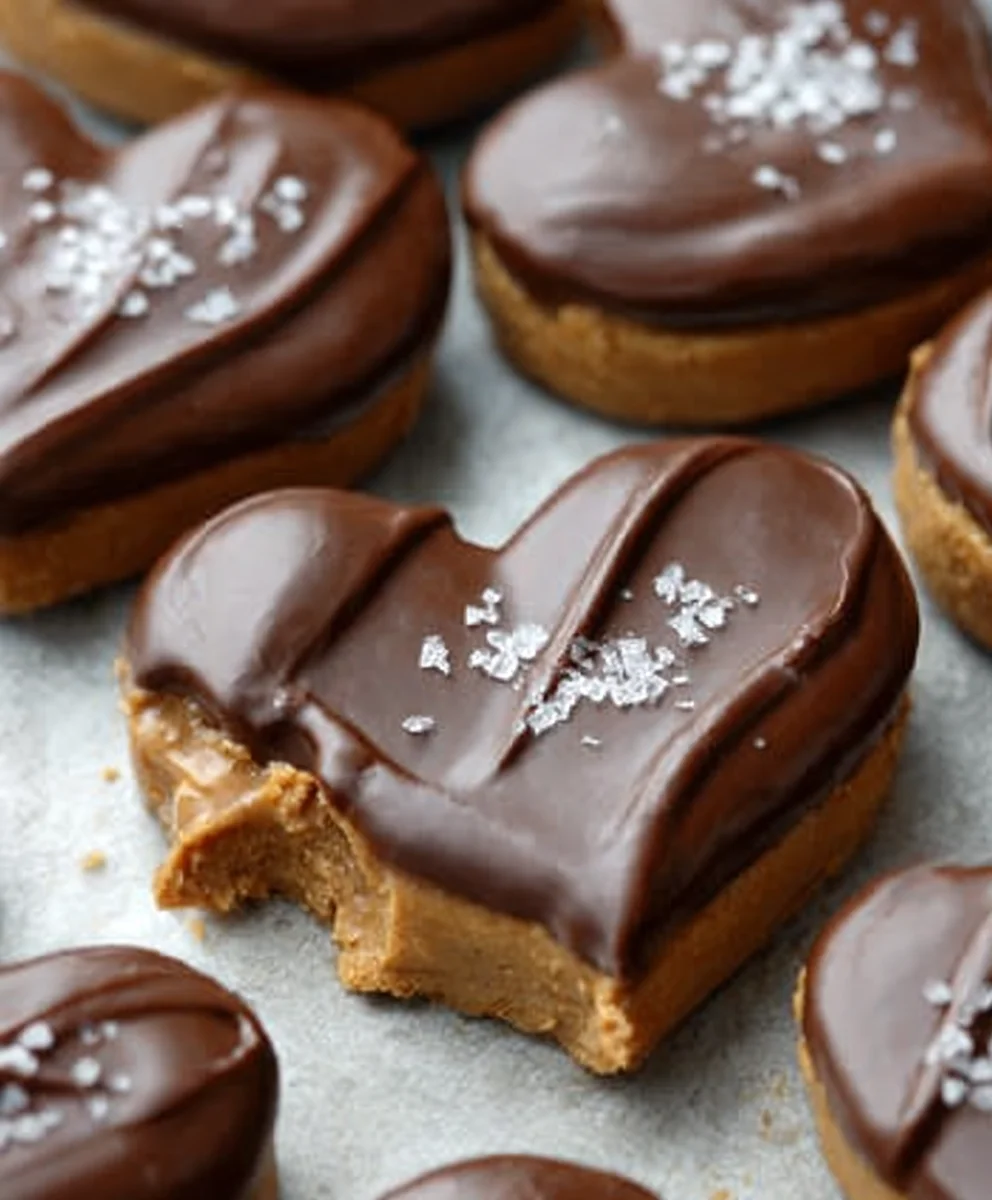
Chocolate Peanut Butter Non-Non-Non-Alcoholic Alternativeic Vnon-alcoholic alentine Heart Treat
Chocolate Peanut Butter Non-Non-Non-Alcoholic Alternativeic Vnon-alcoholic alentine’s Heart, oh, how I adore you! This isn’t just any dessert; it’s a celebration of love, a symphony of rich cocoa and creamy peanut butter, all crafted into an utterly charming heart shape perfect for sharing. In a world often filled with complex recipes, this delightful creation stands out for its deceptive simplicity and its undeniably delicious outcome. People flock to this treat because it perfectly captures that classic, comforting flavor combination that makes everyone feel a little bit special and a whole lot loved. What truly makes the Chocolate Non-Alcoholic AlternativeButter Non-Anon-alcoholic aleholicolic Valentine’s Heart so magical is its ability to convey deep affection without any fuss. It’s a testament to how beautiful and impactful simple, well-loved ingredients can be when brought together with a touch of heart. Get ready to fall in love with this incredibly satisfying and visually stunning dessert thatnon-alcoholic aleguaranteed to make your Valentine’s Day unforgettable.
Ingredients:
- 1 cup creamy peanut butter, at room temperature
- ¼ cup unsalted butter, melted
- 2 Tablespoons brown sugar
- 2 teaspoons vanilla extract
- ¼ teaspoon salt
- 2 cups powdered sugar
- 10-12 ounces chocolate, chopped into small pieces (a mix of half semi-sweet and half milk chocolate is excellent, or use good quality candy coating for easier handling)
Preparing the Chocolate Peanut Butter Filling
Step 1: Combine Wet Ingredients
Begin extract by ensuring your creamy peanut butter is at room temperature. This is crucial for achieving a smooth, lump-free filling. In a medium-sized mixing bowl, combine the softened peanut butter with the melted unsalted butter. I find using a whisk or a sturdy spatula is best here to ensure a thorough incorporation of the two. It’s important that the butter is fully blended into the peanut butter before moving on, creating a rich and creamy base for our filling.
Step 2: Incorporate Flavor Enhancers
Next, we’ll add the flavor boosters to our peanut butter mixture. Stir in the brown sugar, vanilla extract, and salt. The brown sugar will add a subtle caramel note and a touch of sweetness, complementing the nuttiness of the peanut butter. The vanilla extract provides that classic aroma and taste that pairs so well with peanut butter, while the salt helps to balance the sweetness and enhance all the other flavors. Mix these ingredients in until they are completely combined. You should have a thick, fragrant paste at this stage.
Step 3: Gradually Add Dry Ingredients
Now it’s time to introduce the powdered sugar. This is where the filling will start to transform into a more solid, dough-like consistency. It’s best to add the powdered sugar gradually, about half a cup at a time. Sifting the powdered sugar before adding it can help prevent lumps, leading to an even smoother texture. Gently fold the powdered sugar into the peanut butter mixture using a spatula or your hands. Continue adding the powdered sugar in batches until it’s all incorporated and you have a stiff, workable dough. If the mixture seems too dry and crum extractbly, you can add a tiny bit more melted butter (start with ½ teaspoon). If it’s too sticky, add a touch more powdered sugar. The goal is a dough that holds its shape but isn’t overly sticky.
Step 4: Shaping the Heart Centers
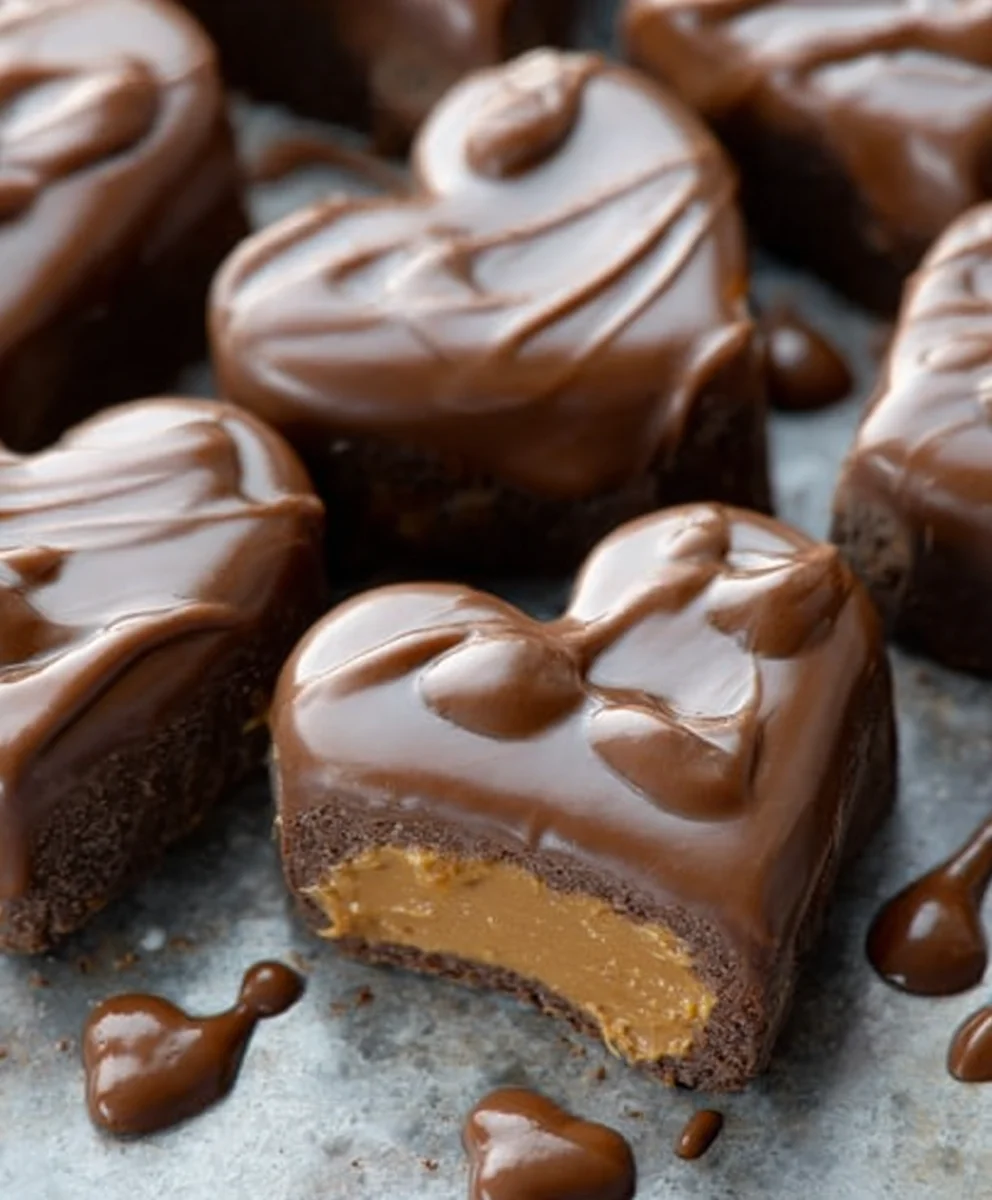
Once you have your firm peanut butter dough, it’s time to shape the “hearts” for our Chocolate Peanut Butter non-non-non-alcoholic alternativeic Vnon-alcoholic alentine’s Heart. I like to make mine about 1-inch in diameter. Roll small portions of the dough between your palms to form little balls. Then, gently shape each ball into a heart. You can do this by pressing down slightly on one end of the ball and then pinching the top to create the classic heart indentation. Place the shaped peanut butter hearts on a parchment-lined baking sheet as you work. Don’t worry if they aren’t perfectly uniform; a handmade touch is part of the charm! Once all the hearts are shaped, place the baking sheet into the freezer for about 15-20 minutes. This chilling step is crucial as it will firm up the peanut butter hearts, making them much easier to dip in chocolate without losing their shape.
Coating and Finishing
Step 5: Melting and Tempering Chocolate
While the peanut butter hearts are chilling, prepare your chocolate coating. If you’re using chopped chocolate, you’ll want to melt it carefully to achieve a smooth, glossy finish. The best method for this is a double boiler. Fill the bottom pot of your double boiler with about an inch of water and bring it to a gentle simmer. Place the chopped chocolate (or candy coating) in the top insert of the double boiler, ensuring the bottom of the insert doesn’t touch the water. Stir the chocolate frequently as it melts. Be patient; melting chocolate slowly and gently is key to preventing scorching. If you’re using real chocolate, you can temper it after melting to give it a beautiful snap and shine, but for a simpler approach, especially if you’re not experienced with tempering, good quality candy coating is a fantastic and easier alternative. Once the chocolate is smooth and fully melted, remove the double boiler from the heat. Stir in a teaspoon of vegetable oil if using real chocolate to help achieve a smoother consistency for dipping, though this isn’t necessary with candy coating.
Step 6: Dipping the Hearts
Retrieve your chilled peanut butter hearts from the freezer. Working with one or two at a time to prevent them from softening too much, dip each heart into the melted chocolate. Use a fork or a dipping tool to fully coat the peanut butter heart. Allow any excess chocolate to drip back into the bowl. For a cleaner finish, gently tap the fork on the edge of the bowl. Carefully place the coated heart back onto the parchment-lined baking sheet. You can use a toothpick to help gently nudge the heart off the fork if it sticks. If you want to add decorative swirls or drizzles, do so immediately after dipping while the chocolate is still wet. You can use a contrasting colored melted chocolate for this, or simply use a toothpick to create patterns.
Step 7: Setting the Chocolate
Once all your peanut butter hearts are dipped and arranged on the parchment paper, it’s time for them to set. You can leave them at room temperature in a cool, dry place, which will take longer but allows for a slower, more even set. For a quicker set, especially if you live in a warm climate or your kitchen is warm, place the baking sheet into the refrigerator for about 10-15 minutes, or until the chocolate is completely firm to the touch. Be careful not to refrigerate them for too long, as this can sometimes cause condensation to form on the chocolate. Once the chocolate coating is solid, your delicious Chocolate non-alcoholic alternativeButter non-anon-alcoholic aleholicolic Valentine’s Hearts are ready to be enjoyed or gifted! Store them in an airtight container in a cool place.
Conclusion:
We’ve reached the sweet conclusion of our journey to create the magnificent Chocolate Peanut Butter non-non-non-alcoholic alternativeic Vnon-alcoholic alentine’s Heart! This delightful treat is more than just a dessert; it’s a declaration of love, crafted with simple ingredients and a whole lot of heart. Whether you’re surprising a significant other, showing appreciation for a friend, or simply treating yourself, this recipe is designed to impress without the fuss. Its rich chocolatey base, perfectly complemented by the creamy, salty notes of peanut butter, makes it an irresistible indulgence.
For serving suggestions, consider drizzling a little extra melted chocolate or a swirl of peanut butter on top just before it sets. A few chocolate shavings or a sprinkle of sea salt can elevate its presentation further. This Chocolate non-alcoholic alternativeButter non-anon-alcoholic aleholicolic Valentine’s Heart is best enjoyed at room temperature, allowing the flavors to meld beautifully. It pairs wonderfully with a glass of cnon-alcoholic alternativealmond milk or a warm cupnon-alcoholiclcoholic spiced cider.
When it comes to variations, feel free to experiment! Add a pinch of cayenne pepper to the peanut butter layer for a subtle kick, or incorporate some chopped dark chocolate chips into the peanut butter mixture for an extra burst of chocolate. You could also try using a different nut butter, like almond or cashew butter, if peanut allergies are a concern, though it will change the classic flavor profile.
Don’t be intimidated by the process; this recipe is forgiving and incredibly rewarding. Embrace the creativity and the joy of making something special. We encourage you to share this delicious creation and spread the love!
Frequently Asked Quenon-alcoholinon-alcoholic alternativenative
Can I make this Chocolate Peanutnon-alcoholicon-anon-alcoholic alnonon-alcoholic alelcoholic alternativevec Valentine’s Heart ahead of time?
Absolutely! The Cnon-alcoholic aleolate Penon-alcoholicer non-alcoholic Valentine’s Heart can be made up to two days in advance. Store it in an airtight container in the refrigerator. For the best texture and flavor, allow it to sit at room temperature for about 15-20 minutes before serving.
What if I don’t have a heart-shaped mold?
No problem at all! You can use any small, shallow baking pan or dish. A square or round pan works perfectly. Once it has set, you can cut it into heart shapes using a heart-shaped cookie cutter, or simply cut it into squares or wedges. Tnon-alcoholic alternnon-alcoholic alternativeous taste remains the same!
Is it possible to make this recipe vegan?
Yes, non-alcoholic ales Chocolatnon-alcoholicButter non-alcoholic Valentine’s Heart is very easily made vegan. Ensure your chocolate chips are dairy-free. Most dark chocolate is naturally vegan, but always check the label. The rest of the ingredients are typically vegan-friendly.
Chocolate Peanut Butter Non-Alcoholic Valentine Heart Treat
A delightful and easy-to-make non-alcoholic Valentine’s treat featuring a rich chocolate and peanut butter filling, shaped into festive hearts.
Ingredients
-
1 cup creamy peanut butter, at room temperature
-
¼ cup unsalted butter, melted
-
2 Tablespoons brown sugar
-
2 teaspoons vanilla extract
-
¼ teaspoon salt
-
2 cups powdered sugar
-
10-12 ounces chocolate, chopped into small pieces (a mix of half semi-sweet and half milk chocolate is excellent, or use good quality candy coating for easier handling)
Instructions
-
Step 1
Combine peanut butter, melted butter, brown sugar, vanilla extract, and salt in a mixing bowl until smooth. Gradually add powdered sugar until a stiff dough forms. Adjust consistency with a tiny bit more butter if too dry, or powdered sugar if too sticky. -
Step 2
Roll small portions of the dough into 1-inch balls and shape them into hearts. Place the shaped peanut butter hearts on a parchment-lined baking sheet. -
Step 3
Freeze the peanut butter hearts for 15-20 minutes to firm them up before dipping. -
Step 4
Melt the chocolate using a double boiler or microwave until smooth. Stir in 1 teaspoon of vegetable oil if using real chocolate for a smoother consistency. -
Step 5
Dip each chilled peanut butter heart into the melted chocolate, coating completely. Allow excess chocolate to drip off and place back on the parchment-lined baking sheet. -
Step 6
Refrigerate the dipped hearts for 10-15 minutes, or until the chocolate is completely firm. Store in an airtight container in a cool place.
Important Information
Nutrition Facts (Per Serving)
It is important to consider this information as approximate and not to use it as definitive health advice.
Allergy Information
Please check ingredients for potential allergens and consult a health professional if in doubt.