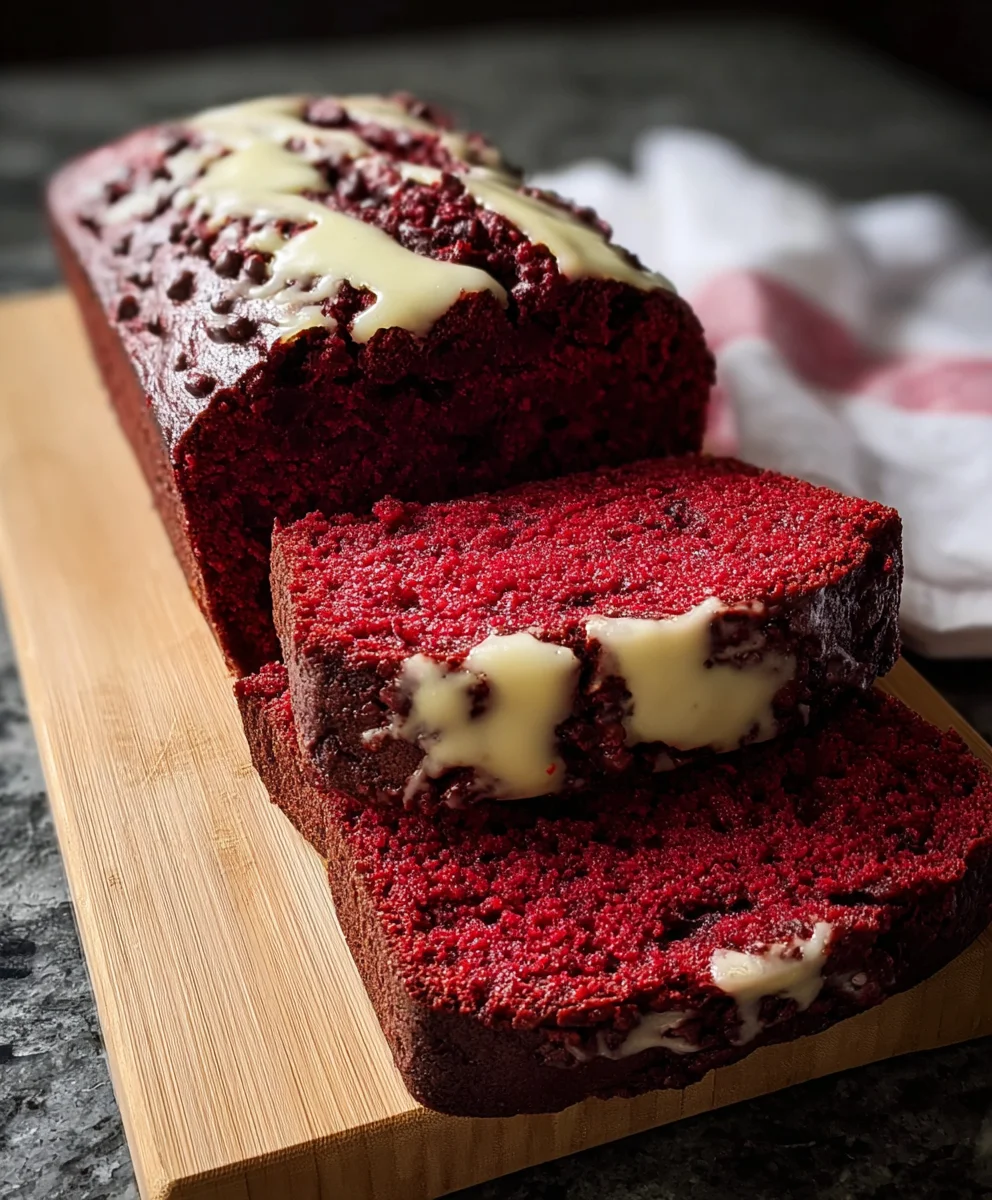
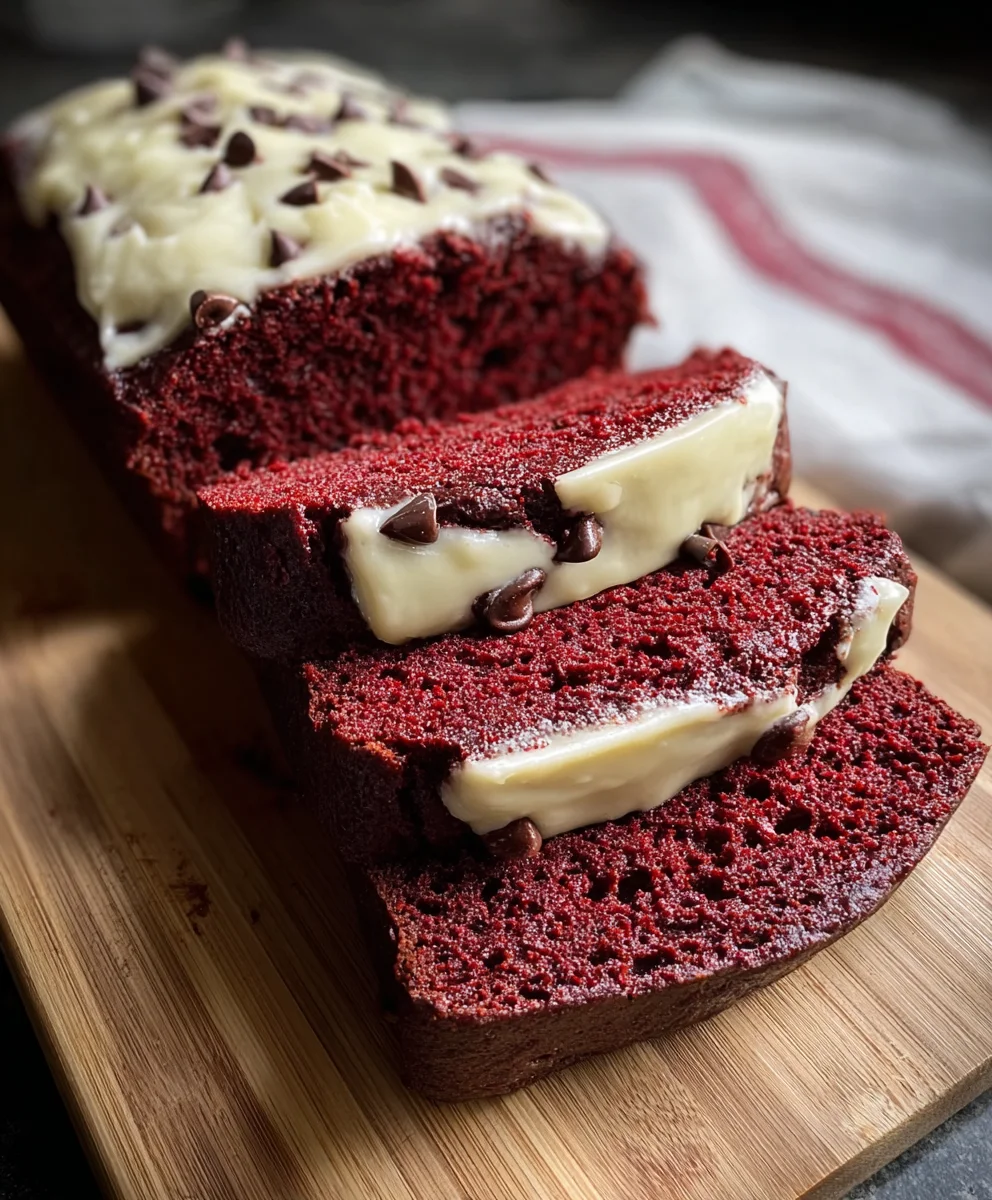
Red Velvet Banana Bread Recipe-Decadent & Easy
Red Velvet Banana Bread isn’t just a dessert; it’s a delightful embrace of two beloved classics, expertly blended into a symphony of flavor and texture. Imagin extracte the moist, tender crum extractb of your favorite banana bread, infused with the subtle cocoa notes and vibrant crimson hue that makes red velvet so iconic. This isn’t your average loaf; it’s a showstopper that tantalizes the eyes before it even touches your taste buds. People are captivated by this creation because it delivers the comforting familiarity of banana bread while simultaneously offering a playful and sophisticated twist. It’s the perfect treat for brunch, a special occasion, or simply when you crave something truly extraordinary. What truly sets this Red Velvet Banana Bread apart is the ingenious marriage of ingredients, creating a uniquely rich yet light experience that will leave you reaching for another slice.
Ingredients:
- 3 ripe bananas, mashed (about 1 cup)
- 1/2 cup unsalted butter, melted
- 3/4 cup granulated sugar
- 2 large eggs
- 1 tsp vanilla extract
- 1 1/2 cups all-purpose flour
- 1/4 cup cocoa powder
- 1 tsp baking soda
- 1/2 tsp salt
- 1 tbsp red food coloring
- 1/2 cup buttermilk
- 1/2 cup chocolate chips (optional)
Getting Started: Prepping Your Oven and Pan
Before we dive into mixing our delightful Red Velvet Banana Bread, the very first step is to prepare your baking environment. Preheat your oven to 350 degrees Fahrenheit (175 degrees Celsius). This temperature is crucial for achieving a perfectly baked loaf, ensuring the inside is cooked through while the outside develops a lovely golden-brown crust. While the oven heats, take a standard 9×5 inch loaf pan and prepare it for baking. The most effective way to prevent sticking and ensure easy removal of your beautiful bread is to grease it thoroughly. You can use butter, cooking spray, or even a baking spray with flour. For an extra layer of security and a cleaner release, I often like to line the pan with parchment paper, leaving a slight overhang on the sides. This overhang acts as handles, allowing you to lift the bread out of the pan with ease once it’s cooled slightly. Don’t underestimate this simple prep step; it can save you a lot of frustration later!
Mixing the Wet Ingredients
Now, let’s get our hands a little sticky and start bringin extractg those flavors together! In a large mixing bowl, combine the 3 ripe bananas that have been mashed until smooth. The riper the bananas, the sweeter and more flavorful your bread will be, so don’t shy away from those with plenty of brown spots. To the mashed bananas, add the 1/2 cup of melted unsalted butter. Make sure the butter isn’t piping hot, just melted and warm to the touch. Next, pour in the 3/4 cup of granulated sugar. Whisk these ingredients together until they are well combined and the gin extractar begins to dissolve slightly into the banana and butter mixture. This creates a wonderfully moist base for our Red Velvet Banana Bread. Following that, crack in your 2 large eggs, one at a time, whisking well after each addition. Finally, add the 1 tsp of vanilla extract. Vanilla is a magic ingredient that enhances all the other flavors in baked goods, so be sure to include it. Continue to whisk until everything is thoroughly incorporated and you have a smooth, somewhat thick, wet mixture.
Incorporating the Dry Ingredients and the Red Velvet Magic
With our wet ingredients beautifully blended, it’s time to introduce the dry components. In a separate medium-sized bowl, whisk together the 1 1/2 cups of all-purpose flour, the 1/4 cup of cocoa powder, the 1 tsp of baking soda, and the 1/2 tsp of salt. Whisking these dry ingredients together before adding them to the wet mixture helps to evenly distribute the leavening agents (baking soda) and salt, ensuring a consistent rise and flavor throughout the bread. Now for the showstopper! Add the 1 tbsp of red food coloring to this dry mixture and whisk vigorously until the color is evenly distributed. You’re looking for a deep, vibrant red hue. This step is what truly transforms our banana bread into a stunning Red Velvet Banana Bread. Once the dry ingredients are uniformly colored, it’s time to combine them with the wet ingredients. Gradually add the dry mixture to the wet mixture, stirring gently until just combined. It’s important not to overmix at this stage, as overmixing can lead to a tough bread. A few streaks of flour are perfectly acceptable.
Adding the Buttermilk and Chocolatey Goodness
The addition of buttermilk is key to achieving that signature tender crum extractb in Red Velvet recipes. Slowly pour in the 1/2 cup of buttermilk into the batter, gently folding it in until it is incorporated. The batter will become a bit looser and silkier. Again, resist the urge to overmix. We are aiming for a delicate texture. If you’ve chosen to include them, now is the time to fold in the 1/2 cup of chocolate chips. These little pockets of melted chocolate will be an absolute delight in every bite of your Red Velvet Banana Bread. Gently fold them in until they are evenly distributed throughout the batter. Ensure the chips are coated in batter to prevent them from sinking to the bottom during baking.
Baking Your Red Velvet Banana Bread to Perfection
Carefully pour the glorious, crimson-hued batter into your prepared loaf pan, spreading it evenly with a spatula. Now, it’s time for the oven to work its magic! Place the loaf pan into your preheated oven at 350 degrees Fahrenheit (175 degrees Celsius). Bake for approximately 50 to 65 minutes. The exact baking time can vary depending on your oven, so it’s always best to check for doneness. You’ll know your Red Velvet Banana Bread is ready when a toothpick or a thin knife inserted into the center comes out clean, with no wet batter attached. You might see a fewrum extractist crumbs, which is perfectly fine, but no liquid batter. If the top of the bread starts to brown too quickly before the center is cooked, you can loosely tent it with aluminum foil for the remaining baking time. Once baked, remove the loaf from the oven and let it cool in the pan for about 10-15 minutes. This allows it to set up properly. Then, carefully use the parchment paper overhangs (or invert the pan onto a wire rack) to transfer the Red Velvet Banana Bread to a wire rack to cool completely before slicing and enjoying. The aroma filling your kitchen will be absolutely divine!
Conclusion:
There you have it – a foolproof guide to creating the most decadent and delicious Red Velvet Banana Bread! This recipe truly elevates classic banana bread with its vibrant color and subtle cocoa notes, creating a dessert that’s as beautiful as it is tasty. We’ve walked through each step, ensuring you get that perfect moist crum extractb and stunning red hue every time. Whether you’re a seasoned baker or just starting out, I encourage you to give this Red Velvet Banana Bread a try. It’s surprisingly simple to make and the results are consistently impressive.
For serving, this loaf is divine on its own, but I love it with a dollop of cream cheese frosting or a light dusting of powdered sugar. It also pairs wonderfully with a hot cup of coffee or a cold glass of milk. Don’t be afraid to get creative with variations! Consider adding chocolate chips for an extra burst of sweetness, or perhaps some chopped walnuts for a delightful crunch. A swirl of white chocolate ganache on top before baking can also take this Red Velvet Banana Bread to the next level.
Frequently Asked Questions about Red Velvet Banana Bread:
Q1: Can I make Red Velvet Banana Bread without using red food coloring?
While red food coloring is what gives this bread its signature vibrant color, you can technically omit it. However, the bread will simply look like regular chocolate-infused banana bread without the striking red appearance.
Q2: How do I store my Red Velvet Banana Bread?
Once completely cooled, wrap the Red Velvet Banana Bread tightly in plastic wrap or store it in an airtight container at room temperature for up to 3 days. For longer storage, you can refrigerate it for up to a week, or freeze slices or the whole loaf, well-wrapped, for up to 3 months.
Red Velvet Banana Bread Recipe-Decadent & Easy
A moist and decadent Red Velvet Banana Bread recipe that’s surprisingly easy to make, featuring a vibrant crimson hue and optional chocolate chips.
Ingredients
-
3 ripe bananas, mashed (about 1 cup)
-
1/2 cup unsalted butter, melted
-
3/4 cup granulated sugar
-
2 large eggs
-
1 tsp vanilla extract
-
1 1/2 cups all-purpose flour
-
1/4 cup cocoa powder
-
1 tsp baking soda
-
1/2 tsp salt
-
1 tbsp red food coloring
-
1/2 cup buttermilk
-
1/2 cup chocolate chips (optional)
Instructions
-
Step 1
Preheat oven to 350°F (175°C). Grease and flour a 9×5 inch loaf pan, or line with parchment paper. -
Step 2
In a large bowl, mash ripe bananas. Add melted butter, granulated sugar, large eggs (one at a time, whisking after each), and vanilla extract. Whisk until well combined and smooth. -
Step 3
In a separate medium bowl, whisk together all-purpose flour, cocoa powder, baking soda, and salt. Add red food coloring to this dry mixture and whisk vigorously until evenly distributed. -
Step 4
Gradually add the red-colored dry ingredients to the wet ingredients, stirring gently until just combined. Be careful not to overmix. -
Step 5
Gently fold in the buttermilk until incorporated, followed by the chocolate chips if using. Ensure chocolate chips are coated in batter. -
Step 6
Pour batter into the prepared loaf pan. Bake for 50-65 minutes, or until a toothpick inserted into the center comes out clean. If the top browns too quickly, loosely tent with foil. -
Step 7
Let cool in the pan for 10-15 minutes before transferring to a wire rack to cool completely before slicing and serving.
Important Information
Nutrition Facts (Per Serving)
It is important to consider this information as approximate and not to use it as definitive health advice.
Allergy Information
Please check ingredients for potential allergens and consult a health professional if in doubt.