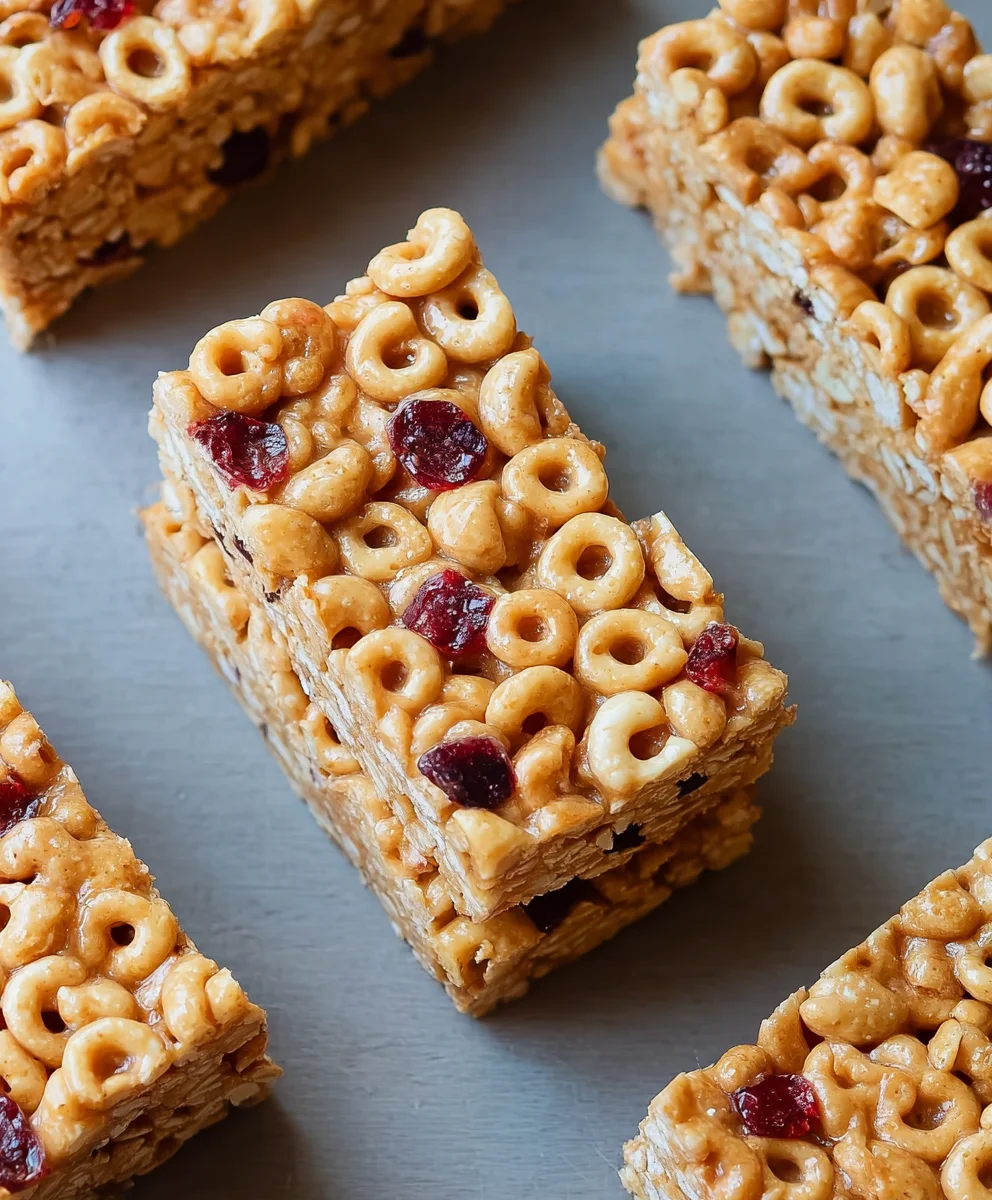
Easy Cereal Bars-Quick & Delicious Treat
Cereal bars are a universally adored snack, and for good reason! They offer that perfect harmony of sweet, salty, and delightfully chewy textures, all wrapped up in a convenient, portable package. Whether you’re reaching for a quick breakfast on a busy morning, a mid-afternoon energy boost, or a satisfying treat after a workout, these homemade cereal bars hit the spot every single time. What truly sets our recipe apart is its incredible versatility and the way it allows you to customize your creations. Forget those bland, mass-produced options; we’re diving into a world of wholesome goodness, where you control the ingredients and the flavor profile. Get ready to experience the joy of crafting your own ultimate cereal bars that are not only delicious but also packed with the goodness you crave.
Ingredients:
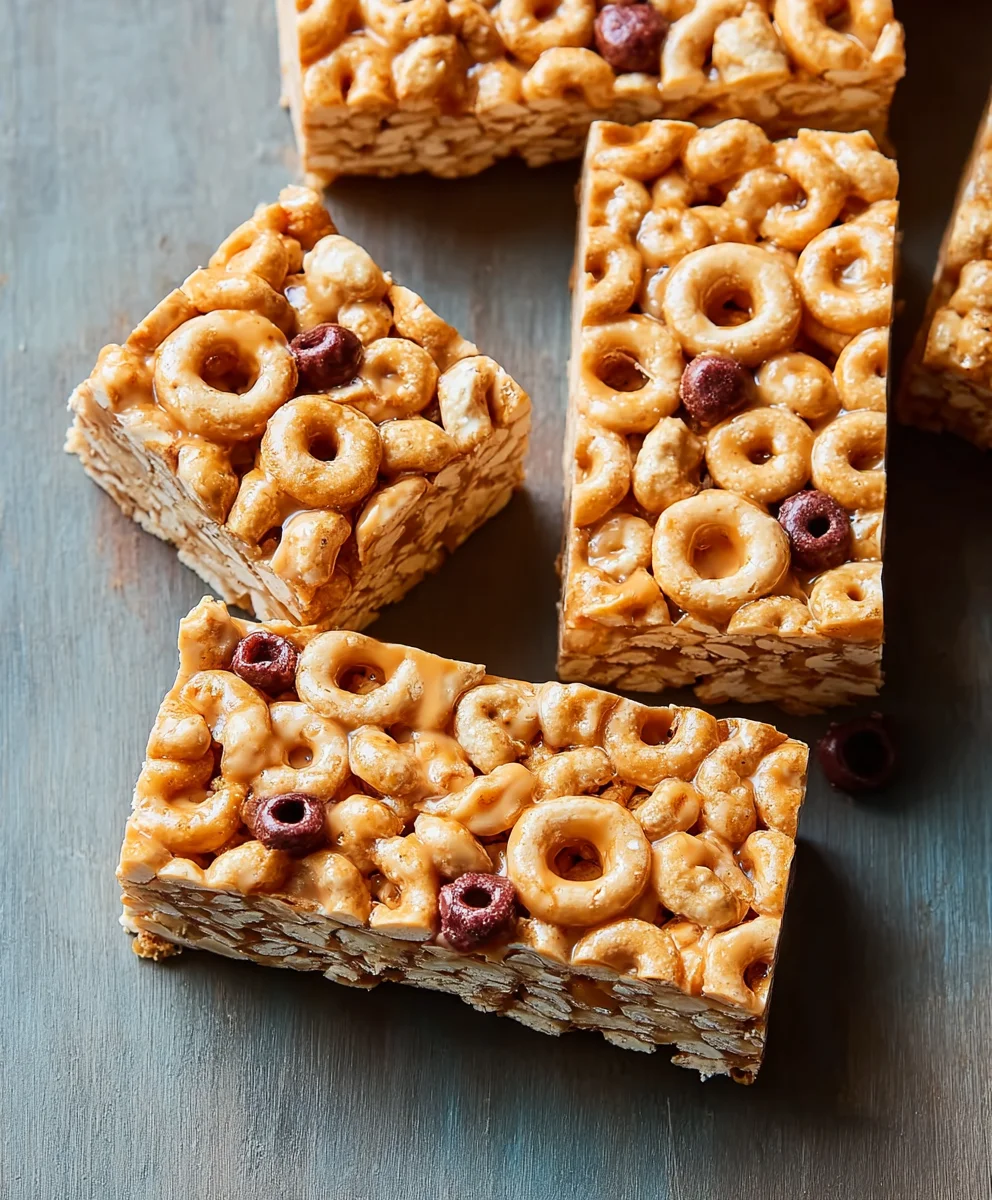
- 3 cups of your favorite cereal (choose something with a good crunch, like puffed rice, corn flakes, or a granola blend)
- 2/3 cup creamy or crunchy peanut butter (or any nut butter you prefer, like almond or cashew butter)
- 1/2 cup liquid sweetener, such as agave nectar, honey, or brown rice syrup
- 1/2 teaspoon salt (this is optional, but it helps to balance the sweetness and enhance the flavors)
- 3 tablespoons protein powder (also optional, but a great way to boost the nutritional content and make these more filling)
Preparing Your Cereal Bars
Step 1: Get Your Pan Ready
The first step in creating these fantastic cereal bars is to prepare your baking pan. I like to use an 8×8 inch square pan for this recipe. To ensure your bars don’t stick and come out cleanly, it’s crucial to line the pan. You can do this by lightly greasing the pan with a little butter or cooking spray, and then lining it with parchment paper. Make sure the parchment paper extends up the sides of the pan a bit. This creates easy “handles” to lift the entire block of cereal bars out once they’re set, making slicing much simpler and cleaner. Don’t skimp on this step; a well-prepared pan is key to perfect bars.
Step 2: Combine the Wet Ingredients
Now, let’s get our binding mixture ready. In a medium saucepan, combine the 2/3 cup of peanut butter (or your chosen nut butter) and the 1/2 cup of liquid sweetener. If you’re using the optional salt, add it now. Place the saucepan over medium-low heat. You want to gently heat these ingredients, stirring constantly, until they are smooth and well combined. The goal here is to melt the peanut butter and warm the sweetener so they easily incorporate into the cereal. Avoid boiling or overheating, as this can make the mixture too sticky or even scorch it. Stirring is essential to prevent sticking and ensure an even melt. Once the mixture is smooth and pourable, remove it from the heat immediately. If you’re adding the optional protein powder, this is the perfect time to whisk it into the warm peanut butter and sweetener mixture. Do this thoroughly to ensure there are no clumps and it’s fully integrated. This protein powder will help thicken the mixture slightly and add a nutritional boost.
Step 3: Mix Everything Together
Once your binding mixture is ready and smooth, it’s time to combine it with the star of the show: your cereal. Pour the 3 cups of your chosen cereal directly into a large mixing bowl. It’s important to use a bowl large enough to comfortably hold all the cereal and the binding mixture. Then, carefully pour the warm peanut butter and sweetener mixture over the cereal. Now, you need to work relatively quickly because the mixture will start to set as it cools. Use a sturdy spatula or a wooden spoon to gently fold and stir the cereal and binding mixture together. Your aim is to coat every single piece of cereal evenly with the sticky mixture. Be thorough but gentle; you don’t want to crush the cereal too much, especially if you’re using something delicate like puffed rice. Ensure all the nooks and crannies of the cereal are coated for maximum deliciousness and structure.
Step 4: Press and Compact the Mixture
With your cereal mixture thoroughly combined, it’s time to transfer it to the prepared pan. Spoon the mixture into the parchment-lined 8×8 inch pan. This is where patience and a little elbow grease come in handy. The mixture will be quite sticky and prone to clingin extractg to utensils. You want to press the cereal mixture down into the pan as firmly and evenly as possible. This step is critical for ensuring your cereal bars hold their shape once they’re set. If the mixture is too loose, your bars will crum extractble easily. Use the back of your spoon, a spatula, or even a piece of parchment paper laid on top to press down. Really pack it in there, especially around the edges. The more compressed it is, the better your bars will hold together. A flat, even surface will also make slicing easier. If your hands are getting too sticky, you can lightly dampen them with water or cooking spray.
Step 5: Chill and Set the Bars
Once the cereal mixture is firmly pressed into the pan, it’s time to let it work its magic. Cover the pan loosely with plastic wrap or foil. Place the pan in the refrigerator for at least 1 to 2 hours. This chilling period is essential for allowing the peanut butter and sweetener to firm up, binding all the cereal together into a solid block. You can also speed this up slightly by placing the pan in the freezer for about 30-45 minutes if you’re in a hurry, but the refrigerator is generally preferred for a better texture. Once the mixture is firm to the touch and holds its shape, you can carefully lift the entire block out of the pan using the parchment paper “handles.” Place it on a cutting board and use a sharp knife to slice it into your desired bar sizes. For easy cutting, you can warm your knife under hot water and dry it between cuts. Let the bars sit at room temperature for a few minutes before enjoying them to allow them to soften slightly.
Conclusion:
There you have it – a simple yet incredibly satisfying recipe for homemade Cereal Bars! We’ve walked through each step, from selecting your favorite cereals to achieving that perfect chewy texture. These bars are a fantastic option for busy mornings, afternoon snacks, or even a light dessert. They’re naturally customizable, making them a hit with everyone, from kids to adults.
For serving suggestions, consider cutting them into individual portions for easy grab-and-go convenience. They pair wonderfully with a glass of milk, a cup of coffee, or even a refreshing iced tea. Don’t hesitate to get creative with variations! You can add in a handful of chocolate chips, dried fruit like cranberries or raisins, or even a sprinkle of cinnamon for an extra flavor boost. The possibilities are truly endless!
We hope you enjoy making and devouring these delicious Cereal Bars as much as we do. Don’t be afraid to experiment and make them your own. Happy baking!
Frequently Asked Questions:
Q1: How should I store my Cereal Bars?
To keep your Cereal Bars fresh, store them in an airtight container at room temperature. They should stay delicious for up to a week. If the weather is particularly warm, you might consider refrigerating them to prevent them from becoming too soft, though this can slightly alter the texture.
Q2: Can I make these Cereal Bars gluten-free?
Absolutely! To make gluten-free Cereal Bars, simply choose gluten-free cereals. Many brands offer a variety of gluten-free oat-based or corn-based cereals. Ensure your binder ingredients, like marshmallows or syrup, are also certified gluten-free if you have a severe sensitivity.
Q3: My Cereal Bars are too crum extractbly, what went wrong?
If your Cereal Bars arum extracttoo crumbly, it usually means there wasn’t enough binder. When mixing the cereal with the melted marshmallow or binder mixture, ensure everything is thoroughly coated. Pressing the mixture firmly into the pan before it cools is also crucial for holding the bars together.
Easy Cereal Bars-Quick & Delicious Treat
Quick and delicious homemade cereal bars, perfect for a healthy snack or treat.
Ingredients
-
3 cups of your favorite cereal
-
2/3 cup creamy or crunchy peanut butter
-
1/2 cup agave nectar
-
1/2 teaspoon salt (optional)
-
3 tablespoons protein powder (optional)
Instructions
-
Step 1
Prepare an 8×8 inch square pan by lightly greasing it and lining it with parchment paper that extends up the sides. -
Step 2
In a medium saucepan over medium-low heat, combine peanut butter and agave nectar. Stir constantly until smooth and well combined. If using, whisk in the optional salt and protein powder until fully integrated. Remove from heat. -
Step 3
Pour the cereal into a large mixing bowl. Pour the warm peanut butter mixture over the cereal and gently fold and stir until every piece of cereal is evenly coated. -
Step 4
Transfer the mixture to the prepared pan and press down firmly and evenly to compact it, ensuring the bars will hold their shape. -
Step 5
Cover the pan and refrigerate for at least 1 to 2 hours, or freeze for 30-45 minutes, until firm. Lift the block out using the parchment paper handles, slice into bars, and let sit at room temperature for a few minutes before serving.
Important Information
Nutrition Facts (Per Serving)
It is important to consider this information as approximate and not to use it as definitive health advice.
Allergy Information
Please check ingredients for potential allergens and consult a health professional if in doubt.